TASCAM TM-D1000 Operations Manual
18
7 - Channel operations
This covers most common channel operations
(equalization, routing, etc.), as well as the channel
dynamic processors. It does not cover aux sends and
effects, which are described in “Effects” on page 23.
Fader operations are similar to those on any analog
console. The “nominal” level is marked by a 0 on the
fader scale.
The panpot controls are also similar to those of an
analog console.
7.1 Equalization
One of the most common tasks in recording is to
adjust the equalization. To do this on the TM-D1000:
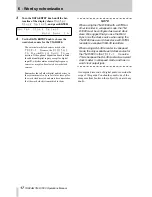
1
Press the
PARAM SEL
key until the
EQ
indi-
cator lights green:
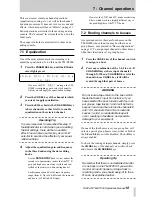
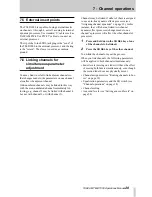
If you see the
CH SEL!
message, the TM-
D1000 is reminding you to select a channel to
which you will apply the equalization settings.
2
Press the
CH SEL
key of the channel to which
you want to apply equalization.
3
Press the
EQ
key beside the
CH ASSIGN
keys
(above channel 6) so that it is lit, to enable
equalization on the selected channel.
Operating Tip
It is very important to remember this step. If
the
EQ
indicator is not lit when you are editing
the EQ settings, there will be no audible
effect. You can also use this key as an “A-B”
selector to examine the effects of your equal-
ization settings.
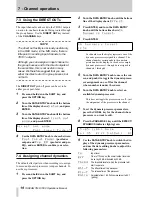
4
Adjust the equalization gain and frequency
in the three bands using the data editing
knobs.
Use the
DATA ENTRY
knob to view and set the
second set of parameters (notice that the
MID
gain and frequency are always visible and con-
trolled by the center two data editing knobs).
Each frequency band has the same frequency
range (from 41 Hz to 16.0 kHz) and the same cut
and boost (±15 dB in 0.5dB steps).
However, the
LOW
and
HI
bands are shelving
filters, which work in a slightly different way to
the peak/dip filter of the
MID
band.
7.2 Routing channels to busses
As explained earlier, there are four busses on the
TM-D1000 whose function may be either aux or
group busses, as explained in “Buss configurations”
on page 11. To assign input channels to these busses
when their function is set as group busses:
1
Press the
CH SEL
key of the channel you wish
to assign to a buss.
2
Press any combination of the
1-2
,
3-4
or
L-R
CH ASSIGN
keys (above input channels 3
through 5). When a
CH ASSIGN
key is lit, the
channel whose
CH SEL
key is lit will be
routed through that pair of busses.
WARNING
Do not route a tape return to the buss which
feeds that track’s input. For instance, if you
have selected the buss function with four out-
put groups, tape tracks 1 and 2 will be fed by
busses 1 and 2 and be returned to channels 9
and 10. If channels 9 and 10 are routed to
busses 1 and 2, an undesirable loop will
occur, resulting in feedback, and possible
damage to your equipment.
If none of the four busses is set as a group bus, or if
only one pair of group busses is set, either or both of
the
1-2
and
3-4
keys will be disabled. The
L-R
key is
always enabled.
To check the routing of input channels, simply press
the
CH SEL
key of the channel you wish to check,
and observe the
CH ASSIGN
keys.
Operating Tip
Remember that there is no dedicated monitor
or cue buss on the TM-D1000. If you want to
monitor an input channel or a tape track in
recording mode, you should assign it to the L-
R buss, as explained earlier.
L O W - G
M I D - f
M I D - G
H I - G
©
C H
S E L
!


