


4
TASCAM XS-8
English
1. Introduction
Table of contents
1. Introduction.......................................................... 4
1.1. Some notes and precautions .................. 4
1.2. Serial number, etc. ................................. 4
2. Features and controls ........................................... 5
2.1. Top panel ............................................... 6
2.2. How to replace the fader........................ 6
2.3. Rear panel .............................................. 7
2.4. Front panel ............................................. 8
3. Modification......................................................... 8
3.1. Output level ........................................... 8
4. Specifications ....................................................... 9
5. Block diagram .................................................... 40
1. Introduction
The XS-8 is a sophisticated 2 channel DJ mixer which
allows the connection of many devices, and allows you to
mix in a creative way. Following the sophisticated layout
design, the XS-8 combines easy operation with a wide
range of functions.
It is VERY IMPORTANT that you read this manual
before connecting the mixer in order to obtain its
maximum performance.
We recommend our authorised Technical Services
whenever any maintenance task should be needed so that
optimum operation shall be achieved.
1.1. Some notes and precautions
Treat the XS-8 as you would any other piece of precision
equipment.
Avoid exposing it to extremes of temperature and
humidity and avoid mechanical shocks and vibration.
Keep the unit away from strong magnetic fields (TV sets,
computer monitors, large electric motors, etc.).
Environmental considerations
The XS-8 may be used in most areas, but to maintain top
performance, and prolong operating life, observe the
following environmental conditions:
The nominal temperature should be between 5°C and
35°C (41°F and 95°F).
Relative humidity should be 30 to 90 degrees non-
condensing.
As the unit may become hot during operation, always
leave sufficient space above and around the unit for
ventilation.
Do not install this equipment in a confined space such as
a bookcase or similar unit.
You should not place the unit on a piece of equipment
generating heat, e.g. an amplifier, to avoid possible
problems with overheating.
XS-8 operates under 100 to 240V, 50-60Hz. Make sure
that the power cable is far away from the signal cables in
order to avoid any possible audio hum.
When transporting the unit, always use the original
packing materials or a properly-designed equipment
case. For this reason, we strongly recommend that
you save all the packing materials that came with
the XS-8, in case you need to transport it in the
future.
In order to protect the unit from an eventual electrical
overload it carries a 250mA fuse . Should it ever blow up,
unplug the unit from mains and replace it with an
identical one. If the new fuse blows again, contact
immediately with our authorized technical service.
NEVER SHORT-CIRCUIT THE SECURITY PATH
NOR USE A HIGHER VALUE FUSE.
Fuse substitutions have to be performed by a
qualified technician.
Connections to other equipment
It is extremely important that the power is turned off on
all units when making or breaking connections to or from
the XS-8.
When turning power on, it is usually a good idea to start
with the source (turntables, CD players, etc.), then the
XS-8 and finish with the amplifier system.
Turning power off should be done in the other direction
(amplifiers first, then other equipment).
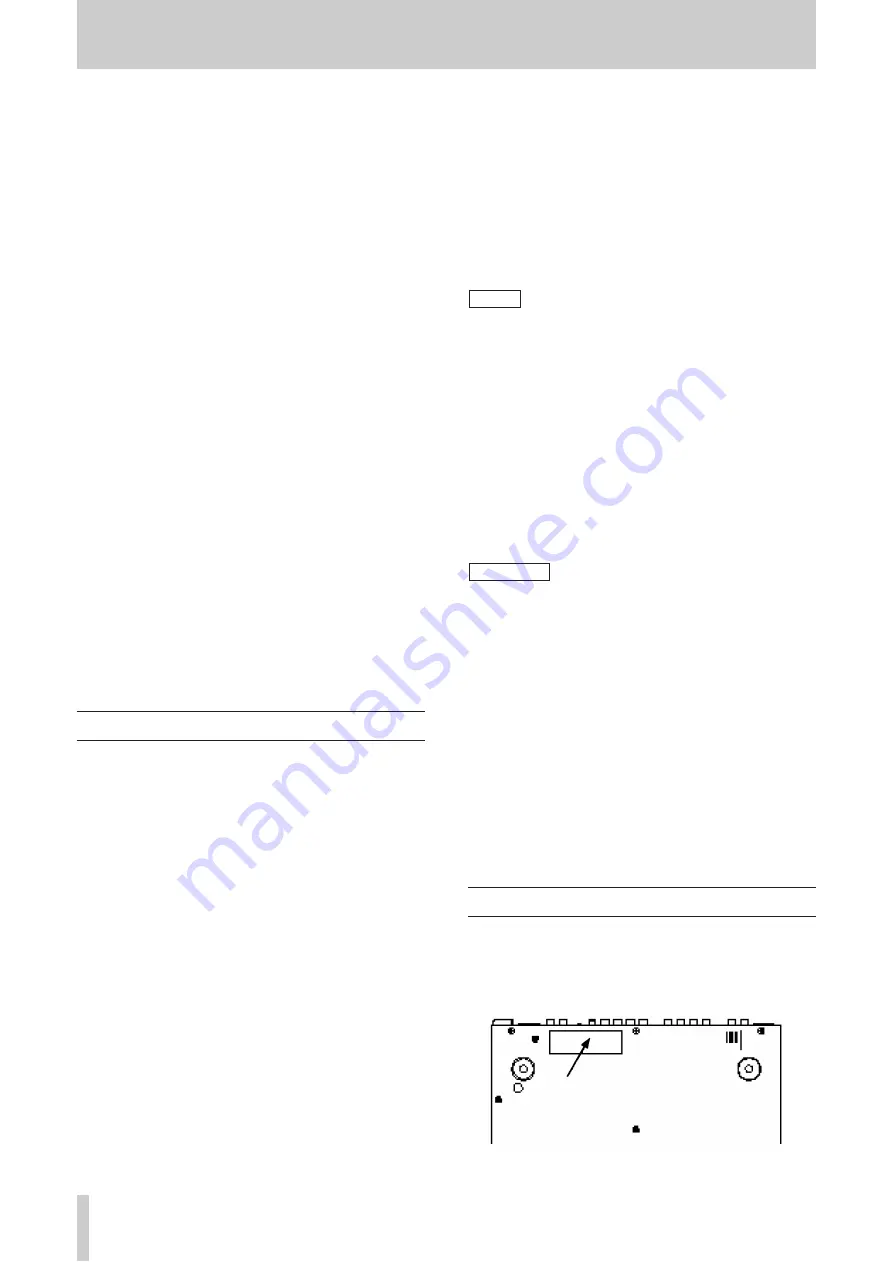
1.2. Serial number, etc.
The serial number of the XS-8 is located on a sticker at
the front of the unit on the bottom panel. Make a note of
this for future reference (warranty, etc.).
WARNING
NOTE


