©Copyright Task Force Tips LLC 2021-2022
4
LIC-300 May 9, 2022 Rev02
3.0 INSTALLATION
3.1 CARTRIDGE INSTALLATION
The cartridge is shipped in the unit with a protective wrap covering. Prior to starting the unit, remove the protective wrap and reinstall the
cartridge following the instructions in "Changing the cartridge" on page 7.
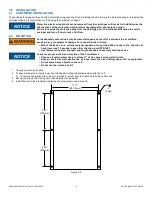
3.2 MOUNTING
1. Choose a mounting location.
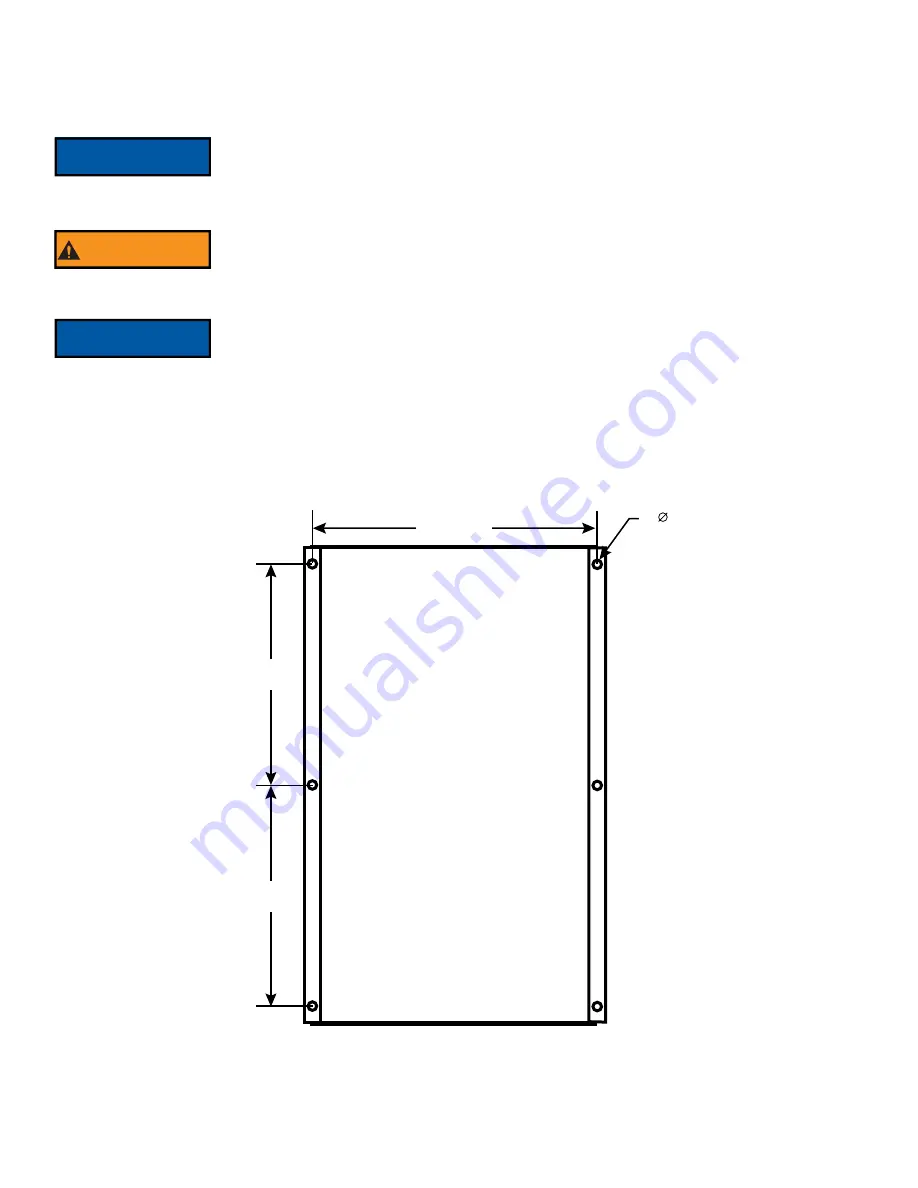
2. To ensure proper hole location, use the full sized mounting template provided with the unit.
A. To remove the bracket from the unit, remove (3) screw from the right and left sides of the unit.
3. Secure the CrewProtect using (6) nuts and bolts (not provided).
4. Install the unit to the bracket by replacing the screws removed in step 2A.
Figure 3.2
NOTICE
Protective plastic wrap should not be removed from the cartridges until ready for installation as the
effectiveness of the molecular material starts degrading after exposure to oxygen.
Failure to remove the protective wrap from the cartridge prior to installation will cause the unit to
overheat and turn off due to lack of air flow.
WARNING
An inadequately secured unit may become dislodged as a result of a sudden stop or collision,
causing injury or equipment damage. To reduce the risk of injury:
• Mount the device on a surface material capable of supporting 250 pounds in the direction of
truck travel and 75 pounds in any other direction, per NFPA 1901.
• Use fasteners of a size, strength, and length adequate to securely hold the device.
NOTICE
To ensure proper air flow and function of the CrewProtect:
• Choose a location where there is at least 1” of free space around all air ducts.
• Keep air ducts free from obstruction by loose items such as clothing, paper, dirt, or equipment.
• Do not place heavy objects on the unit.
• Do not use the unit as a shelf.
9.25”
[235 mm]
9.25”
[235 mm]
11.71”
[297.4 mm]
.2”
[5 mm]
6X


