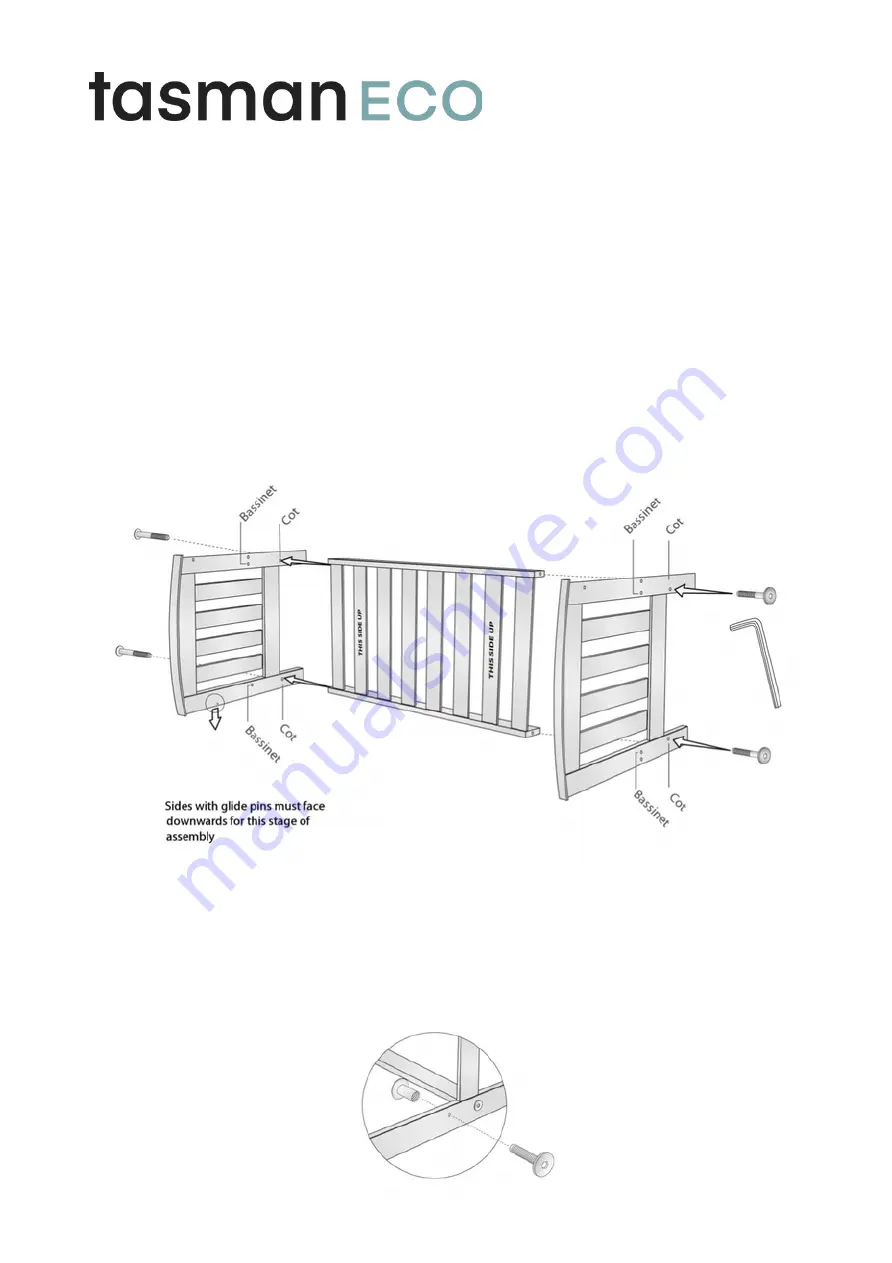
Assembly (continued...)
*When building the cot, use the base holes on the headboards below, labelled
'COT'. When building the cot at bassinet height, use the base holes on the
headboards below, labelled 'BASSINET'.
STEP 3: Connect the cot base to the left bed head. Ensure the sides of the bed
head and the metal glide pins inserted are facing the correct way for this stage
of assembly. Screw these together using the 2 x bolts, but do not fully tighten.
Now connect the right bed head to the base. Screw these sections together
using 2 x bolts, but do not fully tighten.
STEP 4: Fit the double ended screws to the unused holes.
Use the double ended screws to fill the four unused locating holes, one in each
corner of the cot. This is required to prevent the entry of small fingers into these
holes.


