!
!
x
6
M8*1.25*8T
x
6
M8*1.25*50L
x
6
D22*D8.5*1.5T
10
13L
12L
9
8
13R
12R
8
9
10
5-2
5-1
10
9
8
step5
16
FX10.5
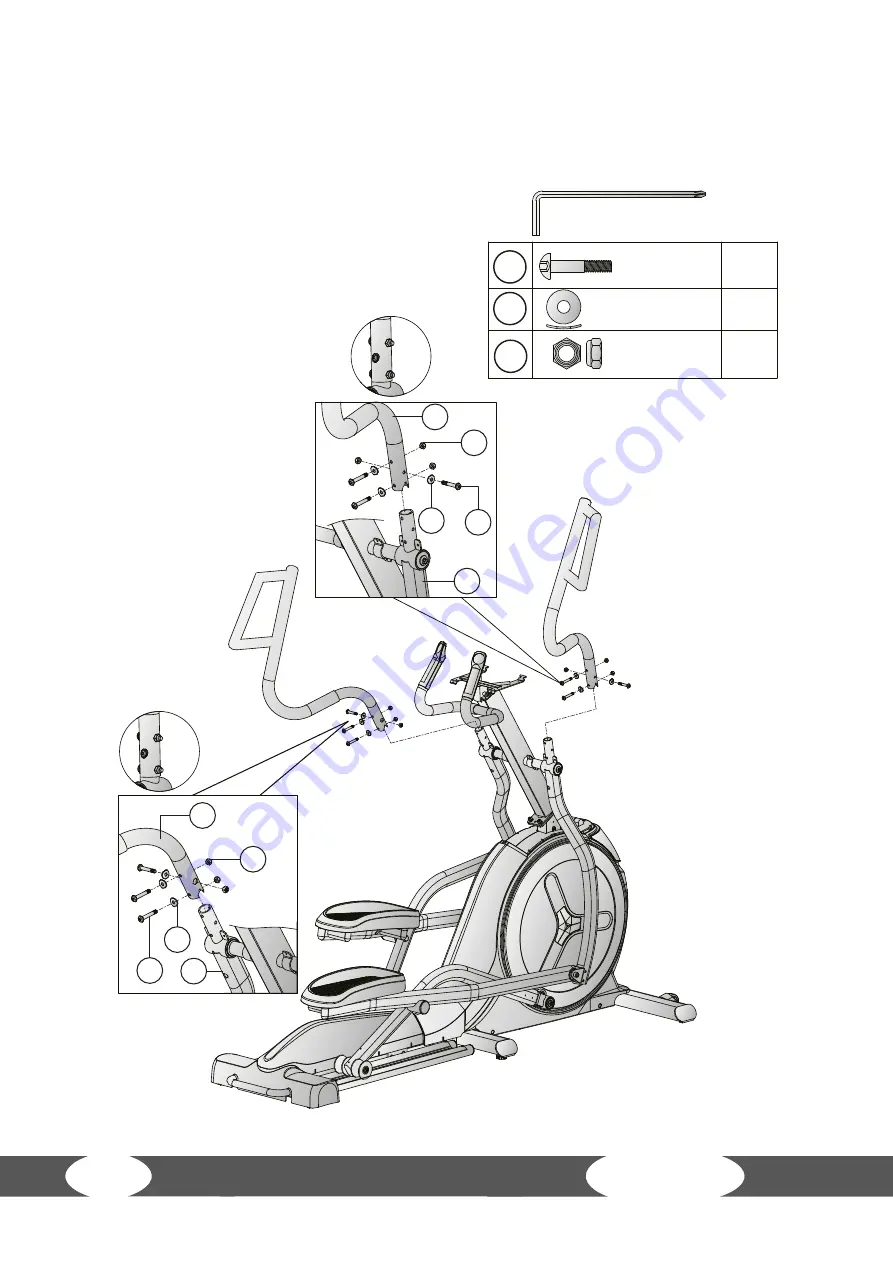
Step 5:
Mounting the handles
Screw the right and left handles (13R/13L) onto the respecitve arm (12R/12L), each with three curved
washers (9), three Allen screws (8) and three locking nuts (10) (see figs. 5-1 & 5-2). Only hand tighten
the screws in place.
Summary of Contents for Crosstrainer FX10.5 Pro
Page 2: ...2 FX10 5 ...
Page 26: ...P7 P8 P9 P10 P11 P12 P1 P2 P3 P4 P5 P6 26 FX10 5 ...
Page 43: ...43 8 3 Exploded Drawing ...
Page 48: ...48 FX10 5 Notes ...
Page 49: ...49 Notes ...
Page 50: ...50 FX10 5 Notes ...
Page 51: ...51 ...
Page 52: ...Crosstrainer FX10 5 Pro ...


