ENGLISH
13
12
Place the appliance on a flat, stable surface that can
withstand high temperatures, located at a safe dis-
tance from other sources of heat or possible water
splashes.
Do not cover or obstruct the ventilation grills located
at the rear of the appliance.
1.
Connect the appliance to the power supply.
2.
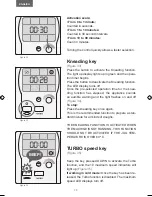
Turn the appliance on by pressing the start /stop
switch
(Figure 29).
The appliance carries out a self-
test with the digital display reading 00:00
(Figure 30)
.
The appliance is now ready to operate.
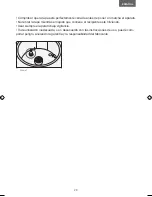
Digital screen
(Figure 31)
Function icons at the top:
P
Blades activated.
Q
Heating activated.
R
Timer activated.
Control display icons in the centre:
S
Timer
Information icons in the bottom:
T
Jug missing, not properly covered or improperly
fitted onto the central unit.
U
The jug and the temperature sensor are hot.
V
Timer finished.
Time selector control
(Figure 32)
Turn the control slowly to the right to select the ope-
ration time.
Maximum: 90 minutes.
Turn the control slowly to the left to reduce the time.
ON / OFF
SWITCH
Figure 29
Figure 30
00 00
88 88
Figure 31
P
T
Q
U
R
V
S
Manual Mycook 1.8.indd 13
03/03/15 09:35


