Adjustment
(Cont.)
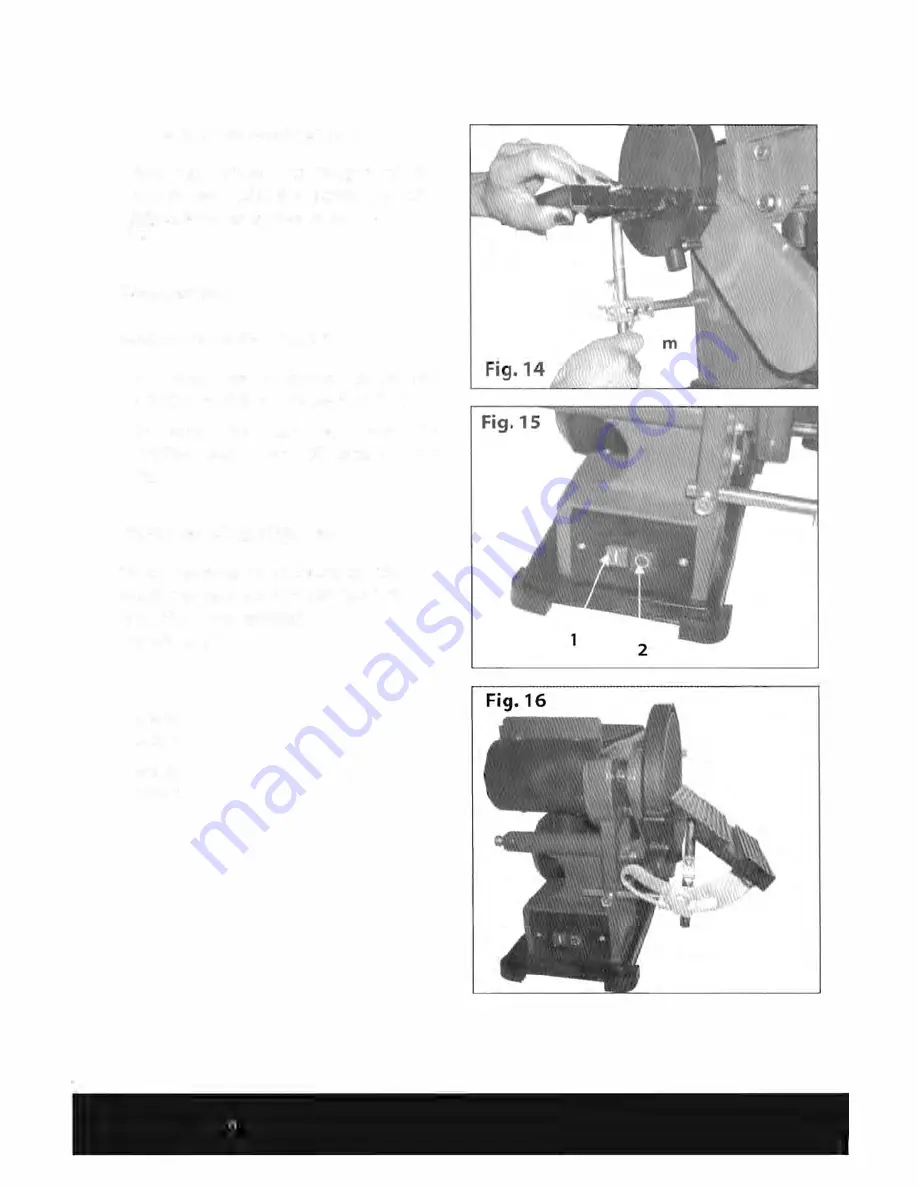
Adjusting the worktable (Fig.
14):
•
You can adjust the height
of
the
worktable. Twist
the
screw
(m)
w
i
th
hex wrench as shown
in Fig.
14.
Operation
Sw
i
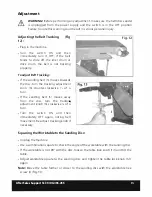
tch ON/OFF (Fig. 15):
•
To start the machine,
press
the
ON/OFF
s
w
itch
to
ON
position
"I"
(1).
•
To stop the machine, press the
ON/OFF
switch to
OFF
p
o
si
t
i
o
n
"0"
(2).
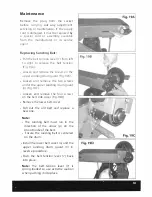
Bevel Sanding (Fig
.
16):
When sanding small items
on
the
disc
sander always use the left-hand side of
the
d
i
sc.
The
w
o
rk
t
ab
l
e
can be tilted
f
ro
m
0
to
45°
for bevel
sanding.
To tilt the worktable:
•
Loosen
the table lock knob (12) by
turning it counter-clockwise.
•
Set the w
or
ktab
l
e
to
the
desired an
gle
with the bevel gauge (11).
Note:
Position the
worktable no
f
u
r
ther
than 1.6mm from the
s
a
n
d
i
n
g surface.
•
Tighten the table
lock
knob (12) by
turning
i
t
c
l
o
c
k
w
i
s
e
.
•
Whe
n
sanding small items on the
disc
sander always use the left hand side
of the
disc.
After Sales Support Tel: 1300-355-255
16
Summary of Contents for TTA-11241
Page 2: ......
Page 22: ...Notes After Sales Support Tel 1300 355 255 20 ...
Page 23: ......
Page 24: ......


