80
ATTENTION!
Corresponding AC1 and AC2 earthing jumpers should be removed before external AC/DC
source with predefined neutral is connected to the RC5_4.
After the main line is powered, the commissioning engineer should make sure that the auxiliary supply is
connected correctly. The auxiliary supply voltage should be checked by digital voltmeter.
For that purpose the RC5_4 battery switch should be set OFF, corresponding AC switch (both switches if two
supply options is used) set ON.
Measured AC voltage at terminals 1-2 and 8-9 (in case two VTs are installed) should not exceed the limits of
85-265 V.
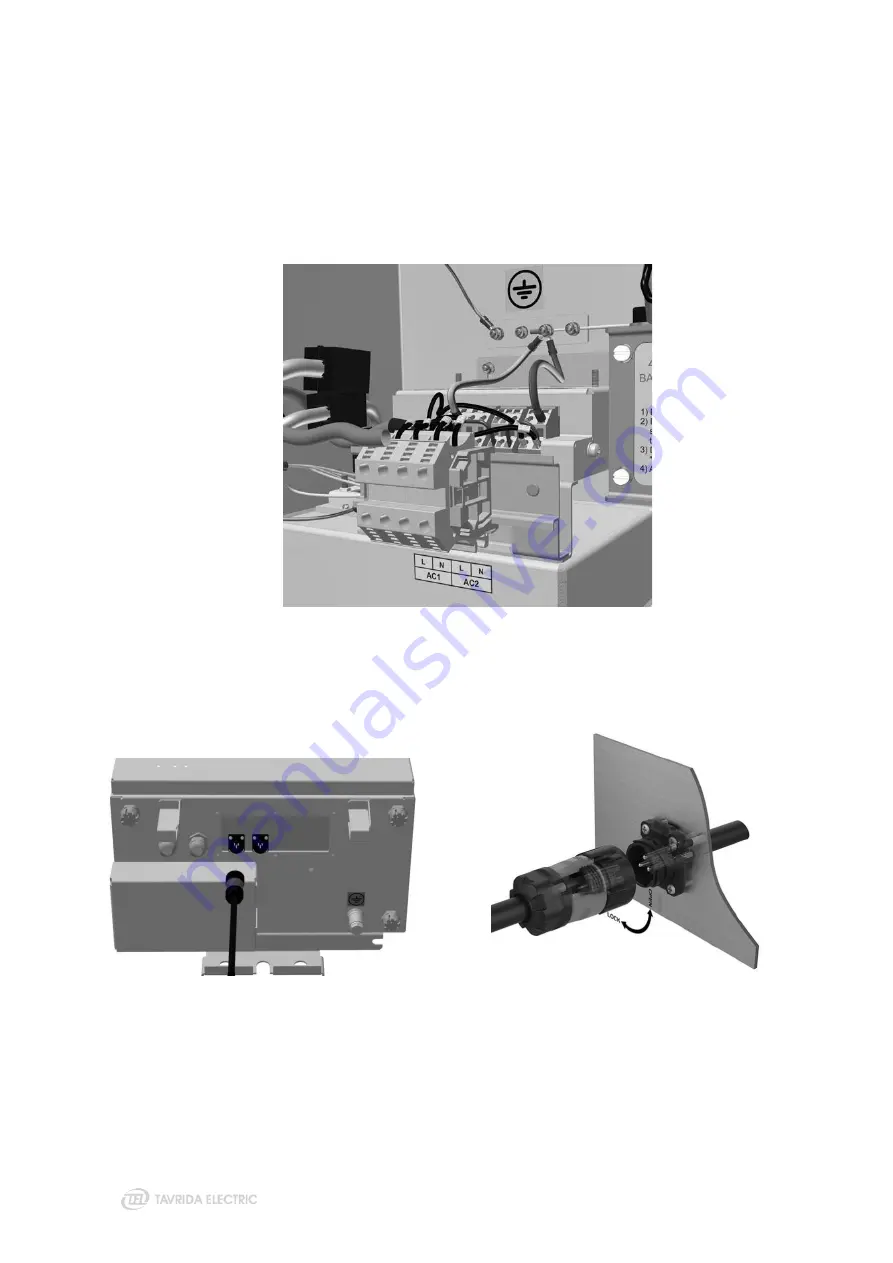
Connection terminals for the Recloser Control auxiliary power supply are shown below (Figure 59).
Figure 59
Auxiliary supply connections inside PSFM
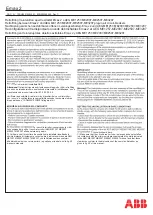
Bayonet connection terminals for the Recloser Control auxiliary power supply (available on request) are shown
below (Figure 60 and Figure 61).
Figure 60
Auxiliary power supply connection with bayonet connectors
Figure 61
Three pin bayonet connector
6.3 Dismounting Procedure
Protection device dismounting should be performed in reverse order to the installation procedure. All safety
procedures and precautions should be applied accordingly. The integrity of the line should be restored in case
the protection device is removed completely.
Summary of Contents for Rec15
Page 1: ......
Page 5: ...1 Introduction...
Page 9: ...2 Technical Parameters...
Page 14: ...3 Product Description...
Page 26: ...26 Figure 25 Anti vandal housing...
Page 27: ...4 Functionality...
Page 56: ...5 Product Handling...
Page 69: ...6 Installation...
Page 81: ...7 Commissioning...
Page 84: ...8 Operation...
Page 99: ...99 Figure 76 Settings uploading wizard...
Page 100: ...9 Maintenance and Troubleshooting...
Page 114: ...114 Figure 90 Securing the trip hook shaft against rotation...
Page 115: ...10 Product Coding...
Page 122: ...11 Appendices...
Page 128: ...128 Appendix 4 Recloser Control Drawings Figure 99 Dimensions of RC5_4...
Page 133: ...133 Figure 106 Dimensions of standard OSM mounting kit arrangement for lateral installation...
Page 134: ...134 Figure 107 Dimensions of interface bracket...
Page 135: ...135 Figure 108 Dimensions of OSM mounting kit with M16 pole interface front installation...
Page 136: ...136 Figure 109 Dimensions of OSM mounting kit with M16 pole interface lateral installation...
Page 137: ...137 Figure 110 Dimensions of OSM mounting kit with M20 pole interface front installation...
Page 138: ...138 Figure 111 Dimensions of OSM mounting kit with M20 pole interface lateral installation...
Page 149: ...149 Figure 122 Dimensions of OSM substation mounting kit...
Page 152: ...152 Figure 125 Dimensions of RC mounting kit for through the pole installation...
Page 153: ...153 Figure 126 Dimensions of RC substation mounting kit...
Page 154: ...154 Figure 127 Dimensions of VT mounting kit One VT holder...
Page 163: ...163 Appendix 8 Connectors Drawings Figure 141 Dimensions of aerial connector...
Page 164: ...164 Figure 142 Dimensions of bird guards for aerial connector...
Page 165: ...165 Figure 143 Dimensions of two hole NEMA connector...
Page 166: ...166 Figure 144 Dimensions of bird guards for two hole NEMA connector...
Page 167: ...167 Figure 145 Dimensions of four hole NEMA connector...
Page 168: ...168 Figure 146 Dimensions of bird guards for four hole NEMA connector...
Page 169: ...169 Figure 147 Dimensions of Burndy NEMA connector...
Page 170: ...170 Appendix 9 Recloser Control Wiring Diagram Figure 148 RC5_4 wiring diagram...
Page 172: ......


