Motor Service
Motor
Page 5
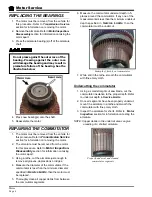
REPLACING THE BRUSHES
NOTE: It is recommended that all four brushes be
replaced as a set.
NOTE: Motors without removable brush covers must
be disassembled to replace the brushes.
Refer to
Motor Inspection-Disassembly
section for information on taking the motor
apart.
NOTE: Some motors are equipped with brush pairs.
These motors must be disassembled to
replace the brushes. Refer to
Motor
Inspection-Disassembly
section for
information on taking the motor apart. Refer
to the
Motor Parts List
for your vehicles
brush configuration.
NOTE: Some motors have brush leads that are routed
through or behind the brush holder assembly.
In this case, the brush holder assembly must
be removed to replace the brushes.
NOTE: The motor must be removed from the vehicle
for this procedure. Refer to
Transmission
Service
section for information on removing
the motor.
Motors with brush covers and brushes with
termination screws
1. Remove the brush covers.
2. Loosen the brush wire retaining screw and remove
the brush from the brush holder. Be careful with
the brush spring and do not let it slip off of the
spring mount. If the spring comes off, then the
motor must be disassembled. Refer to
Motor
Inspection-Disassembly
section for
information on taking the motor apart.
3. Install the new brushes in reverse order.
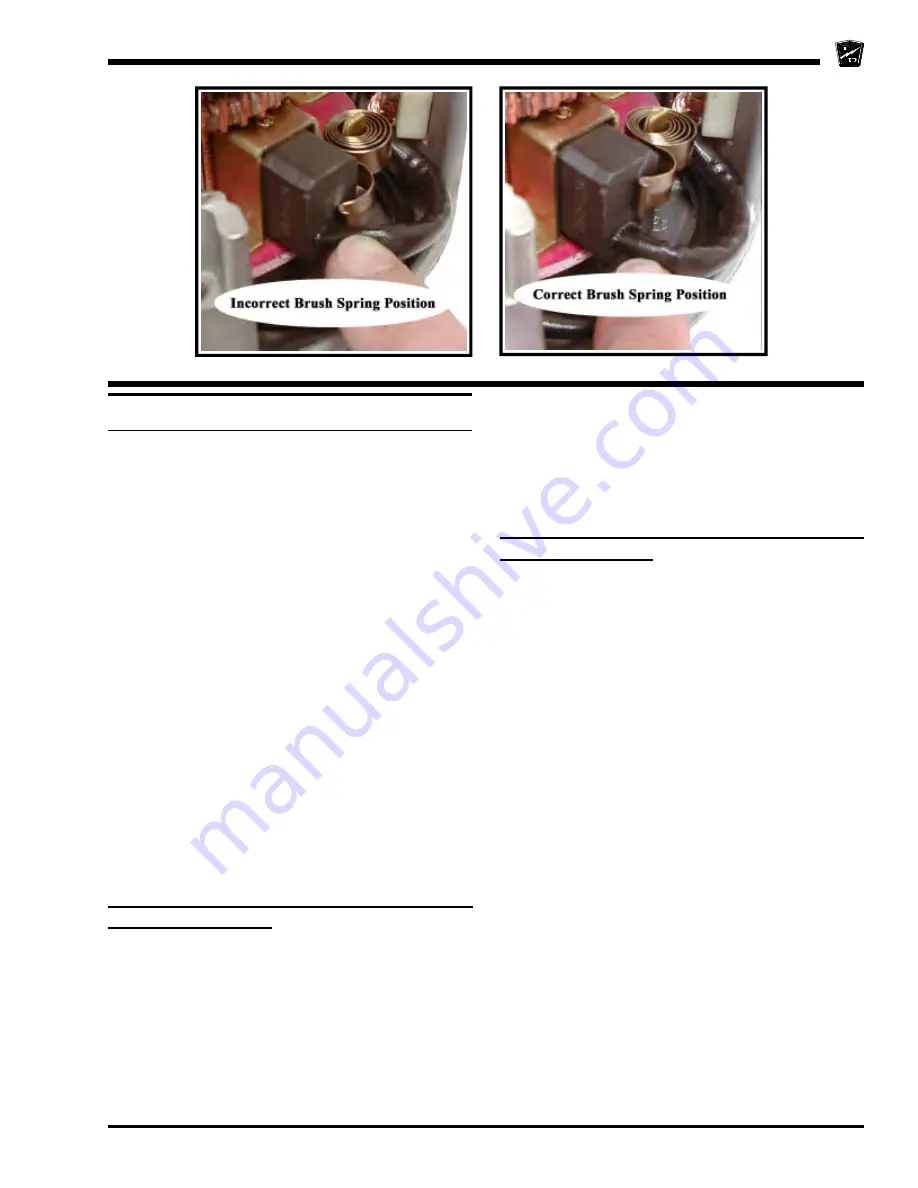
4. Be certain that the brush springs do not rest up
against the brush wires. Refer to illustrations in
Motor Inspection-Assembly
for proper brush
spring position.
Motors with brush pairs or not equipped
with brush covers
1. Disassemble the motor. Refer to
Motor
Inspection-Disassembly
section for information
on taking the motor apart.
2. Remove the brush holder.
Note:
Remember the position and routing of the
brush crossover leads. They must be
reinstalled in the same position.
3. Remove the brush termination screws or the
armature studs and remove the brushes from the
brush holder.
4. Install the new brushes in reverse order.
5. Reassemble the motor. Refer to
Motor
Inspection-Assembly
for information regarding
reassembling the motor.
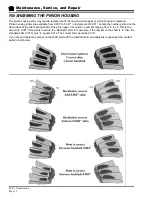
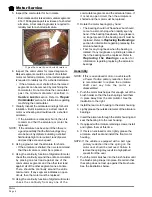
Brush Spring Orientation
Summary of Contents for B0-012-10
Page 2: ......
Page 26: ...TAYLOR DUNN...
Page 53: ...Maintenance Service and Repair Steering Page 15 Exploded View of Steering Gear...
Page 54: ...TAYLOR DUNN...
Page 72: ...TAYLOR DUNN...
Page 85: ...Maintenance Service and Repair F2 F3 Transmission Page 13 EXPLODED VIEW...
Page 86: ...TAYLOR DUNN...
Page 94: ...TAYLOR DUNN...
Page 100: ...TAYLOR DUNN...
Page 106: ...TAYLOR DUNN...
Page 116: ...TAYLOR DUNN...
Page 172: ...Illustrated Parts Parts Page 2 Front Axle...
Page 176: ...Illustrated Parts Parts Page 6 STEERING...
Page 178: ...Illustrated Parts Parts Page 8 STEERING GEAR...
Page 180: ...Illustrated Parts Parts Page 10 PARK BRAKE...
Page 182: ...Illustrated Parts Parts Page 12 DEADMAN SEAT BRAKE optional...
Page 184: ...Illustrated Parts Parts Page 14 MASTER CYLINDER BRAKE LINKAGE...
Page 186: ...Illustrated Parts Parts Page 16 HYDRAULIC BRAKE LINES...
Page 188: ...Illustrated Parts Parts Page 18 FRONT BRAKES optional REAR BRAKES...
Page 195: ...Illustrated Parts Parts Page 25 This page intentionally left blank...
Page 202: ...Illustrated Parts Parts Page 32 POWER TRACTION DRIVE...
Page 204: ...Illustrated Parts Parts Page 34 REAR DIFFERENTIAL...
Page 208: ...Illustrated Parts Parts Page 38 Tires Wheels 10 Ref wheel hub 1 2 5 assembly 4 3 6 7 8 9...
Page 210: ...Illustrated Parts Parts Page 40 CONTROL PANEL...
Page 212: ...Illustrated Parts Parts Page 42 CONTROL PANEL EE...
Page 216: ...Illustrated Parts Parts Page 46 DECALS MISCELLANEOUS STANDARD PARTS...
Page 218: ...Illustrated Parts Parts Page 48 MISCELLANEOUS STANDARD PARTS Cont d...
Page 220: ...Illustrated Parts Parts Page 50 Options...
Page 222: ...Illustrated Parts Parts Page 52...
Page 224: ...Illustrated Parts Parts Page 54...
Page 226: ...Illustrated Parts Parts Page 56...
Page 228: ...Illustrated Parts Parts Page 58...
Page 230: ...Illustrated Parts Parts Page 60...
Page 232: ...Illustrated Parts Parts Page 62...
Page 234: ...Illustrated Parts Parts Page 64...
Page 238: ...Illustrated Parts Parts Page 68...
Page 244: ...Illustrated Parts Parts Page 74...
Page 246: ...TAYLOR DUNN...

