Maintenance, Service, and Repair
F2/F3 Transmission
Page 3
CHANGE THE OIL
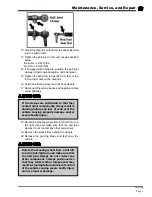
6. Place a large drain pan under the chain housing.
7. Remove the chain case drain plug and allow all of
the oil to drain from the housing and then reinstall
the drain plug
8. Place the drain pan under the drive housing.
9. Remove the drive housing drain plug and allow
all of the oil to drain from the housing and then
reinstall the drain plug
10. Remove the chain case fill plug and add 1-pint of
oil.
11. Remove the drive housing fill plug and add 2-
quarts of oil.
NOTE: Refer to the
Lubrication Chart
for information
regarding the type of oil.
12. Replace all fill plugs.
NOTE: Dispose of waste oil in accordance with your
local regulations.
13. Reconnect the main positive and negative at the
batteries, remove the blocks from the wheels, and
test drive.
CHECK THE OIL LEVEL
NOTE: The oil level in the chain case is maintained
by the transmission. Oil is pumped from the
3rd member into the chain case housing. It
is not necessary to check the oil level in the
chain case.
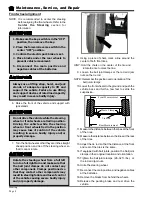
6. Park the vehicle on a level surface.
7. Place a small oil drain pan under the drive housing.
8. Remove the drive housing level plug.
9. A small amount of oil should come out. This
indicates the correct oil level.
NOTE: If a large amount of oil comes out, then let it
drain to the proper level and replace the level
plug.
If no oil comes out, then fill the drive to the proper
level and replace the level plug.
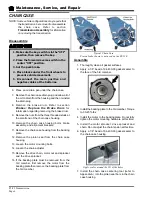
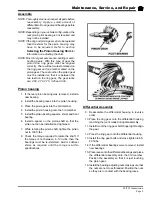
Typical location of oil plugs. The actual
location of the level plug will vary depending
on your vehicles configuration. The model
ET-015-00 and ET-015-72 does not have a
chain case. An additional fill plug is located
on top of the drive housing. NOTE: This
illustration shows a pinion parking brake, the
ET-150 is not equipped with this brake.
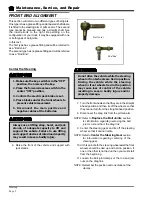
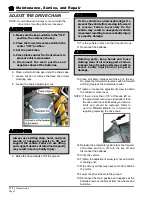
1. Make sure the key-switch is in the “OFF”
position, then remove the key.
2. Place the forward-reverse switch in the
center “OFF” position.
3. Set the park brake.
4. Place blocks under the front wheels to
prevent vehicle movement.
5. Disconnect the main positive and
negative cables at the batteries.
Wear protective gloves when working with
petroleum lubricants. Repeated contact
with petroleum lubricants can result in skin
disorders.
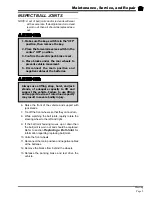
1. Make sure the key-switch is in the “OFF”
position, then remove the key.
2. Place the forward-reverse switch in the
center “OFF” position.
3. Set the park brake.
4. Place blocks under the front wheels to
prevent vehicle movement.
5. Disconnect the main positive and
negative cables at the batteries.
Summary of Contents for ET-015-00
Page 2: ......
Page 14: ...TAYLOR DUNN...
Page 28: ...TAYLOR DUNN...
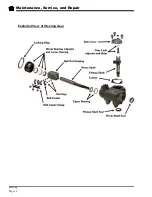
Page 48: ...Maintenance Service and Repair Steering Page 12 Exploded View of Steering Gear...
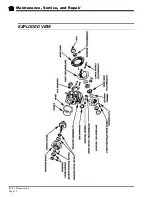
Page 60: ...Maintenance Service and Repair F2 F3 Transmission Page 12 EXPLODED VIEW...
Page 71: ...Maintenance Service and Repair Brakes Page 11 Rear Brake left side shown...
Page 72: ...TAYLOR DUNN...
Page 80: ...TAYLOR DUNN...
Page 90: ...TAYLOR DUNN...
Page 94: ...TAYLOR DUNN...
Page 100: ...TAYLOR DUNN...
Page 114: ...TAYLOR DUNN...
Page 116: ...TAYLOR DUNN...
Page 130: ...Illustrated Parts Parts Page 14 Rear Axle Axle tube 4 5 6 7 3 2 Rear Brakes...
Page 132: ...Illustrated Parts Parts Page 16 Rear Suspension 1 2 3 4 5 6 7 8 9 10 11 12 13 14 Drive Shaft...
Page 134: ...Illustrated Parts Parts Page 18 Motor direct drive Motor Mount direct drive...
Page 142: ...Illustrated Parts Parts Page 26 Instrument Panel dash...
Page 144: ...Illustrated Parts Parts Page 28 Speed Control Panel 1 2 3 4 5 6 7 8 9 10 11 12 4...
Page 152: ...Illustrated Parts Parts Page 36 Charger 2 1 15 12 11 4 3 5 8 10 6 7 9 13 14 16...


