Brakes
Page 62
R-380 DC System
MR-380-03
BLEED SYSTEM
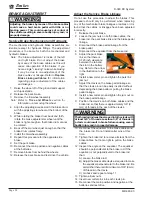
Note: Start this procedure at the wheel furthest
from the master cylinder, then work toward
the wheel closest to the master cylinder.
The rear bleeder valves can be accessed
through the center rear inspection cover.
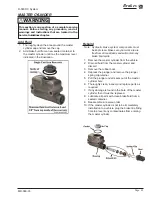
1: Thoroughly clean the area around the master
cylinder cap and remove the cap.
2:
Add brake fluid from a new sealed container to
the master cylinder. Fill to 1/4” from the top of the
master cylinder chamber.
3:
The master cylinder fluid level will drop as the
brakes are bled. Periodically check and fill the
master cylinder during this procedure. Do not
allow the fluid level in the master cylinder to drop
too low as this will allow air into the brake lines.
4: Attach a clear hose to the bleeder valve on the
brake cylinder that is to be bled. Route the hose
into a clear container for waste brake fluid.
5: Pump the brake pedal a few times and then press
and hold light pressure to the brake pedal.
6: Open the brake bleeder valve.
7:
Depress the foot pedal to the floor and then close
the bleeder valve. Do not release pressure on the
brake pedal until the bleeder valve is closed.
8: Slowly release the foot pedal, allowing it to return
to its released position.
Note: Check and fill the master cylinder frequently
during the bleeding process. Do not allow
the fluid level in the master cylinder to drop
low enough to allow air to enter the brake
lines. If air enters the brake lines during the
bleeding process, then you will have to start
again from the beginning.
9: Repeat the above steps until you are sure that
all of the air is expelled from the brake line. Any
air bubbles that can be seen in the clear hose
attached to the bleeder is an indication that there
is still air in the brake lines.
10: Repeat this process with each of the other
wheels.
Note: When finished, top off the master cylinder
with fluid. See Check Master Cylinder Fluid
for information on filling the master cylinder.
11: Reconnect the battery, remove the blocks from
behind the wheels and test drive.
This section is one section of a complete service
manual. Before starting any procedure, read all
warnings and instructions that are located in the
Service Guidelines chapter.
WARNING
FLUSH SYSTEM
1: Raise the rear wheels off of the ground and
support with jack stands.
2: If equipped with front brakes, raise the front
wheels off of the ground and support with jack
stands.
3: Release the park brake.
4: Remove both rear wheels and, if equipped with
front brakes, the front wheels. Refer to Tires
and Wheels section for information regarding
removing the wheels.
5: Remove the wheel cylinders from each axle.
Refer to Replace the Wheel Cylinder section
for information regarding removing the wheel
cylinder.
6: Attach a clear hose to the bleeder valve on each
of the wheel cylinders and route the hoses into a
container for waste brake fluid.
7: Position the wheel cylinders so that the bleeder
screw is pointing to the ground and open all
bleeder screws.
8:
Pump the master cylinder until all fluid has been
pumped from the brake lines and all wheel
cylinders.
9: Close all bleeder screws.
10:
Fill the master cylinder with fluid.
11: Open one of the bleeder screws and pump the
master cylinder until all fluid has been pumped
from the master cylinder and close the bleeder
screw.
12: Repeat the above two steps for each wheel
cylinder.
13: Reinstall the wheel cylinders and bleed the
brakes. Refer to Bleed the Brakes for information
regarding bleeding the brakes.
14: Set the park brake.
15: Install the wheels and lower the vehicle to the
ground.
16: Reconnect the battery, remove the blocks from
behind the wheels and test drive.
Summary of Contents for R0-380-36
Page 6: ......
Page 12: ...Page 12 MR 380 03 Introduction R 380 DC System Notes...
Page 21: ...Table of Contents Special Tool List Special Tool List Troubleshooting Guide 23...
Page 24: ...Tool List Page 24 R 380 DC System MR 380 03 Notes...
Page 27: ...Lubrication Page 27 MR 380 03 R 380 DC System LUBRICATION DIAGRAM...
Page 28: ...Lubrication Page 28 R 380 DC System MR 380 03 Notes...
Page 44: ...Drive Axle Page 44 R 380 DC System MR 380 03 Notes...
Page 53: ...Steering Page 53 MR 380 03 R 380 DC System Exploded View of Steering Gear...
Page 72: ...Drive Motor Page 72 R 380 DC System MR 380 03 Notes...
Page 90: ...Tires Wheels Page 90 R 380 DC System MR 380 03 Notes...
Page 102: ...Replacement Parts Page 102 MR 380 03 R 380 DC System AXLE ASSEMBLY FRONT...
Page 104: ...Replacement Parts Page 104 MR 380 03 R 380 DC System AXLE REAR...
Page 106: ...Replacement Parts Page 106 MR 380 03 R 380 DC System BATTERY...
Page 108: ...Replacement Parts Page 108 MR 380 03 R 380 DC System BRAKES BRAKE LINES...
Page 114: ...Replacement Parts Page 114 MR 380 03 R 380 DC System BRAKES PARK BRAKE LINKAGE...
Page 118: ...Replacement Parts Page 118 MR 380 03 R 380 DC System CAB DOORS...
Page 136: ...Replacement Parts Page 136 MR 380 03 R 380 DC System STEERING LINKAGE...
Page 142: ...Replacement Parts Page 142 MR 380 03 R 380 DC System Notes...
Page 143: ......


