6-8
OPERATING PROCEDURES
Model 736
Operating Procedures
6
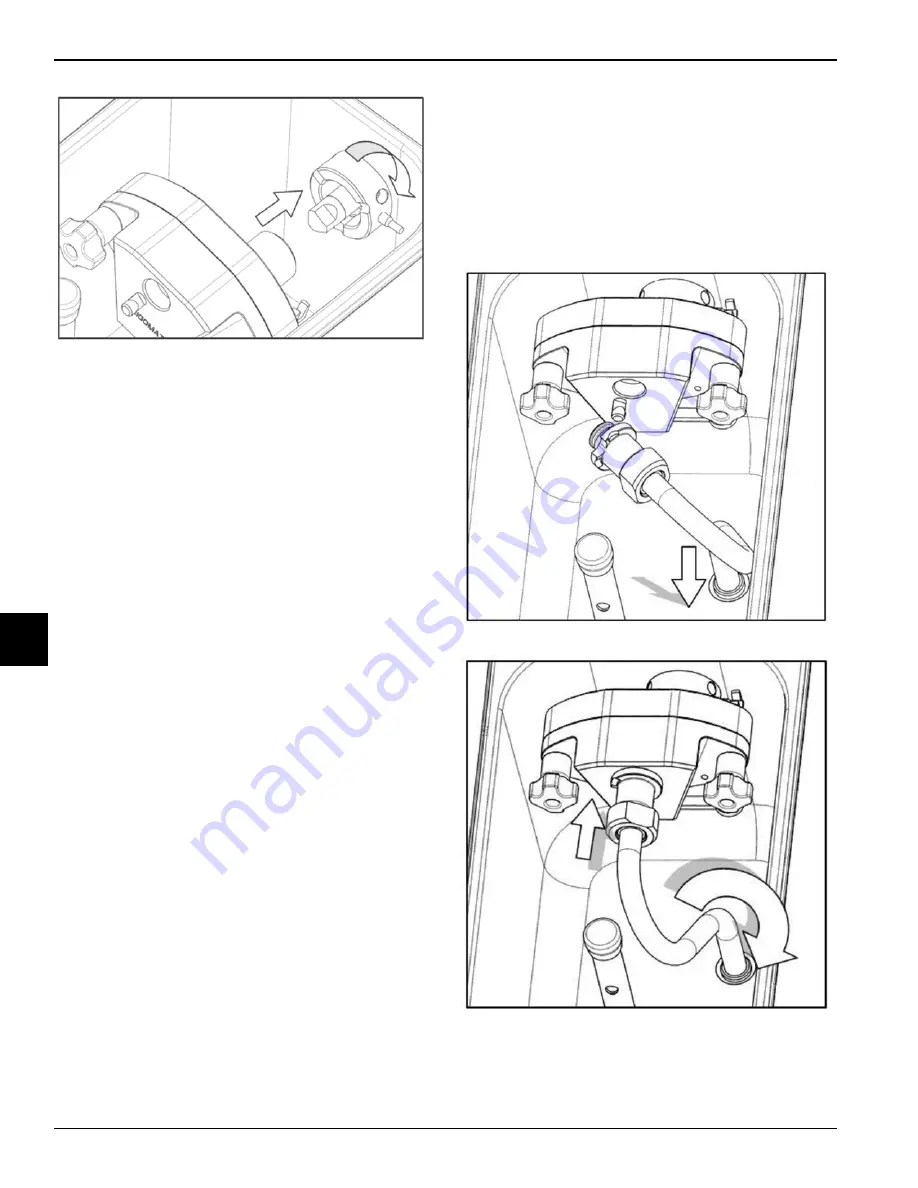
Figure 6-32
8. Press the Wash button. This will cause the sanitizing
solution to be circulated through the pump. Wait at
least 1 minute before proceeding to the next steps.
Open the draw valve and draw off the sanitizing
solution from barrel and hopper.
9. Press the STOP button and close the draw valve.
Important!
The machine must
not
be placed in Auto
mode until all sanitizing solution has been removed
from the barrel and proper priming procedures have
been completed. Failure to follow this instruction may
result in damage to the barrel, the beater and/or the
door.
Note:
Make sure your hands are clean and
sanitized before proceeding to the next step.
10. Place the hopper agitator on the agitator driveshaft
housing. Rest the feed tube against the inside wall of
the hopper.
Priming
Note:
Use only
fresh
mix when priming the freezer.
1. Place an empty pail beneath the door spout. Pour
2 gal. (8.0 L) of
fresh
mix into the mix hopper and
allow it to flow into the barrel.
To remove all sanitizing solution, open the draw valve
until fresh mix flows from the door spout, then close
the draw valve.
Important!
Failure to remove all sanitizing solution
may result in damage to the barrel.
2. Allow the mix to continue filling the freezing cylinder.
3. Press the Wash button to prime the pump. Verify that
the mix is flowing out of the pump for a few seconds.
Press STOP button.
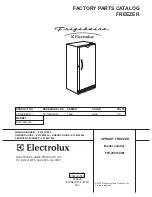
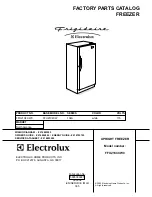
4. Install the assembled feed tube in the mix inlet in the
bottom of the hopper. Connect the other end of the
feed tube to the outlet of the pump. Secure the feed
tube in place by rotating the feed tube coupling.
Make sure that the regulator tube is set to the correct
position for the desired overrun.
Note:
Make sure your hands are clean and
sanitized before proceeding to the next step.
Figure 6-33
Figure 6-34
Summary of Contents for 0736
Page 34: ...5 10 USER INTERFACE Model 0736 User Interface 5 Notes...
Page 54: ...8 4 TROUBLESHOOTING GUIDE Model 0736 Troubleshooting Guide 8 Notes...
Page 56: ...9 2 PARTS REPLACEMENT SCHEDULE Model 0736 Parts Replacement Schedule 9 Notes...
Page 60: ...10 4 LIMITED WARRANTY ON MACHINES Model 0736 Limited Warranty on Machines 10 Notes...
Page 64: ...11 4 LIMITED WARRANTY ON PARTS Model 0736 Limited Warranty on Parts 11 Notes...


