OPERATING PROCEDURES
6-7
Models C709 & C717
Operating Procedures
6
3.
While the solution is flowing into the freezing cylinder,
brush-clean the mix-level sensing probe on the
bottom of the hopper, mix hopper, mix inlet hole, and
feed tubes.
4.
Place the power switch in the ON position.
5.
Press the Wash key
/ and allow the sanitizing
solution in the freezing cylinder to agitate for
5 minutes.
6.
With a pail beneath the door spout(s), open and
close the draw valve six times. Then open the draw
valve and draw off the sanitizing solution.
7.
Press the Wash key
/ and close the draw valve.
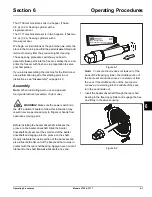
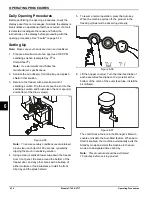
Figure 6-27
Note:
Make sure your hands are clean and
sanitized.
8.
Lubricate the O-rings on the inner and outer feed
tubes.
Do not
lubricate the O-ring on the air orifice.
Place the inner feed tube inside the outer feed tube.
Figure 6-28
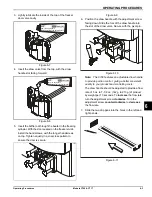
9. Install the air orifice into the hole in the top of the
inner feed tube.
Figure 6-29
Note:
Make sure the hole in the air orifice is clean
and is not clogged. If the hole in the air orifice should
become clogged, use soap and hot water to clear the
hole.
Do not
enlarge the hole in the air orifice
.
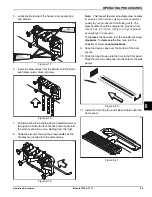
10. Stand the assembled feed tube in the corner of the
mix hopper and place the agitator on the agitator
housing.
Figure 6-30
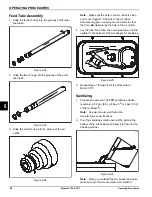
Return to the freezer with a small amount of
sanitizing solution. Dip the door spout brush into the
sanitizing solution and brush-clean the door spout
and bottom of the draw valve.
Note:
To ensure sanitary conditions are maintained,
brush-clean each item for a total of 60 seconds,
repeatedly dipping the brush in sanitizing solution.
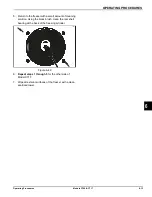
11.
Repeat steps 1 through 10
Model C717.
13406BR
12035
Apply the appropriate
Taylor approved food safe lubricant.
HP
12152
12153
Summary of Contents for C709
Page 8: ...1 4 TO THE INSTALLER Models C709 C717 To the Installer 1 Notes...
Page 36: ...5 16 USER INTERFACE Models C709 C717 User Interface 5 Notes...
Page 50: ...6 14 OPERATING PROCEDURES Models C709 C717 Operating Procedures 6 Notes...
Page 56: ...8 4 TROUBLESHOOTING GUIDE Models C709 C717 Troubleshooting Guide 8 Notes...
Page 58: ...9 2 PARTS REPLACEMENT SCHEDULE Models C709 C717 Parts Replacement Schedule 9 Notes...
Page 62: ...10 4 LIMITED WARRANTY ON EQUIPMENT Models C709 C717 Limited Warranty on Equipment 10 Notes...
Page 66: ...11 4 LIMITED WARRANTY ON PARTS Models C709 C717 Limited Warranty on Parts 11 Notes...

