6-14
OPERATING PROCEDURES
Model 8756
Operating Procedures
6
Closing Procedure
To disassemble, the following items will be needed:
•
Two cleaning and sanitizing pails
•
Cleaning brushes (provided with freezer)
•
Cleaner
•
Single-service towels
Draining Product from the Freezing
Cylinder
1. Press the AUTO and MIX Ref keys to cancel freezer
operation.
2. Open the mix cabinet door and remove the mix
storage cover, mix tank cover, mix tank, and mix
probe.
3.
If local health codes permit the use of rerun,
empty the mix from the mix tank into a sanitized,
NSF-approved stainless-steel rerun container. Place
a sanitized lid on the rerun container and place it in
the walk-in cooler.
Note:
If local health codes
do not
permit the use of
rerun, the product must be discarded.
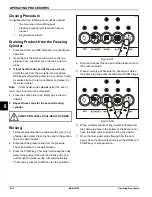
4. Place the suction line in an empty pail in the mix
cabinet.
5. Repeat these steps for the second freezing
cylinder.
Rinsing
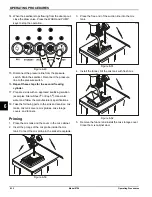
1. Fill the empty pail in the mix cabinet with 2 gal. (7.6 L)
of
cool
, clean water. Place the free end of the suction
line in the pail of water.
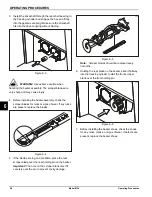
2. Disconnect the pressure line from the pressure
switch and place it in the pail of water.
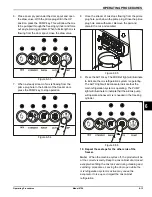
3. Press the PUMP key. This action will cause the rinse
water to be pumped through the air/mix pump and
out through the pressure line. After approximately
15 seconds, press the PUMP key to stop operation.
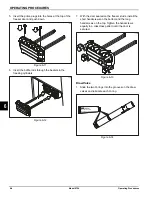
Figure 6-57
4. Drain and connect the free end of the pressure line to
the pressure switch.
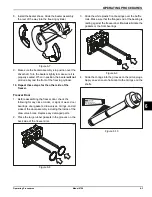
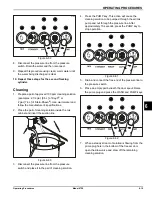
5. Place an empty pail beneath the door spout. Raise
the prime plug and press the WASH and PUMP keys.
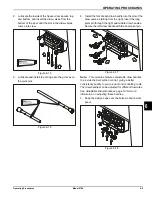
Figure 6-58
6. When a steady stream of rinse water is flowing from
the prime plug hole in the bottom of the freezer door,
open the draw valve and drain all the rinse water.
7. Once the rinse water stops flowing from the door
spout, close the draw valve and press the WASH and
PUMP keys to stop operation.
!
ALWAYS FOLLOW LOCAL HEALTH CODES.
13038p
13038wp
Summary of Contents for Horizon 8756
Page 18: ...4 6 OPERATOR PARTS IDENTIFICATION Model 8756 Operator Parts Identification 4 Notes ...
Page 22: ...5 4 USER INTERFACE Model 8756 User Interface 5 Notes ...
Page 40: ...6 18 OPERATING PROCEDURES Model 8756 Operating Procedures 6 Notes ...
Page 46: ...8 4 TROUBLESHOOTING GUIDE Model 8756 Troubleshooting Guide 8 Notes ...
Page 48: ...9 2 PARTS REPLACEMENT SCHEDULE Model 8756 Parts Replacement Schedule 9 Notes ...
Page 52: ...10 4 LIMITED WARRANTY ON EQUIPMENT Model 8756 Limited Warranty on Equipment 10 Notes ...
Page 56: ...11 4 LIMITED WARRANTY ON PARTS Model 8756 Limited Warranty on Parts 11 Notes ...
Page 58: ...12 2 WIRING DIAGRAMS Model 8756 Wiring Diagrams 12 Notes ...

