USER INTERFACE
5-3
Model SB25
User Interface
5
Blender Pitchers
Blender pitchers must be washed, rinsed, and sanitized
every 4 hours to prevent a buildup of film on the pitchers.
WARNING!
This machine has many sharp
edges that can cause severe injuries.
•
DO NOT
put objects or fingers near the shaver
or the pitcher blades.
•
USE EXTREME CAUTION
when removing
blades that are very sharp.
Failure to follow this instruction may result in
contaminated product or personal injury from blade
contact.
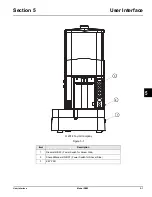
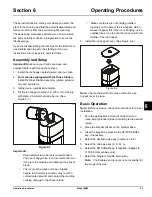
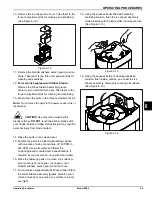
Ice Hopper
The ice hopper is at the top of the blender. The ice
hopper holds the ice until it is needed. When a drink is
selected, the proper amount of ice is shaved and blended
with the selected product in the blender pitcher.
Figure 5-3
Important!
The machine will not function without the ice
hopper cover in place.
The ice hopper must be emptied every day. The ice
hopper and hopper cover must be washed, rinsed, and
sanitized during the Daily Cleaning and Sanitizing
Procedures described on page 6-3.
Recipe Upload Procedure
The customer recipe information is held in the
microprocessor memory. Recipes distributed on USB
memory drives can be uploaded to the system
automatically.
Important!
When new recipes are uploaded, any recipes
currently on the system will be overwritten.
Programming Using USB Memory
Drive
Note: Do Not
plug in the USB memory drive and the PC
USB cable at the same time.
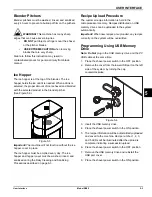
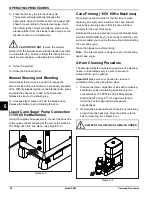
1. Place the shaver power switch in the OFF position.
2. Remove the cover from the lower USB port on the left
side of the system by turning the cap
counterclockwise.
Figure 5-4
3. Insert the USB memory drive.
4. Place the shaver power switch in the ON position.
5. The recipe information will be automatically uploaded
and saved to the machine. Recipe number 1, 2, 3,
and 5 LEDs will be illuminated after the upload is
complete, indicating a successful upload.
6. Place the shaver power switch in the OFF position.
7. Remove the USB memory drive and reinstall the
USB port cover.
8. Place the shaver power switch in the ON position.
101508
13944
Summary of Contents for SB25
Page 8: ...1 4 TO THE INSTALLER Model SB25 To the Installer 1 Notes...
Page 10: ...2 2 TO THE OPERATOR Model SB25 To the Operator 2 Notes...
Page 16: ...4 4 OPERATOR PARTS IDENTIFICATION Model SB25 Operator Parts Identification 4 Notes...
Page 28: ...6 8 OPERATING PROCEDURES Model SB25 Operating Procedures 6 Notes...
Page 30: ...7 2 OPERATOR S CHECKLIST Model SB25 Operator s Checklist 7 Notes...
Page 34: ...9 2 PARTS REPLACEMENT SCHEDULE Model SB25 Parts Replacement Schedule 9 Notes...
Page 40: ...11 4 LIMITED WARRANTY ON PARTS Model SB25 Limited Warranty on Parts 11 Notes...


