User Manual NVR TBK-NVR5016P8 TBK PLUS
28
www.tbkvision.com
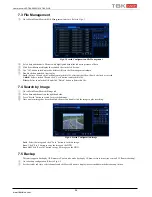
7.3 File Management
①
Go to Main Menu
Search
File Management interface. Refer to Fig 6-3.
Fig 6-3 Search Configuration-File Management
②
Select date and channels. The date with highlighted borderline indicates presence of data.
③
Click Search button to display the searched files in the file list box.
④
Use “All” button to lock/unlock or delete all files in the file management column.
⑤
Double click an unlocked item to play.
Lock:
Select a file and click Lock button to lock this file, after that, that file will not be deleted or covered.
Unlock:
Select a locked file and click “Lock” button to unlock this file.
Delete:
Select an unlocked file and click “Delete” button to delete this file.
7.4 Search by Image
①
Go to Main Menu
Search
Image tab.
②
Select data and channels on the right hand side.
③
Press “Search” button to search for a recorded image.
④
Once an alarm image has been identified, the user can double click the image to play recording.
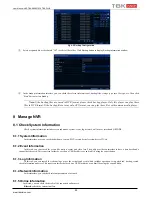
Fig 6-4 Search Configuration-Image
Lock
: Select the image and click “Lock” button to lock this image.
Save
: Click “Save” button to copy the image on the HDD.
Save All
: Click “Save All” button to copy all images on the HDD.
7.5 Backup
This unit supports backup by USB memory. You can also make backup by IE browser via internet (see section 8.5.2 Remote backup).
①
Go to backup configuration. Refer to Fig 6-5.
②
Set the start & end time, select channels and click Search button to display the searched data in the data backup list box.


