User Manual NVR TBK-NVR5016P8 TBK PLUS
23
www.tbkvision.com
6.1.3 Email
To set up Email:
①
Go to Main Menu
Setup
Network
Email tab. Refer to Fig 5-24.
②
Set SMTP Server and port.
Fig 5-24 Network Configuration-Email
SMTP Server/Port:
The name and port number of SMTP server. You can set up SSL check (such as Gmail) according to actual needs.
③
Set sender’s address and password.
④
Set receiver’s email address and click “Test” button to test the validity of the mailbox.
6.1.4 Network Server
This function is mainly used for connecting to the NVR from a control point with TBK VMS-3000 software. The NVR connects directly
with the software .The setting steps are as follows:
①
Go to Main Menu
Setup
Network
Network Server
②
In the server interface, select “Enable” as shown in the Fig 5-25.
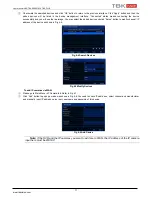
Fig 5-25 Network Configuration-Network Server
③
Check the IP address and port of the transfer media server in the TBK VMS-3000 The default server port for auto report is 2009. If it is
modified, please go to the transfer media interface to check.
④
Enable the auto report in the TBK VMS-3000 when adding a new device. Then self-define device ID and input the remaining information
of the device in the TBK VMS-3000
⑤
Input the above-mentioned server IP, server port and device ID in the NVR. Then click “Apply” button to save the setting. Now, the TBK
VMS-3000 system will automatically connect this device.
6.1.5 NAT
Remote connection to the recorder without opening ports, being a connection through a server is somewhat slower and less safe, TBK
recommends opening ports and use your DDNS server.
To configure the NAT function, NVR must already be connected to the network and have properly configured the Network section, it is
important that they are configured DNS addresses.
①
Go to Main Menu
Setup
Network
NAT interface. Refer to Fig 5-26.
②
Enable NAT and input the NAT Server (The default NAT Server is
www.autonat.com
).
③
Click “Apply” to save the settings.


