User Manual NVR TBK-NVR5016P8 TBK PLUS
24
www.tbkvision.com
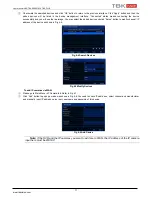
Fig 5-26 Network Configuration-NAT
6.1.6 Other Settings: DDNS
Your NVR allows to set up DDNS service to be used in connection. The setting steps are as follows:
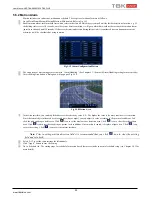
Fig 5-27 Network Configuration-Other Settings
①
Go to Main Menu
Setup
Network
Other Settings
②
Check mark DDNS.
③
Select DDNS type at pull down list, in order to use HOMMAX DDNS service please select HOMMAX DDNS
④
Enter user name, password (there are the www.hommax-ddns user and password) and host domain name of the registered website.
⑤
Click “Test” button to test the effectiveness of the relevant information.
⑥
Click “Apply” button to save the setting.
Note: The domain name selected by user is a banding domain name of NVR. User should logon the website
provided by the server supplier to register a user name and password and then apply for a domain name online.
After the successful application, user can access the device from the IE client by inputting that domain name.
Note: It is necessary to configure the network parameters
IP Address, Subnetmask and Gateway (see Fig. 5.23)
Note: It is necessary open NVR pots, by default 6036 and 80.
Note: Do not forget to configure DNS (prefered and alternate), if you do nor know which are your Internet provider
DNS please use: 8.8.8.8 and 8.8.4.4
Enable UPnP:
Select UPnP here and then enable UPnP function in your router. Therefore, there is no need for you to forward LAN IP
address and port in the router in connection of internet.
After that, you can check the WAN IP address in the router.
6.2 User Management Configuration
This tab allows you to add normal or advanced users. To add user and set up user authority:
①
Go to Main Menu
Setup
Users. Refer to Fig 5-28.
Fig 5-28 User Management Configuration


