User Manual NVR TBK-NVR5016P8 TBK PLUS
32
www.tbkvision.com
③
Open IE browser, input IP address, or dynamic domain name and enter. If HTTP port is not 80, add the port number after IP address or
domain name.
④
IE will download ActiveX control automatically. Then a window pops up and asks for user name and password. Input name and password
correctly, and enter to view.
Note:
If you cannot download and install ActiveX, please refer to FAQ Q8.
2. Connect the NVR to internet through PPPoE directly.
①
Go to the NVR’s Main Menu
Setup
Network interface to enable PPPoE and then input user name and password received from your ISP.
Next, click “Apply”. The NVR will connect to the server and would give a confirmation message.
②
When accessing the remote interface of NVR, user can input WAN IP to access directly (user can go to Main
Menu
Information
Network interface to check IP address).
③
If users want to utilize dynamic domain name, please apply for a domain name in a DNS server supported by the NVR or router. Then add
to the NVR.
④
Open IE browser to input WAN IP address or domain name and then enter. If HTTP port is not 80, add the port number after IP address or
domain name.
9.3 Remote Preview
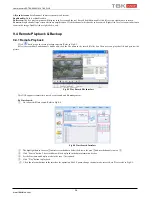
Fig 8-1 Remote Live Preview
Note: 32CH device only supports 16CH remote preview.
Symbol and function Definitions:
1
Channel
indicator
2
Screen
display mode
3
Volume
4
Snap
5
Start
IE
record
6
Start
manual record
7
Start
Talk
8
Playback
9
Color
1
0
P.T.Z
1
1
Master/sub stream status
Note:
Click
button to record manual and the record file will be saved in user’s PC.
Screen display mode.
Snap pictures:
The system will automatically capture pictures and save those pictures in the computer by clicking “Snap”
icon. You should set up the
path for those pictures in the Configuration
Local configuration.


