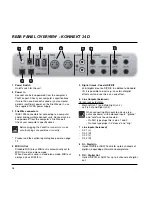
FRONT PANEL OVERVIEW - KONNEKT 24D
11
4
Input LEDs
Three input level indicators. -30dB, -10dB and 0dB.
First adjust the Gain Trim so the 0dB LED is only lit at
absolute peaks. Then reduce the Gain Trim slightly
so the 0dB LED is never lit.
5
Gain/Trim
Use this control to set the appropriate input level.
(see previous paragraph)
6
Phantom Power +48v
The XLR part of the Combo XLR/Jack connections
fe48 phantom power when this switch is
pressed. Phantom power is used to power line-
drivers and condenser microphones.
There are three main types of microphones.
Condenser microphones
- phantom power required
except for some models that use proprietary power
supplies or built-in batteries. Please check the
microphone's manufacturer specifications for details.
Electrodynamic microphones
- phantom power is not
required but does no harm to the microphone.
Ribbon microphones
-
phantom power could
damage the microphone. Search advice from the
manufacturer of the microphone!
Only the condenser type requires phantom power.
It is however no problem combining a condenser
microphone in e.g. ch. 1, with a standard
electrodynamic microphones (such as e.g. a Shure
SM57) in ch. 2. Nor is it any problem to activate
phantom power and use a condenser microphone to
one of the inputs and connect a guitar using a 1/4
jack to the other input, as phantom power only
concerns the XLR connections.
7
Line In - ch 1/2 on rear panel
This switch alternates between using the front panel
inputs or rear panel inputs for channels 1/2.
Rear panel inputs are balanced line inputs.
Connect a TV, a radio tuner or any secondary
device that you don’t use in music production to
Line inputs 1/2 on the rear panel. Use the “Line
In” switch to alternate between front and rear
panel inputs.
8
Source Level (push to control Pan)
Controls the level or pan-position of the selected
channel. The light ring shows the level or pan position
of the selected channel.
By default the Source Level knob controls the source
level of the selected channel. Press once and turn
the knob to pan the signal. Leave the knob
untouched for 1 second and it will automatically
return to volume control function.
9
Monitor LEDs
Indicate which channel is monitored. Select channels
using the Ch. Select button.
10 Ch. Select
The LED light-ring around the SOURCE level knob
indicates the source level of channel you have
selected or the pan position if the Source Level knob
(8) has been pushed.
Select between monitoring the following channels:
Ch 1
- Front or rear panel input channel 1*
Ch 2
- Front or rear panel input channel 2*
* Select between channel 1/2 front and
rear panel using the Line in switch on the
front panel.
Summary of Contents for Konnekt 24D
Page 1: ...User s Manual English Version Konnekt 24D Konnekt 8...
Page 2: ......
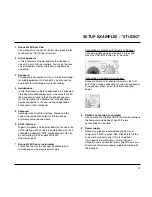
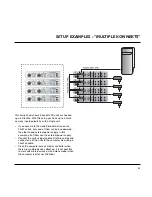
Page 18: ...SETUP EXAMPLES STUDIO 16...
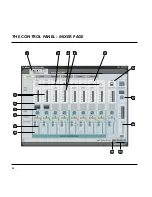
Page 24: ...THE CONTROL PANEL MIXER PAGE 22...
Page 28: ...SETUP PAGE 26...
Page 34: ...32...
Page 36: ...SYSTEM SETTINGS 34 Access the System Settings page by pressing...


