background image

6


Introduction

Sockets

Note:

 The location and names of the sockets on the TV may vary according to TV model, and not all sockets 

available on all models.

LAN

This socket can be used to connect to external modem or network access equipment.

OPTICAL socket (output)

This socket can be used to connect a compatible digital audio receiver.

HDMI1/HDMI2/HDMI3 socket (input)

such as a Blu-ray player, with a HDMI output for best picture quality. It also provides 

an uncompressed digital connection that carries both video and audio data by way of 

an integrated mini-plug cable.

USB 2.0/USB 3.0 socket (input)

This socket can be used to connect a USB device.

ANTENNA IN socket (input)

This socket can be used to connect to external antenna, a cable or cable box.

Headphone socket (output)

This socket can be used to connect headphones or stereo earphones.

Note

: When the Headphone socket is connected, the speakers will be muted.

Warning

: Excessive sound pressure from earphones and headphones can cause 

hearing loss.

LAN

HDMI 1

or HDMI 2

or HDMI 3

ANTENNA IN

USB 2.0

or

USB 3.0


OPTICAL

Summary of Contents for 43P20US/50E17US

Page 1: ...43P20US 50E17US...

Page 2: ...on The exclamation point within an equilateral triangle is intended to alert the user to the presence of important operating and maintenance servicing instructions in the literature accompanying the a...

Page 3: ...does not appear to operate normally or exhibits a marked change in performance E The appliance has been dropped or the enclosure damaged 17 Tilt Stability All televisions must comply with recomm ende...

Page 4: ...E 14 Chapter 4 System Settings Menu Using Menu System 15 CHANNEL 15 Auto Scan 15 DTV Manual Tuning 15 ATV Manual Tuning 15 Channel Edit 15 PICTURE 15 Picture Mode 15 Mix Dimmer 15 Content Type 15 ECO...

Page 5: ...the dangers of climbing on furniture to reach the television or its controls Precautions Read all of the instructions before operating the set Keep these instructions well for future use Note The app...

Page 6: ...5 Introduction...
Page 7: ...ty It also provides an uncompressed digital connection that carries both video and audio data by way of an integrated mini plug cable USB 2 0 USB 3 0 socket input This socket can be used to connect a...

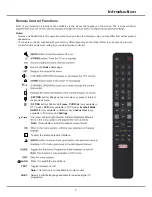
Page 8: ...c e t o m e r e h T control functions below according to your actual remote control s Goes to the Golive Homepage SETTING button Brings up the main menu or press to return to the previous menu OPTION...

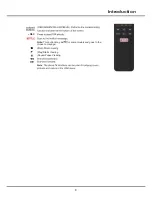
Page 9: ...8 Note This button may be for some models and goes to the Golive homepage Introduction Play Starts Viewing Pause Puase Viewing five REC...

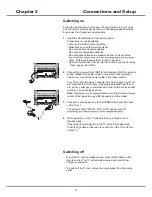
Page 10: ...ect the power cable to the mains socket Your TV set should only be connected to an AC supply It must not be connected to a DC supply If the plug is detached from the ca ble do not under any circumstan...

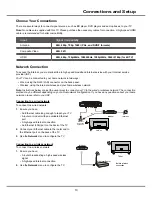
Page 11: ...eless network Note Instructions below are just the usual ways to connect your TV to the wired or wireless network The connection method may be different depending on your actual network configuration...

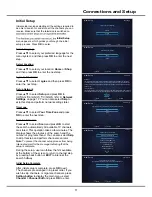
Page 12: ...the last step by pressing back button or EXIT to interrupt the search halfway Initial Setup Complete After initial setup is complete press OK to exit The channels are arranged in a preset order If yo...

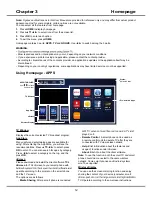
Page 13: ...th operate according to the prompt on the smart phone and the TV screen The options are as follows Media Sharing After a smart phone is connected Note Figures and illustrations in this User Manual are...

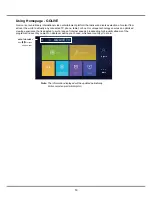
Page 14: ...unction of Media be equipped with a USB storage device mobile hard disk U disk etc Settings customize your TV settings For details refer to Chapter 4 System Settings Menu Favorite Displays the list of...

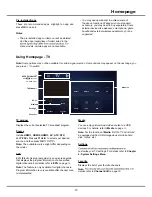
Page 15: ...TV phone tablet or box Our unique technology ensures an optimized viewing experience that is adapted to suit a range of Internet speeds broadcasting high quality streams of the programs and events yo...

Page 16: ...start channel scanning 4 Press SETTING to return or EXIT to close the menu ATV Manual Tuning This allows you scan with a rang of channels Operations are similar to that of DTV Manual Search Note This...

Page 17: ...Warm for a more red palette of picture colors Note For some models the Color Temperature option is not available Aspect Ratio Press OK to enter Press select the mode to display the picture Auto 4 3 16...

Page 18: ...You can see WiFi networkand MAC Address WiFi network Press OK to display the available wireless networks Select one of wireless network and press OK Press OK on Password You can input password through...

Page 19: ...ter the This option allows you to lock a certain TV channel Press OK to enter and then press to select a certain TV channel you want to lock and then press the red button To unlock use the same operat...

Page 20: ...toggle among the program information of different channels Press to highlight a specific program below a channel Media Your TV is fitted with a USB socket that enables you to view photos listen to mu...

Page 21: ...he network Check if your TV is connected with the network Reboot your TV Consult your internet service provider to confirm if access of your router is supported Refer to the operation manual of your r...

Page 22: ...eception Radio frequency interference This interference produces moving ripples or diagonal streaks and in some case loss of contrast in the picture Find out and remove the radio interference source T...

Page 23: ...e available through this device and does not warrant that the device content or services will meet your requirements or that operation of the device or services will be uninterrupted or error free Und...

Page 24: ...ectronics Australia Pty Ltd ABN 83 111 032 896 Address 797 Springvale Road Mulgrave VIC 3170 Australia Telephone 1300 738 149 service au tcl com www tclelectronics com au Like us on Facebook 72 50D29C...

Reviews: