


EN
14
English
Chapter 5 - Other information
Password in Parental Control
- The default password is 1234. You can change it to
a new one.
- The super password is 0423. If you forget your
code, enter the super password to override any
existing codes.
Troubleshooting
Please check the following list before requesting
service.
There is no picture or sound.
•
Make sure the power cord is properly inserted in the
power outlet.
•
Make sure the source type is set correctly.
•
Make sure the antenna is properly connected.
•
Make sure the volume is not set to minimum or the
sound is not set to mute.
•
Make sure the headphones are not connected.
•
The TV may be receiving a signal other than from
TV broadcasting stations.
Picture is not clear.
•
Make sure the antenna cable is properly connected.
•
Consider whether your TV signal is being properly
received.
•
Poor picture quality can occur due to a VHS
camera, camcorder, or other peripheral being
connected at the same time. Switch off one of the
other peripherals.
•
The ‘ghost’ or double image may be caused by
obstruction to the antenna due to high-rise buildings
or hills. Using a highly directional antenna may
improve the picture quality.
•
The horizontal dotted lines shown on the pictures
may be caused by electrical interference, e.g., hair
dryer, nearby neon lights, etc. Turn off or remove
these.
Picture is too dark, too light or tinted.
•
Check the colour adjustment.
•
Check the brightness setting.
•
Check the sharpness function.
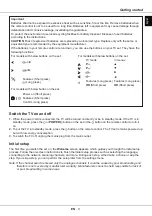
Remote control does not work.
•
Check the batteries of the remote control.
•
Make sure the remote sensor window on the TV
front is not under strong fluorescent lighting.
•
Try to clean the remote sensor window on the TV
front with a soft cloth.
If the above suggestions do not solve your technical
issue, please refer to the warranty card for service
information.
Operating Conditions
Temperature 5°C - 35°C (41°F - 95°F)
Humidity 20 - 75% (non-condensing)
Storage Conditions
Temperature -15°C - 45°C (5°F - 113°F)
Humidity 10 - 90% (non-condensing)
Radio Information
•
Bluetooth® transmitter frequency range: 2402 -
2480MHz
•
Bluetooth®
transmitter power: 2dBm (+/- 5dB)
•
2.4G Wi-Fi transmitter frequency range: 2412 -
2472MHz
• 2.4G Wi-Fi transmitter power: 16dBm (+/- 4dB)
• 5G Wi-Fi transmitter frequency range:
-
Band 1: 5180 - 5240MHz
-
Band 4: 5745 - 5825MHz
• 5G Wi-Fi transmitter power:
-
Band 1: 14dBm (+/- 3dB)
-
Band 4: 11dBm (+/- 3dB)
• DVB-T/T2/C tuner frequency range: 45 - 858MHz
• DVB-S/S2 tuner frequency range: 950 - 2150MHz
*
In all EU member states, operation of 5180 -
5240MHz is restricted to indoor use only.
BE BG CZ DK DE EE IE
EL ES FR HR IT CY LV
LT LU HU MT NL AT PL
PT RO SI SK FI SE UK
OSS Notice
This product uses the GPL (Version 2 and 3) and
LGPL (version 2.1) and MPL (version 1.1).
To send inquiries and requests for questions
regarding open source, contact nearest TCL office.
This product uses some software programs which are
distributed under the Independent JPEG Group.
This product uses some software programs which are
distributed under the libpng Project.
This product uses some software programs which are
distributed under the Freetype Project.
This product uses some software programs which are
distributed under the zlib Project.
This product uses some software programs (libxml2,
curl, expat, c-areas) which are distributed under the
MIT.
This product uses CyberLink for C which is distributed
under the Open Source Project.
This product uses opensl, xerces which is distributed
under the Apach License Project.


