background image

9

Chapter 4

Using More of Your TV

The CAM may enable several digital services, 

depending on the operator and services you choose 

(for example, pay TV). Contact your digital TV service 

operator for more information about services and terms.

Using the Common Interface Function
WARNING: Switch off your TV before inserting a 

CAM. Be sure to follow the instructions described 

below. Wrong insertion of a CAM may damage both 

the module and your TV. 
1. 

Following the directions printed on the CAM, gently 

insert the module into the common interface slot on 

the TV.

2. 

Push the module in as far as it will go.

3. 

Turn on the TV and wait for the common interface 

function to be activated. This may take several 

minutes.

Note

: Do not remove the CAM from the slot. Removing 

the module will deactivate the digital services.

Accessing Common Interface Services

After inserting and activating the CAM, press 

Menu 

on the remote control, select 

Channel > Common 

Interface

 and press 

OK/

 to enter. This menu option 

is only available if the CAM is correctly inserted and 

activated. On-screen applications and content are 

provided by your digital TV service operator.

Note

: This feature is only available for digital channels.

Using Subtitles

You can enable subtitles for each TV channel. 

Subtitles are broadcast via Teletext or DVB-T/DVB-C 

digital broadcasts. With digital broadcasts, you have 

the additional option of selecting a preferred subtitle 

language.

Turning On/Off Subtitles
1. 

Press 

Menu


on the remote control, select 

Setup > 

Subtitle

 and press 

OK/►

 to enter.

2. 

Press 

◄/►

 to select 

On

 or 

Off

.

3. 

Press 

Exit 

to close the menu.

Enabling Subtitle Languages on Digital TV Channels
1. 

Press 

Menu 

on the remote control, select 

Setup > 

Subtitle 

and press 

OK/►

 to enter.

2. 

Press 

/

 to select 

Subtitle Primary Language

and then press 

◄/►

 to select a language as your 

preferred language.

3. 

Press

/

 to select 

Subtitle Secondary Language

and then press 

◄/►

 to select a secondary subtitle 

language.

4. 

Press 

Exit 

to close the menu.

Installing Channels

This section describes how to search and store 

channels automatically. This may be done in any of the 

cases below:


-

you have skipped the channel search step in the 

initial setup;


-

you are prompted that there are no channels in TV 

mode;


-

you want to update your channels.

Auto Scan

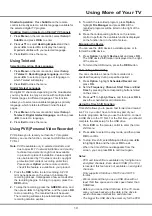
Scanning     CH47

Digital Channels Found:
DTV:          0     Radio:       0      Data:           0

Analog Channels Found:                   0

   MENU:Skip       EXIT:Exit

1. 

In TV mode, press

 Menu 

on the remote control and 

select 

Channel

 > 

Tuner Type

, then press ◄/► to 

select 

Cable

Antenna

 or 

Satellite

.

2. 

Select 

Auto Scan

 and then press 

OK

/► to enter.

3. 

Set 

Country

 and 

Mode

 (

DTV+ATV

DTV

 or 

ATV

), 

press ▲/▼ to highlight 

Start

, and then press 

OK

/► to start the automatic search process. 

The 

search process may take a few minutes. During the 

process, you can press 

Exit

 to abort halfway.

Once the scan ends, the TV automatically goes to 

the first channel searched, and all the channels are 

arranged in a preset order.

Channel Edit

This allows you to skip channels, modify the preset 

order, delete, or rename (only in ATV) channels.

1. 

Press 

Menu

 on the remote control, select 

Channel


Channel Edit

2. 

Press ▲/▼ to highlight a channel, and then press 

the colored buttons to perform the corresponding 

function indicated at the bottom of the screen. 

Automatic Channel Update

This allows you to update all available channels, without 

altering the sorting of existing channels.

Note

: This feature is only available for digital channels.

1. 

In DTV mode, press

 Menu 

on the remote control 

and select 

Channel

 > 

Auto Channel Update

.

2. 

Press ◄/► to select 

On

 to enable automatic 

channel update.

Common Interface

(* not available for some models)

Encrypted digital TV channels can be decoded with a 

Conditional Access Module (CAM) along with a smart 

card provided by a digital TV service operator.

Summary of Contents for LED32D2910

Page 1: ...期 BOM编号 牌子名称 批 次 号 机 芯 制 作 人 PREPARED BY 项目 美工 工程师 EN G C H EC KED BY 市 场 业 务 中 心 确 认 C ON FIR M BY 销 往 地 TCL RUSSIA HZ2019 RD512VS RU 32D3000 2019 10 6 ELQ145380U H7 40F60JY URNA3AA 黄艳霞 俄语增加客户内容 业务确认签名为准 俄罗斯客户专用 TCL电子控股有限公司 运营中心 惠州TV工厂 PE部 产品辅助设计室 外销订单 刘洋 数字签名者 刘洋 DN cn 刘洋 o ou email vasya liu tcl c om c 无 日期 2019 10 08 13 59 36 08 00 李良 繁 数字签名人 李良繁 DN cn 李良繁 c 无 日期 2019 10 09 14 25 51 08 00 R1 R...

Page 2: ...LED32D2910 LED40D2910 LED43D2910 Figures and illustrations in this User Manual are actual product appearance Product design and ...

Page 3: ...ing TV Settings Menu 8 Chapter 4 Using More of Your TV Installing Channels 9 Channel Edit 9 Automatic Channel Update 9 Common Interface 9 Using the Common Interface Function 9 Accessing Common Interface Services 9 Using Subtitles 9 Turning On Off Subtitles 9 Enabling Subtitle Languages on Digital TV Channels 9 Enabling Hearing Impaired on Digital TV Channels 10 Using Teletext 10 Selecting Decoding...

Page 4: ...unplug the set and refer to the service personnel If the set is subject to impact or has been dropped and the cabinet has been damaged Where the mains plug or an appliance coupler is used as disconnect device the disconnect device shall remain readily operable Where an all pole mains switch is used as the disconnect device the switch shall remain readily operable Power Cord and Signal Cable Do not...

Page 5: ...ta by way of an integrated mini plug cable ANTENNA CABLE IN socket input This socket can be used to connect the outside aerial or cable network SATELLITE IN socket input This socket can be used to connect a coaxial cable to receive the signal from your satellite receiver AV IN adapter socket input This socket can be used to connect a range of equipment including video recorders camcorders decoders...

Page 6: ... OK To confirm an entry or selection Option To enter the PVR settings Return To return to the previous channel VOL To control the volume Info To display program information if available Mute To switch the sound off and back on CH To change channels Text To toggle Teletext on or off Subtitle To select a subtitle language available for selected digital TV program List To display the channel list TV ...

Page 7: ...is connected to the television please only connect the power cable to the mains socket Your TV set should only be connected to an AC supply It must not be connected to a DC supply If the plug is detached from the cable do not under any circumstances connect it to a mains socket as there is a risk of electric shock Note The figures are for representation only the location of power socket of the tel...

Page 8: ...ady for use Ensure that your TV is connected to an antenna or an external device that inputs TV signal and then follow all the settings in turn listed on the First Time Setup wizard First Time Setup OSD Language Mode Setting Country Tuner Type Auto Scan LCN Auto Channel Update Move Adjust MENU Return EXIT Exit Auto Scan English Home Mode Germany Antenna DTV ATV On Off Press to select each setting ...

Page 9: ...n model Adjusting Volume Volume control press the Vol buttons on the remote control or the corresponding buttons on the TV set to increase or decrease the volume Sound mute press the Mute button to temporarily mute the sound Press this button again or the Vol button to restore the sound Using TV Settings Menu Allows you to adjust TV settings such as picture and sound Picture Mode Brightness Contra...

Page 10: ...uage and then press to select a language as your preferred language 3 Press to select Subtitle Secondary Language and then press to select a secondary subtitle language 4 Press Exit to close the menu Installing Channels This section describes how to search and store channels automatically This may be done in any of the cases below you have skipped the channel search step in the initial setup you a...

Page 11: ...een malfunction and data loss The bigger the USB drive free memory for the PVR Shortcut operation Press Subtitle on the remote control to directly select a subtitle language available for the selected digital TV program Enabling Hearing Impaired on Digital TV Channels 1 Press Menu on the remote control select Setup Subtitle and press OK to enter 2 Press to select Hearing Impaired and then press to...

Page 12: ... about the current or next program playing on each channel Navigate through the different programs using the buttons on the remote control 2 Use the related buttons shown at the bottom of the screen to view EPG Prev day Press the RED button to display EPG of the previous day Next day Press the GREEN button to display EPG of the next day Schedule Press the YELLOW button to bring up the EPG Schedule...

Page 13: ...face recognition if any Please try a similar device If it does not work contact your local dealer 1 Fail to link to the network Check if your TV is connected with the network Reboot your TV Consult your internet service provider to confirm if access of your router is supported Refer to the operation manual of your router Make sure your TV is connected to a router and make sure your router is power...

Page 14: ...e the reception Radio frequency interference This interference produces moving ripples or diagonal streaks and in some case loss of contrast in the picture Find out and remove the radio interference source To bring you better visual experience please remove all labels from TV front panel and screen before use No picture no sound 1 Check if the fuse or circuit breaker is working 2 Plug another elec...

Page 15: ...rvices either express or implied including but not limited to warranties of merchantability of satisfactory quality fitness for a particular purpose of accuracy of quiet enjoyment and non infringement of third party rights TCL does not guarantee the accuracy validity timeliness legality or completeness of any content or service made available through this device and does not warrant that the devic...

Page 16: ...llow the instructions accordingly based on the table stand supplied to you If the table stand has been assembled just ignore the following instructions During installation lay some soft materials below the screen to avoid scratch and damage to the screen When the TV faced down do not impact the screen with sharp edges to avoid scratching the screen If you want to mount the TV to the wall please pu...

Page 17: ...LED32D2910 LED40D2910 LED43D2910 ...

Page 18: ... меню настройки телевизора 8 Глава 4 Другие функции телевизора Настройка каналов 9 Редактирование списка каналов 9 Автоматическое обновление списка каналов 9 Стандартный интерфейс 9 Использование функции стандартный интерфейс 9 Доступ к услугам общего интерфейса 9 Использование субтитров 9 Включение выключение субтитров 9 Активация языка субтитров для цифровых ТВ каналов 10 Включение субтитров для...

Page 19: ...оно падало и его корпус был поврежден Если в качестве разъединяющего устройства используется сетевая вилка или приборный выключатель они должны находиться в рабочем состоянии Если в качестве разъединяющего устройства используется многополюсный выключатель он должен быть в рабочем состоянии Шнур питания и сигнальный кабель Не ставьте на шнур питания и сигнальный кабель посторонние предметы и не пер...

Page 20: ...Разъем выход AUDIO OUT ...

Page 21: ...иси или выделения Option Вход в настройки PVR Return Возврат к предыдущему каналу VOL Регулировка громкости Info Просмотр информации о программе если такая информация доступна Mute Включение и выключение звука CH Переключение каналов Text Переключение в режим телетекста или выход из него Subtitle Выбор языка субтитров доступного для текущей цифровой телепрограммы List Отображение списка каналов TV...

Page 22: ...подключен к телевизору просто подключите его к электророзетке Подключайте телевизор только к сетям переменного тока Запрещается подключать устройство к сети постоянного тока Если на шнуре отсутствует вилка ни в коем случае не под ключайте его к электросети высока вероятность поражения электрическим током Примечание Рисунки даны в ознакомительных целях местоположение разъема питания телевизора може...

Page 23: ...йки необходимые для подготовки телевизора к работе Проверьте подключен ли телевизор к антенне или внешнему устройству которое передает телевизионный сигнал затем следуйте всем указаниям мастера настройки First Time Setup First Time Setup OSD Language Mode Setting Country Tuner Type Auto Scan LCN Auto Channel Update Move Adjust MENU Return EXIT Exit Auto Scan English Home Mode Germany Antenna DTV A...

Page 24: ...овка громкости нажимайте кнопки Vol на пульте ДУ или соответствующие кнопки на телевизоре чтобы сделать звук громче или тише Отключение звука нажмите Mute чтобы временно отключить звук Нажмите повторно кнопку Mute или кнопку Vol чтобы включить звук Использование меню настройки телевизора Это меню позволяет изменять настройки ТВ такие как параметры изображения и звука Picture Mode Brightness Contra...

Page 25: ...выберите Setup Subtitle и нажмите OK чтобы войти в меню 2 Последовательно нажимайте кнопки чтобы выбрать On или Off 3 Нажмите Exit для закрытия меню Настройка каналов В данном разделе описывается как искать и сохранять каналы автоматически Это может быть сделано в любом из перечисленных ниже случаев вы сбросили поиск каналов во время первой настройки вы получили сообщение что нет каналов в режиме ...

Page 26: ... они появляются на экране 3 Последовательно нажимайте кнопки чтобы выбрать Save и далее нажмите OK чтобы сохранить информацию о расписании записи Активация языка субтитров для цифровых ТВ каналов 1 Нажмите кнопку Menu на пульте ДУ выберите Setup Subtitle и нажмите OK чтобы войти в меню 2 Нажимайте кнопки чтобы выбрать Subtitle Primary Language и далее нажимайте на кнопки чтобы выбрать удобный перв...

Page 27: ...е поэтому вы не пропустите ни одной части вашей любимой телепередачи Перед использованием данной функции следует сначала убедиться что к телевизору подключен накопитель USB При первом включении необходимо выполнить процедуру установки диска для накопителя USB 1 Нажмите кнопку ECO на пульте ДУ чтобы войти в меню Time Shift 2 Последовательно нажимайте кнопки чтобы выбрать режим воспроизведения и для...

Page 28: ...Screen беспроводная связь управление жестами распознавание лиц и т п Воспользуйтесь другим устройством Если проблема не исчезнет обратитесь к продавцу 1 Невозможно подключиться к сети Проверьте подключен ли телевизор к сети Перезапустите телевизор Узнайте у интернет провайдера поддерживается ли доступ к вашему маршрутизатору См руководство пользователя маршрутизатора Убедитесь что ваш телевизор по...

Page 29: ...1 ЖК телевизор 1шт 2 Основание опоры компл 1шт 3 Комплект крепежных элементов 1шт 4 Пульт ДУ 1шт 5 Элемент питания 2шт 6 Руководство по эксплуатации 1шт 7 Талон гарантийный 1шт 8 Кабель MINI JACK 1шт ...

Page 30: ...х материалов и услуг включая без ограничений гарантии коммерческой пригодности качества пригодности для целевого использования точности спокойного использования а также отсутствия нарушения прав третьих лиц TCL не гарантирует точность достоверность своевременность законность или полноту информации в любых материалах или услугах доступ к которым может быть получен с помощью данного устройства и ком...

Page 31: ...C 2 C 1 ...
Page 32: ...LED32D2910 220 32 1366X768 5 3 9 LED40D2910 250 40 1920x1080 8 6 1 LED43D2910 270 43 1920x1080 8 7 1 Вес нетто с подствкой ...

Page 33: ...работки и утилизации Обеспечивая правильную утилизацию вы помогаете сберечь природные ресурсы и предотвращаете ущерб для окружающей среды и здоровья людей который возможен в случае ненадлежащего обращения Более подробную информацию о пунктах приема и утилизации данного вида аппаратуры можно получить в местных муниципальных органах или на предприятии по вывозу бытового мусора Дисплеи телевизоров TC...

Reviews: