


2800 Laura Lane • Middleton, WI 53562 | 800.288.9383 • | www.tcsbasys.com
15
15
Configuration
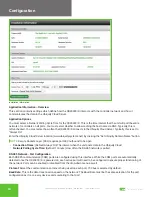
specific site. Typically this indicates that the site is not initialized on the Ubiquity Cloud Server side yet. Contact TCS
Technical Support (800.288.9383, ext. 2) to assign or initialize the QD2040C/D to a site.
3. Established:
The unit is communicating with the Ubiquity Cloud Server AND is ready to go. All Ubiquity functions
(monitoring, programming, alarming, etc.) should be available through the user interface at this point.
Clicking the Refresh button will refresh the connection status.
Refresh Button
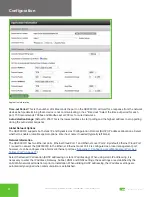
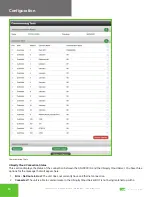
Controller View
This section allows you to see what controllers have been found by the QD2040C/D and view each controller’s address,
model, and communication status. The state field will show AUTO-DETECTED initially when found by the unit and
CONFIRMED once the controller has been recognized by the Ubiquity Cloud Server. This information allows the installer to
verify that each controller has been found by the QD2040C/D and is communicating with the local network. Clicking the
green Refresh button on the right side of the Controller View title bar will refresh each controller’s status.
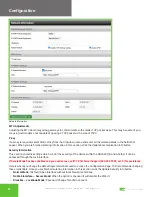
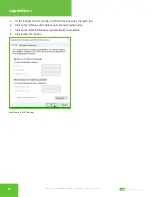
System Commands
This section describes how to set up system flags for the QD2040C/D. “Reboot Unit” sets a flag which will shut off and
restart the QD2040C/D within a five-minute cycle. “Check for Update” contacts the Ubiquity Cloud Server for any updates
relevant to its particular model number and software version. Once the update has been downloaded, it is automatically
applied, and the unit will reboot if necessary.
NOTE:
The “Check for Update” command requires that the QD2040C/D have Internet access to retrieve the update
patch.
After you have finished configuring the Gateway, you can revert your laptop back to its original DHCP settings, if desired.
See
“Appendix B: Revert Back to DHCP Settings” on page 23
.
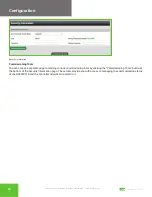
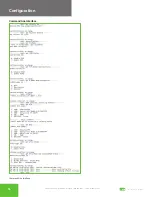
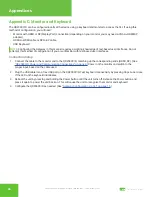
Gateway Configuration via CLI
When you connect to the QD2040C/D using a keyboard and monitor (See
“Appendix C: Monitor and Keyboard” on page
), you can configure the Gateway parameters for your site by using the built-in CLI.
NOTE:
Configuring the Gateway in this manner requires a working knowledge of text-based user interfaces. Do not
attempt this method of configuration if you are unfamiliar with text-based user interfaces.
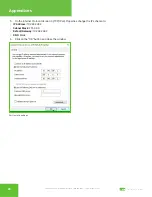
1.
To establish a connection to the CLI, you must enter a login user name and password. If you have not changed the
user name and password, you must enter the default credentials.
If you do not have the default credentials for this
unit, contact TCS Technical Support at 800.288.9383 ext. 2 for assistance.)
2.
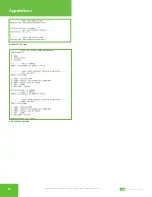
Once logged in, type in “tcssetup.” This will open the CLI (see
“Command Line Interface” on page
3. Scroll to each field that you want to change by pressing the “Enter” button.
4.
Type in new values on any field as needed. Pressing “Enter” will save the new value or keep the current value, and
advance to the next field.
5. Once the final “Secure Mode” section is finalized and you have exited the CLI, the unit will automatically apply the
new configuration and update the unit within five minutes.


