9
Clerks can be created with passwords for added security.
3.
Pres
s OK
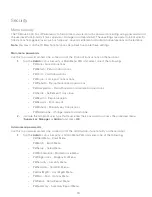
. Depending upon your current settings and which option you select, you may be prompted
to clear the existing clerk file (
Yes
or
No
).
a)
If you select
Yes
, the clerk file will be deleted.
b)
If you select
No
, you will be returned to the
Clerk Prompt
selection screen.
Enable auto clerk IDs
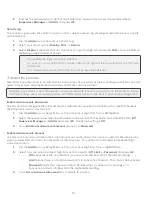
Use this option to auto create a new clerk when performing a transaction on the terminal. This does not
enhance security to your terminal.
1.
Tap the
Admin
icon
Clerk Menu
AutoAddClk.
2.
Select whether you wish to offer the user to automatically create clerk users when certain
transactions are activated (
On
or
Off
):
Add a clerk
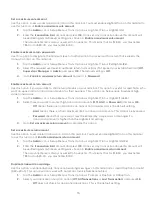
Use this option to create a unique user ID for them with the appropriate level of access to terminal features. You
will be required to log in as an administrator to create a clerk user.
1.
Tap the
Admin
icon
Clerk Menu
Add ID.
2.
Enter
Clerk ID
.
3.
Enter
Clerk Name (optional)
. This is useful to track IDs and their owners.
4.
Enter the
Password (optional)
. This will only appear if the clerk prompt is set to ID & Password.
5.
Reenter
Password (optional)
.
6.
Pres
s OK
.
7.
An option to create another clerk appears. Select
Yes
No
. If you select
Yes
, go to step 2.
Edit a clerk name
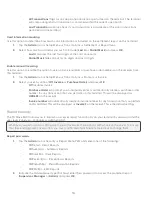
Use this option to add or change an existing clerk name. It requires a higher level user to change it. For
example, it would take a manager tor supervisor to affect a clerk’s name. You must enable
ClkPrompt
to use
this feature (page 8).
1.
Tap the
Admin
icon
Clerk Menu
ClkWording.
2.
Select which name you wish to apply to your general user group (
Clerk
,
Server
, or
Cashier
) and pres
s OK
.
Delete a clerk ID
Use this option to delete one or all existing clerk IDs from a terminal. Repeat these steps on each terminal where
the clerk ID resides. This option cannot delete one or more clerks if the terminal has an open batch.
1.
Tap the
Admin
icon
Clerk Menu
Delete ID.
2.
Confirm how many clerks you wish to delete (
All
or
One
).
This is only used when Clerk Prompt is set to ID Only. This cannot be used when Clerk Prompt is set to
ID & Password (see page 8).
•
If you have multiple terminals, you must add the clerk ID to each one separately.
•
The clerk ID is one to six digits in length.
•
The clerk name is always optional and has a 20 alpha-numeric character limit.
•
The password may be optional and must be a minimum of four to seven digits in length.


