83-517-000 Rev.
A
75
CAUTION
To prevent damage to the unit, do not program the Output voltage and
Output current to higher then the power supply ratings.
8.5
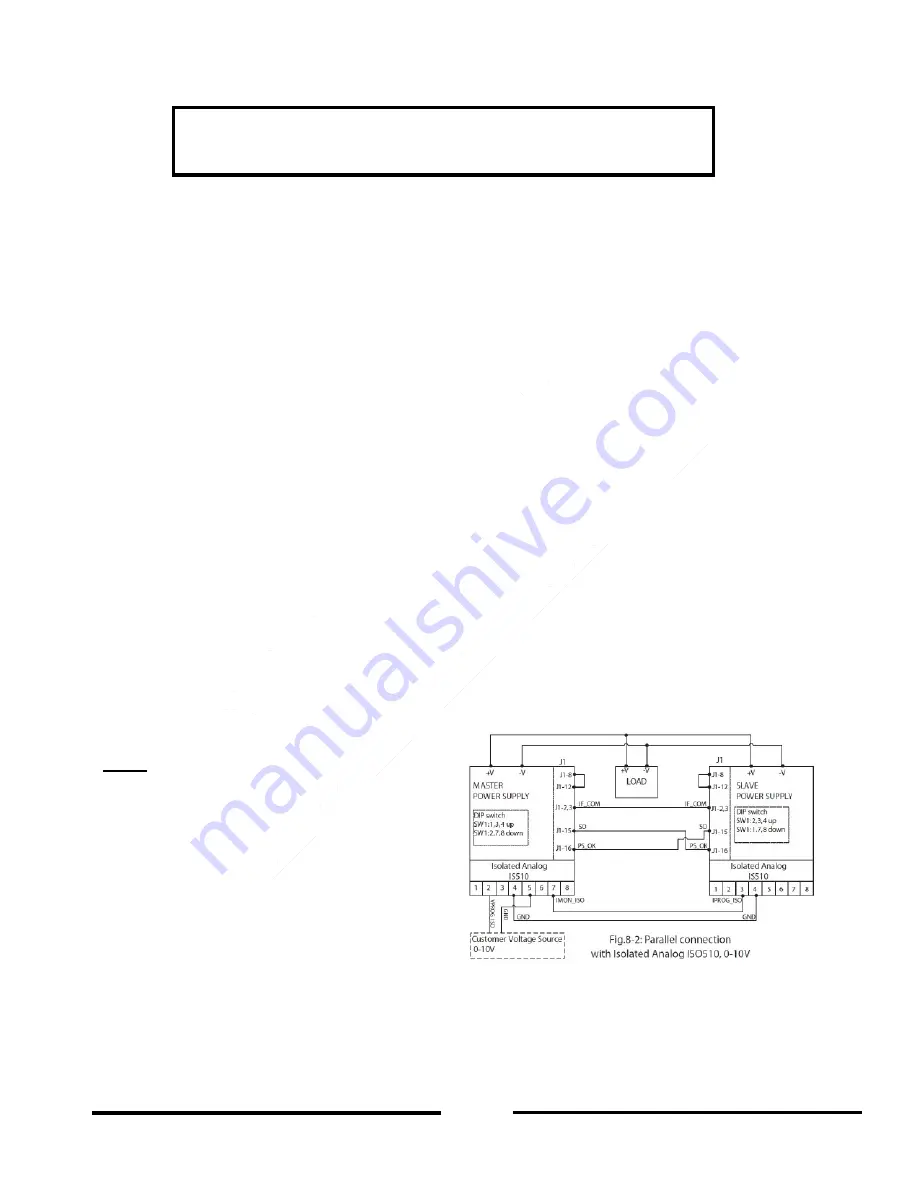
PARALLEL OPERATION WITH ISOLATED ANALOG OPTION
Setting Up The Master Unit
8.5.1
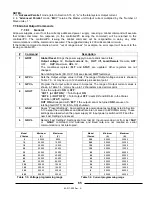
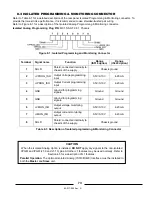
Setting up the Power Supply for 0-5/0-10V Isolated Programming and Monitoring.
Perform the following procedure to configure the power supply:
1. Press the power supply AC Input power switch to the
OFF
position.
2. Connect a wire jumper between J1-8 and J1-12 (refer to Table 4-4).
3. Set DIP-switch SW1-1 to the
UP
position for Output voltage external programming and SW1-2 to
the
UP
position for Output current limit external programming.
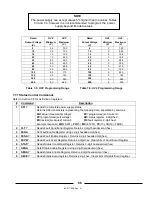
4. Set SW1-3 to select the Programming Voltage Range:
DOWN
= 0-5V,
UP
= 0-10V.
5. Set SW1-4 to select the Monitoring Voltage Range:
DOWN
= 0-5V,
UP
= 0-10V.
6. Ensure that SW1-7 and SW1-8 are in the
DOWN
position.
7. Connect the programming sources to the mating plug of the
Master
Isolated Programming
connector. Observe for correct polarity of the voltage source.
Setting Up The Slave Unit
8.5.2
Setting up the Power Supply for 0-5/0-10V Isolated Programming and Monitoring.
Perform the following procedure to configure the power supply:
1. Press the power supply AC Input power switch to the
OFF
position.
2. Connect a wire jumper between J1-8 and J1-12 (refer to Table 4-4).
3. Set DIP-switch SW1-1 to the
DOWN
position for Output Voltage programming by front panel and
SW1-2 to the
UP
position for Output Current limit external programming.
4. Set SW1-3 to select the Programming Voltage Range:
DOWN
= 0-5V,
UP
= 0-10V.
5. Set SW1-4 to select the Monitoring Voltage Range:
DOWN
= 0-5V,
UP
= 0-10V.
6. Ensure that SW1-7 and SW1-8 are in the
DOWN
position.
7. Connect pin 7 (
IMON_ISO
) of the
Master
unit Isolated Analog connector to pin 3 (
IPROG_ISO
) of
the
Slave
unit Isolated Analog connector.
8. Connect pin 4 (GND) of the
Master
unit Isolated Analog connector to pin 4 (GND) of the
Slave
unit
Isolated Analog connector.
Daisy-Chain Connection:
NOTE
: All power supplies should be connected
in a daisy-chain configuration
9. Connect J1-2, -3 of the
Master
unit to J1-2, -
3 of the
Slave
unit.
10. Connect J1-15 of the
Master
unit to J1-16 of
the
Slave
unit.
11. Connect J1-16 of the
Master
unit to J1-15 of
the
Slave
unit.
12. Set the
Master
unit programming sources to
the desired programming levels.
13. Turn
ON
the
Master
and
Slave
power
supplies by pressing their respective AC Input power switch to the
ON
position and then pressing
the
Master
unit front panel display
OUT
button.
14. Check and readjust the
Master
unit programming sources to the desired programming levels.

