14
SETUP (CONTINUED)
C. TO USE WITH A UNIT WITH PHONO PREAMPLIFIER INPUTS (RECEIVER, PRE-AMP, ETC.):
(See page 10 for the Warning regarding the PRE-AMP switch.)
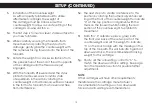
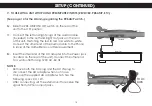
6c. Slide the PRE-AMP ON/OFF switch on the rear of the
unit to the OFF position.
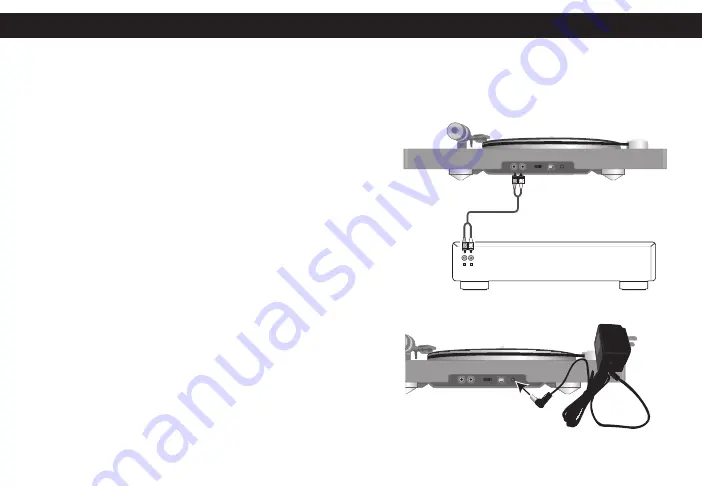
7c. Connect the left and right plugs of the Audio Cable
(included) to the Left and Right Out jacks on the rear
of this unit, matching the red to red and white to white.
Connect the other end of the Audio Cable to the Phono
In jacks of the Home Stereo or similar equipment.
8c. Insert the small end of the AC adapter into the Power jack
(located on the rear of the unit). Connect the other end
to a wall outlet having 120V AC, 60 Hz.
NOTES:
• Remove both the DC plug and the AC IN plug to
disconnect the AC adapter when not in use.
• Only use the supplied AC adapter which has the
following specs: DC 12V.
• After connecting, set the external unit to receive the
signal from its Phono Input jacks.
OUTPUT
R
L
R L
R L
Amplifier
Turntable
TO AC
JACK


