background image

8

V

ersa

s

afe

TM

 I

nsTallaTIon

CONCRETE STRENGTH

The floor at the installation location should 

consist  of  commercial-grade  concrete 

measuring at least 

2000 psi

 in compres-

sion  strength. 

The full effectiveness of 

the  mounting  anchors  depends  upon 

meeting this specification!

  Check  with 

the  contractor/builder  or  owner  of  the 

installation to verify that this requirement 

can be satisfied.


SELECTING  THE

INSTALLATION  LOCATION

Choosing  the  right  location  for  your 

unit is very important. Security con-

cerns suggest a location that is away 

from any door or external access point. 

Ideally, the terminal should be mounted 

as  close  to  a  back  wall  as  possible. 

Wherever  you  decide  to  locate  the 

terminal, be sure to follow the recom-

mended procedures for both mounting 

the unit.

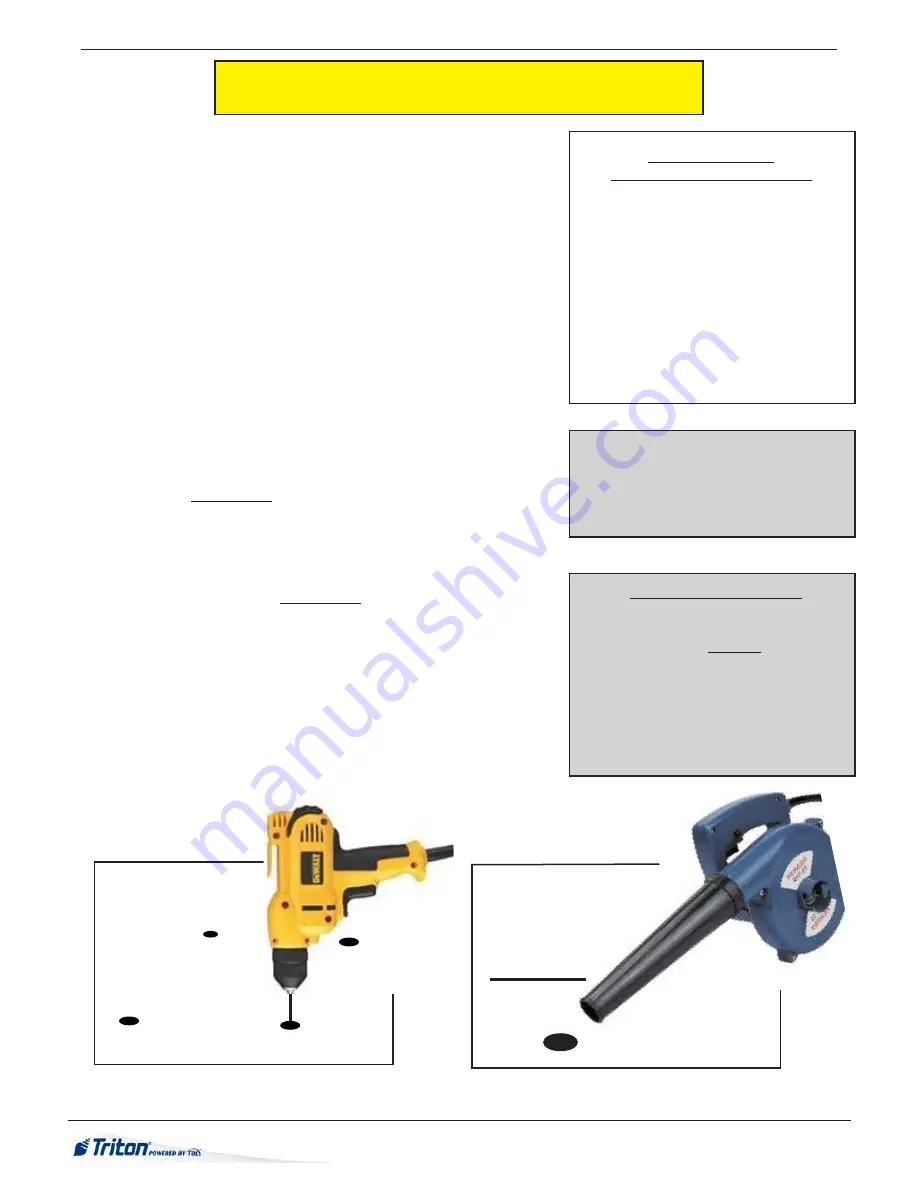
Mark the location of the cabinet mounting holes on the concrete floor. This is 

accomplished as described below, 

(see figure 1)

.

1.

  Move the unit to the location where it will be installed. Open the cabinet vault 

door at least 90° to improve access. Locate the four (4) anchor-bolt holes in 

the bottom of the cabinet (each corner). Use a felt-tip pen or other marker to 

carefully mark the center of each of the four corner holes on the floor; these 

marks will serve as guides for the anchor bolt holes that will be drilled in the 

next step. Move the unit aside to provide clear access to the mounting hole 

marks. Center punch each mark to help align the drill bit.

2.

  Use a 1/4” [6 mm] diameter carbide-tipped masonry bit to drill four pilot 

holes at the drilling points marked in the previous step. Drill the pilot holes 

approximately 1/2” [12 mm] deep into the floor. These holes will help guide 

the masonry bit that will be used to drill the anchor-bolt holes in the next step.

3.


Standard anchors:

  Use a 

1/2” [13mm]

 diameter carbide-tipped masonry bit 

to drill four holes at least 

2-3/4” [70mm]

 deep into the floor. Be sure to take 

into account the depth of any floor covering, such as tile or vinyl when gauging 

the depth of the anchor holes.  

Make sure the holes are drilled at least 2- 3/4” 

[70mm] into the concrete floor.

3a.


Chemical anchors:

  Use a 

9/16” [15mm]

 diameter carbide-tipped masonry 

bit to drill four holes at least 

4-1/2” [115mm] 

 deep into the floor. Be sure to 

take into account the depth of any floor covering, such as tile or vinyl when 

gauging the depth of the anchor holes. 

Make sure the holes are drilled at least 

4- 1/2-inches [115mm] into the concrete floor.

TOOL  USE/SAFETY

Observe ALL safety precautions for operat-

ing hand and power tools! Wear eye and ear 

protection while operating the electric drill!

m

ark

/d

rill

 m

ountinG

 H

oles

4.


Hole Diameter: 

Ensure the holes drilled are not too large in diameter. Test fit 

the anchor bolts by hand. They should require hammering, accomplished in 

a later step, and not fall into the hole. Its easier to drill the holes larger now if 

necessary, than have to move the cabinet and redrill later because they are too 

big. 

DO NOT

 be tempted to install the anchors now. It is 

VERY

 difficult to 

position the terminal onto the anchors because of the weight.

5.

  Use a portable vacuum cleaner or blower to remove dust or debris that may 

have fallen into the holes during the drilling process.

Blow or vacuum out dust/debris.

Figure 2

Drill 9/16” anc

hor hole

s with carbide-tipped bit.

Figure 1

Summary of Contents for Triton VersaSafe

Page 1: ...on and Installation TDN 07103 00335 May 17 2012 Corporate Headquarters 21405 B Street Long Beach MS 39560 PHONE 800 259 6672 FAX 228 868 9445 2012 Triton All Rights Reserved TRITON logo is a registere...

Page 2: ...Describes anchoring the cabinet using standard steel or the optional chemical anchors Anchors provided separately Power and Communication Shows cable access area power requirements and powering up th...

Page 3: ...mizes the possibility of liquid or food spills 2 Site wiring power communication Ensure access will not be hindered by cabinet placement 3 Location of other equipment that may cause electrical electro...

Page 4: ...ted ground Dedicated source TheVersaSafe AC power feed will be a dedicated line to which no other electrical devices are connected The VersaSafe power line will be wired for a single duplex style outl...

Page 5: ...ess Unit shown with Bill Acceptor bracket extended En sure there is adequate room for the door to swing open DO NOT be tempted to place the cabi net on a table or other support Severe injury and equip...

Page 6: ...6 VersaSafeTM Installation Dimensions Deep Cabinet Physical Dimensions...

Page 7: ...nstalled 10 Remove the 4 four bolts and or nuts retaining the unit to the pallet UNLOCKING COMBINATION LOCKS Electronic Lock The combination of the lock is preset to 1 2 3 4 5 6 To unlock enter the pr...

Page 8: ...he previous step Drill the pilot holes approximately 1 2 12 mm deep into the floor These holes will help guide the masonry bit that will be used to drill the anchor bolt holes in the next step 3 Stand...

Page 9: ...to mounting holes Tap anchor mounts into mounting holes 4 Place a bolt into mount then place flat washer on the anchor bolt followed by a 1 2 13mm nut on top to secure Do not tighten fully allow for l...

Page 10: ...the cabinet not to be level 2 Begin by inserting a Chem Stud capsule into one of the mounting holes Either end of the capsule may be inserted first 3 Place a washer and a nut in that order onto a chis...

Page 11: ...dhesive to cure for the specified time see chart and important note which follows prior to applying any load to the anchors During the winter the hole temperature may be different than the room temper...

Page 12: ...ords are not recommended 2 AC power for the terminal should come from a dedicated source with an isolated ground The unit is designed to work on an IT Isolated Terra type power system having a phase t...

Page 13: ...board and serve as its power supply Use TY wraps to bundle cables if necessary The TDL Gateway modem will mount atop the units power supply A USB cable will provide power to the unit from the system s...

Page 14: ...height Ensure the four 4 mounting points between the VersaSafeTM and the Plinth are secure Do not be tempt ed to use less than the four 4 pieces of hardware supplied If more than one Plinth is used en...

Page 15: ...Appendix A Software License Agreement Compliance Emission Statements A 1...

Page 16: ...ense to use the ATM Software but only in connection with the operation of this ATM subject to the terms and restrictions set forth in this License Agreement You are not permitted to use the ATM Softwa...

Page 17: ...R REPRESENTATIVE HAS BEEN ADVISED OF THE POSSIBILITY OF SUCH DAM AGES OR FOR ANY CLAIM BY ANY THIRD PARTY YOUR SOLE REMEDYAGAINSTTRITON FOR DEFECTIVE PERFORMANCE OFTHEATM SOFTWARE WILL BE LIMITED EXCL...

Page 18: ...otection against harmful interference when the equipment is operated in a commercial environment This equipment generates uses and can radiate radio frequency energy and if not installed and used in a...

Page 19: ...Appendix B Warranty Service Statement B 1...

Page 20: ...AR PURCHASE LIMITATION OF LIABILITY IN NO EVENT SHALL MANUFACTURER BE LIABLE FOR LOSS OF PROFITS OR INCIDENTAL INDIRECT SPECIAL CONSEQUENTIAL OR OTHER SIMILAR DAMAGES ARISING OUT OF ANY BREACH OF THIS...

Page 21: ...ibutor s use of the goods or any of their parts by reason of infringement of a patent or other intellectual property right or if in Manufacturer s opinion the goods are likely to become the subject of...

Page 22: ...code on a unit or any component thereof or any attempt to repair a unit or to repair or replace any component by anyone other than a service technician authorized by Triton shall void this warranty W...

Page 23: ...ment is shipped Free On Board FOB Triton s facilities The organization or individual who has purchased the equipment assumes responsibility for the equipment once it leaves Triton s facilities Should...

Page 24: ...d Therefore we will not ship primary structural parts such as a cabinet head or main cabinet body for repair in the field Triton s Technical Services Department The primary purpose of the Technical Se...

Page 25: ...fication as a service technician or the serial number of a Triton terminal Technical support is provided during normal business hours for the life of the product When calling for help with an operatio...

Page 26: ...B 8 Appendix B This Page Intentionally Left Blank...

Reviews: