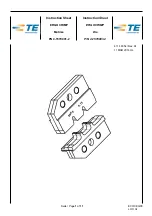
Matrize
PN 4-1579001-2
411-18354 / Rev. A1
Die Set
PN 4-1579001-2
411-18354 / Rev. A1
Seite /
Page
8 of 11
6 Crimp height adjustment
The tool frame assembly features a ratchet
mechanism and adjustment wheel with a range of
settings. The ratchet mechanism ensures that the
tool has completed the cycle. The adjustment wheel
controls the operating distance of the tool jaws
(before the ratchet opens) thereby controlling the
required crimp force. Although the ratchet is preset
prior to shipment, it is important that you verify the
crimp height. Also, general use and subsequent wear
may cause the tool to go out of adjustment. It is
recommended that the crimp height be inspected -
and adjusted, if necessary - on a regular basis by
quality control personnel.
1. Crimp a contact onto a properly- prepared wire of
the correct size.
2. If the crimp height is greater than recommended,
open the plier and remove the screwed stop pin
with a screwdriver. Rotate the adjustment wheel
COUNTERCLOCKWISE (+). If a looser crimp is
required, rotate the adjustment wheel CLOCK-
WISE (-) (Figure 5).
3. Replace the screwed stop pin (Figure 5).
4. Make a sample crimp and measure the crimp
height. If the dimension is acceptable, replace
and secure the screwed stop pin. If the dimension
is unacceptable, continue to adjust the ratchet,
and again measure a sample crimp.
6 Einstellung der Crimphöhe
Die Crimp-Handzange besitzt einen Ratschen-
mechanismus mit einem Einstellrad, das einen be-
stimmten Einstellbereich aufweist. Durch den
Ratschenmechanismus wird sichergestellt, daß der
Crimpzyklus vollständig beendet wird. Über das Ein-
stellrad wird der Betätigungsweg (vor Öffnen der
Ratsche) und damit die erforderliche Crimpkraft ein-
gestellt. Auch trotz Voreinstellung ab Werk ist es
sehr wichtig, die Crimphöhe zu überprüfen. Üblicher
Gebrauch und Abnutzung sind ebenfalls Ursache für
eine Fehleinstellung der Crimphöhe. Es wird empfoh-
len, daß die Crimphöhe regelmäßig durch Qualitäts-
Kontroll-Personal überprüft und ggf. eingestellt wird.
1. Crimpen Sie einen Kontakt an eine ordnungsge-
mäß vorbereitete (abisolierte) Leitung korrekter
Größe (Querschnitt).
2. Ist die Crimphöhe größer als empfohlen, öffnen Sie
die Zange und entfernen mit einem Schraubendre-
her die Schaftschraube. Drehen Sie das Ein-
stellrad GEGEN den Uhrzeigersinn (+).
Ist eine größere Crimphöhe erforderlich, so drehen
Sie das Einstellrad IM Uhrzeigersinn, um einen
'niederen' Wert einzustellen (-)
3. Sichern Sie das Einstellrad mit der Schaftschrau-
be (Bild 5).
4. Crimpen Sie einen Kontakt und messen Sie die
Crimphöhe. Ist die Crimphöhe nicht akzeptabel,
so wiederholen Sie die Einstellung.
Bild / Figure 5
Schaftschraube
screwed stop pin
Einstellrad
adjustment wheel
Sicherungsscheibe
retaining plate


