HT40 Basic Hand Tool
Page 5 - 7
Operating instructions
411-18589-1 Rev.A
4
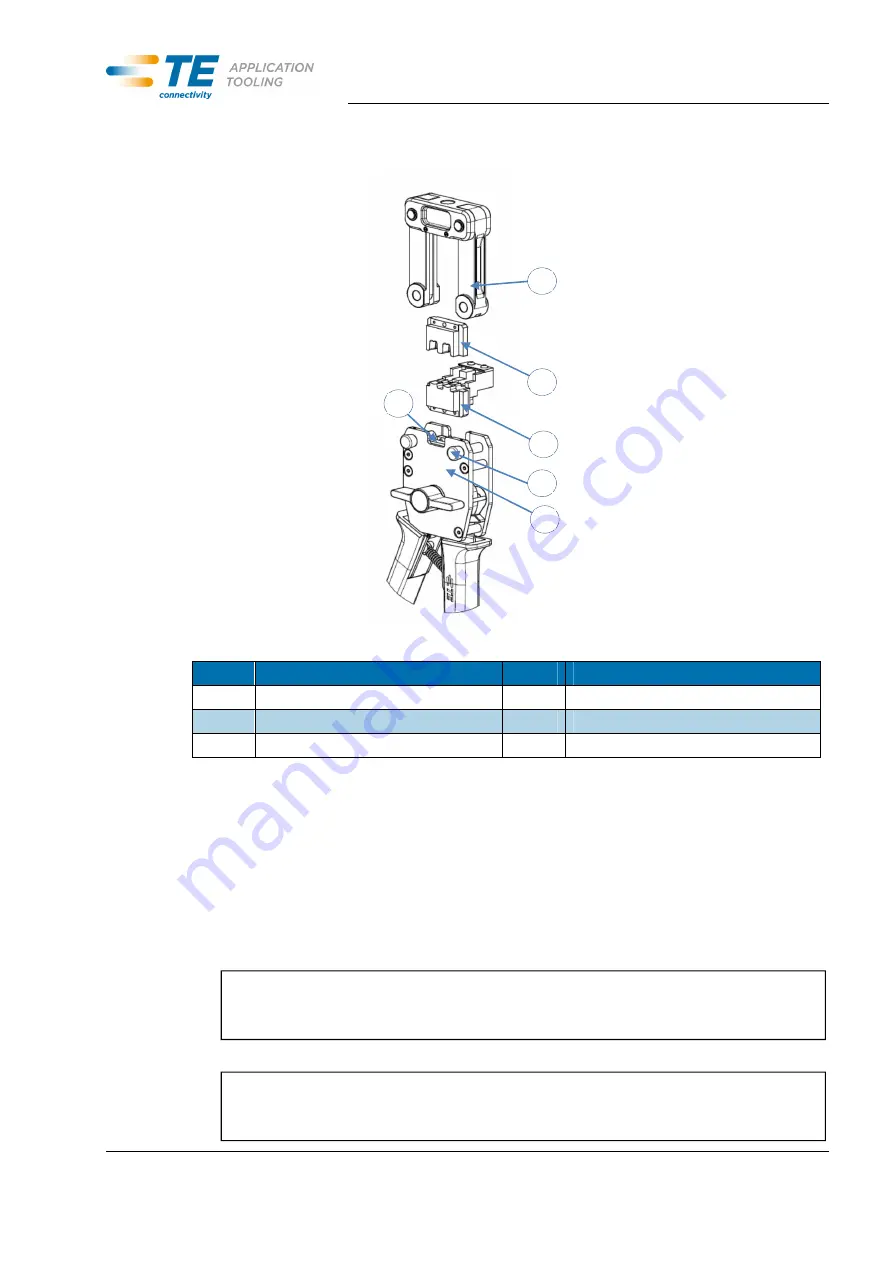
Changing the dies
Abb. 2 :
Exploded diagram
No.
Description
No.
Description
1
Hand tool basic body
2
Crimping head/Upper die holder
3
Lower die
4
Upper die
5
Locking pin
6
Lower, movable die holder
Tab. 3 :
Hand tool components
4.1
Installing dies
Select the crimping die that you require.
Open the tool grip and check that the movable die holder is completely retracted.
Pull both locking pins out until the stop.
Remove the crimping head.
Position the lower die in the lower die holder until it has engaged.
Position the upper die in the crimping head until it has engaged.
4
3
1
2
5
6
NOTE
Ensure that the die label points in the direction of the fast feed lever.
NOTE
Ensure that the die label points in the direction of the fast feed lever.


