408-1697
Rev
D
3
of 11
4. Loosen the lock screw.
5. Insert the shank of the moving die into the ram well. The retaining ring holds the die in place.
6. Activate the power unit to complete the cycle and allow the ram to return to the DOWN position.
2.2.
Crimping head 69099 and 1752868-1
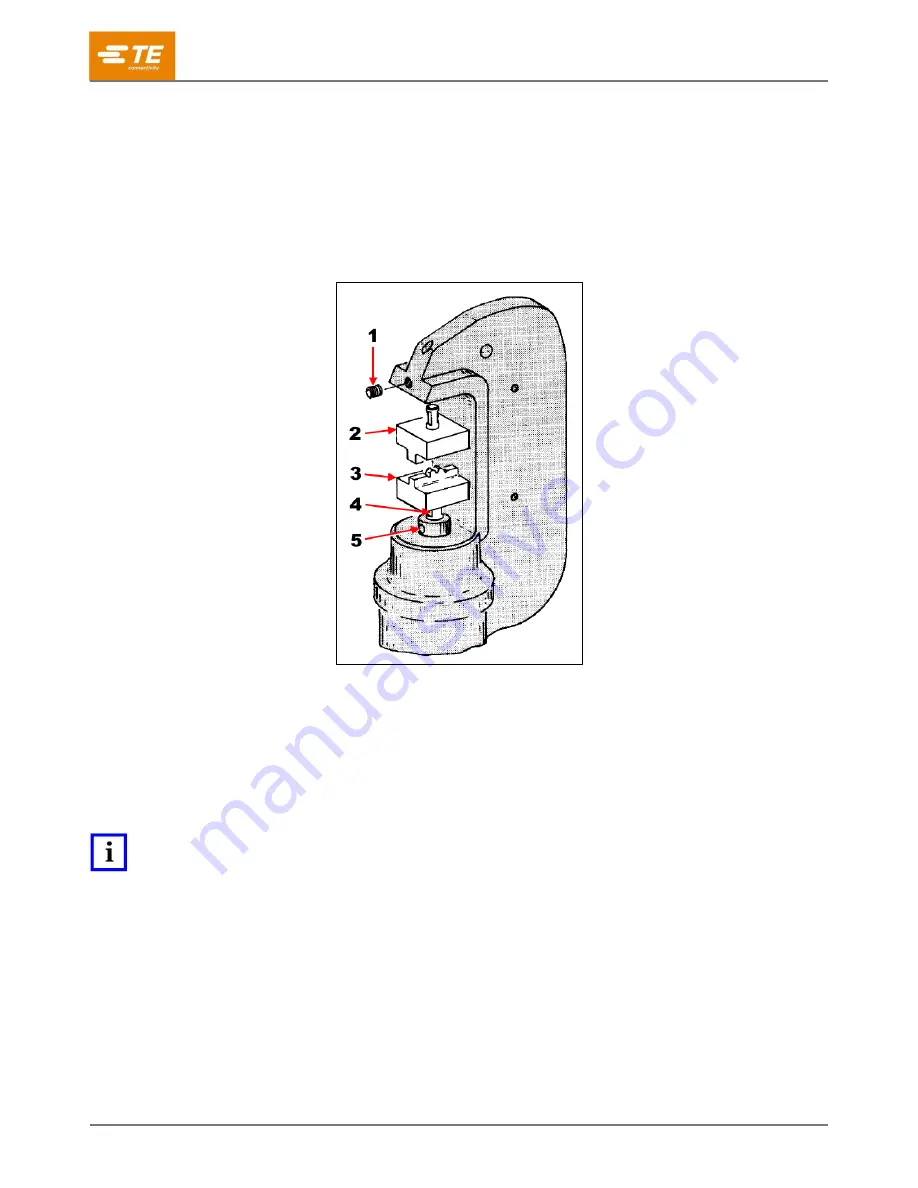
1. Loosen the lock screw in the top section of the crimping head (Figure 3).
Figure 3: Crimping head 69099 (die set 69218 shown)
1
Lock screw
2
Stationary die
3
Moving die
4
Flat on shank faces lock screw
5
Ram locking screw
2. Insert the shank of the stationary die into the top section of the crimping head.
NOTE
Ensure that the dies are inserted
fully
and that the flats on the shanks are facing the lock screws.
3. Tighten the lock screw.
4. Loosen the ram lock screw.
5. Insert the shank of the moving die into the ram well.
6. Tighten the lock screw.
3.
REMOVING THE DIES
Crimping head 69097:
Insert the screwdriver blade under the base of the stationary and moving dies. Use a
prying action to loosen and remove the dies.
Crimping heads 69099 and 1752868-1:
Loosen the lock screws in the top section of the crimping head and
ram. Remove the dies.


