25
CONNECTING TO A COMPUTER
If you want to watch, play, share, edit, … the videos and photos you made, you can do so by
connecting the Guardo 360 Cam to your computer!
• Connect the micro USB cable (12) to the Micro USB Port (10) of the Guardo 360 Cam.
• Connect the other end of the micro USB cable to the USB port of your computer.
• Turn the Guardo 360 Cam ON.
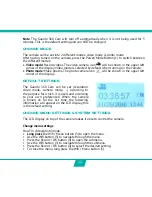
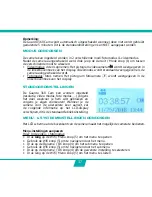
• ‘MSDC’ will now appear on the display.
• On your PC a pop-up “removable disk window” (e.g. ‘D:’,‘E:’, …) will appear or you will
find an “extra disk” (e.g. ‘D:’,‘E:’, …) under ‘My Computer’ or ‘Explorer’ in case you have a
Windows PC or in ‘Finder’ in case you have a Mac (It can take some time before the
window appears).
The following folders will be shown:
• JPG
• VIDEO
Copy/move the files to your hard disk or external disk to open, play, share or edit them!
Note: Cyclic recording and frequent recording/deleting operations may leave data frag
-
ments in the SD card, causing failure to file recording or saving. To solve this problem, just
back up the data on an external storage and format the SD card.
Format Micro SD card:
you can use your computer to format your Micro SD card inside
the camera! On a Windows computer: Right-click the removable disk and choose ‘format’.
Format Micro SD card on Mac
: Open the ‘Disk Utility’ program: you can now format your
Micro SD card by clicking it in the left-hand pane and then clicking the ‘Erase’ tab.
Summary of Contents for GUARDO 360 CAM
Page 1: ...1 USER S MANUAL GB NL D FR 360...
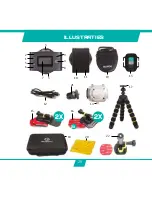
Page 3: ...3 ILLUSTRATIONS 2X 2X 2X 1 16 15 14 13 12 11 10 9 8 7 6 5 4 3 2 17 18 19 20 21 3 22...
Page 28: ...28 NL...
Page 29: ...29 ILLUSTRATIES 2X 2X 2X 1 16 15 14 13 12 11 10 9 8 7 6 5 4 3 2 17 18 19 20 21 3 22...
Page 54: ...54 FR...
Page 55: ...55 2X 2X 2X 1 16 15 14 13 12 11 10 9 8 7 6 5 4 3 2 17 18 19 20 21 3 22 ILLUSTRATIONS...
Page 80: ...80 D...
Page 81: ...81 2X 2X 2X 1 16 15 14 13 12 11 10 9 8 7 6 5 4 3 2 17 18 19 20 21 3 22 ABBILDUNGEN...

