8
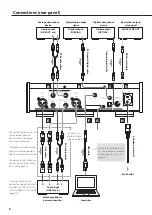
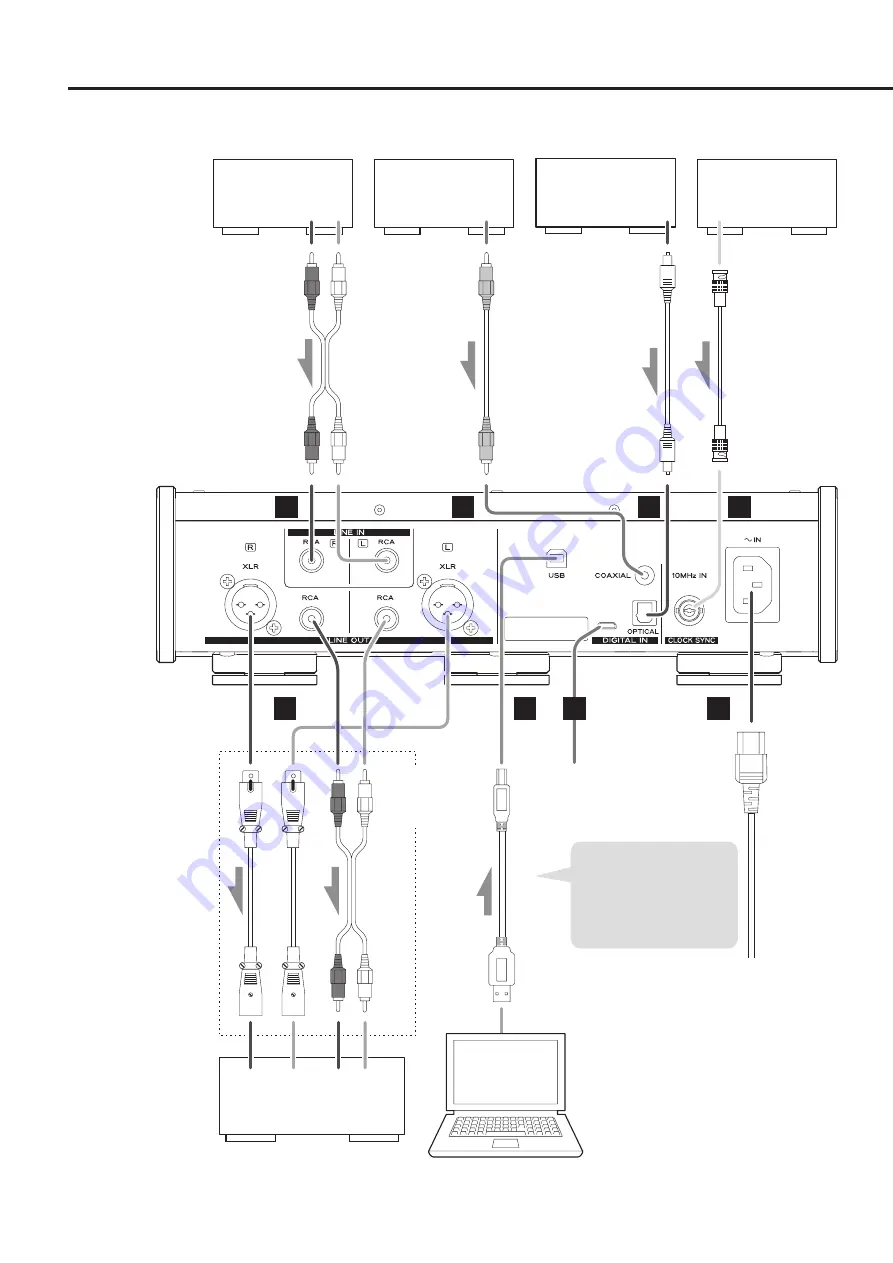
Connections (rear panel)
L
R
L
R
L
R
A
B
H
G
C
D
F
E
Analog audio output
device
Device that outputs
clock signal
Digital audio output
device
Digital audio output
device
Audio output
(LINE OUT, etc.)
CLOCK SYNC OUT
Digital output
(COAXIAL)
Digital output
(OPTICAL)
RC
A audio c
ables
O
ptic
al digital c
able
BNC c
oaxial c
able
RC
A c
oaxial digital c
able
RC
A audio c
ables
XLR c
ables
USB c
able
Included p
ow
er c
or
d
Audio input
(LINE IN, etc.)
Computer
Connect a set
of cables of one
type or the other.
Install the dedicated driver
on the computer before
connecting this unit to it
(page 27).
Connect cables for the pair set
for line output (page 25).
Sound will only be output
from the selected pair.
If headphones are connected,
sound will stop being output
from the rear panel connectors.
The polarity of the XLR connec-
tors can be set so that either 2
or 3 is HOT (page 25).
If you want to be able to
control the volume from the
amplifier, set LINE OUT LEVEL
to “FIXED 0dB” or “FIXED +6dB”
(page 25).
c
Wall outlet
Stereo amplifier or
powered speakers


