During image transfer the network status is replaced by the image file transfer status,
with the information being updated approximately once per second during a transfer
operation. The status will typically show the number of megabytes transferred so far,
and the total number of megabytes to send. At the same time, a progress bar will appear
on the main screen (not shown above), together with an approximate time remaining
based on the amount of data transferred so far, and the total amount left to transfer.
1.4.6 Ink Levels
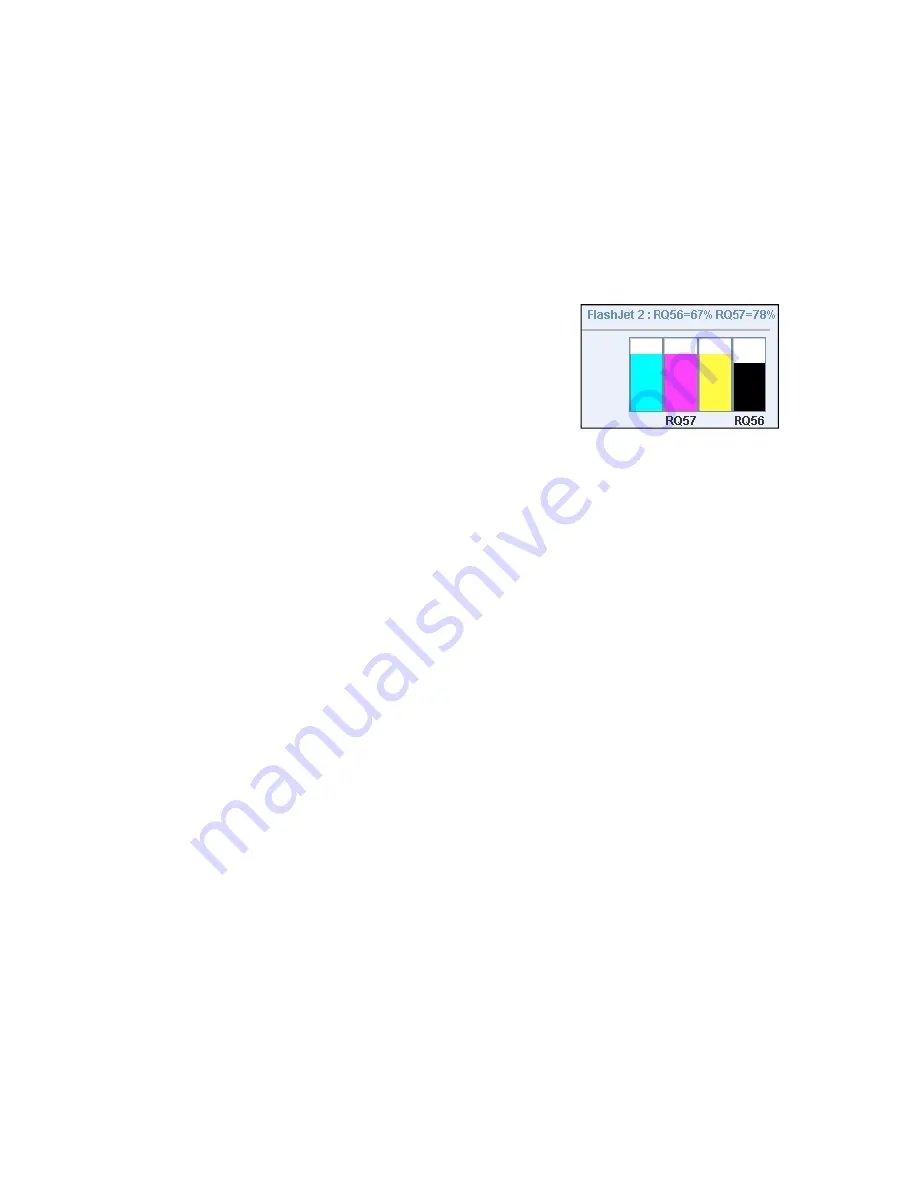
The level of ink remaining is displayed graphically to make
it easy to recognize low ink status. The level is also
displayed in text form just above the graphic display. The
AP-150 includes an embedded FlashJet2 print engine, and
the bars represent the RQ56 (Black) and RQ57 (Color)
cartridge types.
1.4.7 Left Menu Bar
The left menu bar allows access to the various functions available within TrueNet. To
select an item in the menu, move the mouse over the item and single-click that item.
Each item in the menu will change color as the mouse is moved over it to show which
menu item would be activated if selected by the single mouse click.
If you are logged in as a System Administrator an additional menu (Administration) will
appear below ‘User Settings’ (which is the settings for the current user – see ‘User
Settings’ for more information). When this menu item is selected, the System Setup
window will open. See the Administrator Guide section for more information on System
Setup.
1.4.7.1 New Job
Selecting New Job on the left menu bar will launch the Create New Job dialog box. This is
only one of four ways to activate the Create New Job dialog box. You could also double-
click the main Job Status area (do not double-click on a job because this will bring up the
Edit Job dialog!), or you can right-click in the same Job Status area. If there are jobs
already present in the Job Status area, right-clicking on any job will activate a pop-up
menu which also includes a Create New Job menu item.
1.4.7.2 Edit Job
Selecting a job in the Job Status window (single-click the job) followed by the Edit Job
item on the left menu bar will launch the Edit Job dialog box. This is one of three ways to
launch the Edit Job function. The other ways are to double-click the job in the Job Status
window or to right-click the job and choose ‘Edit Job’ from the pop-up menu that
appears. Editing a job allows real time changes to be made to a job that has already been
submitted, including changes to disc quantities, job priorities, and adding or removing
Compare/Audit functions. Additional functions include stopping a running job, restarting
a stopped job or starting a master disc reading. For more information on editing jobs,
see the Editing Jobs section.


