background image

5

ENGLISH

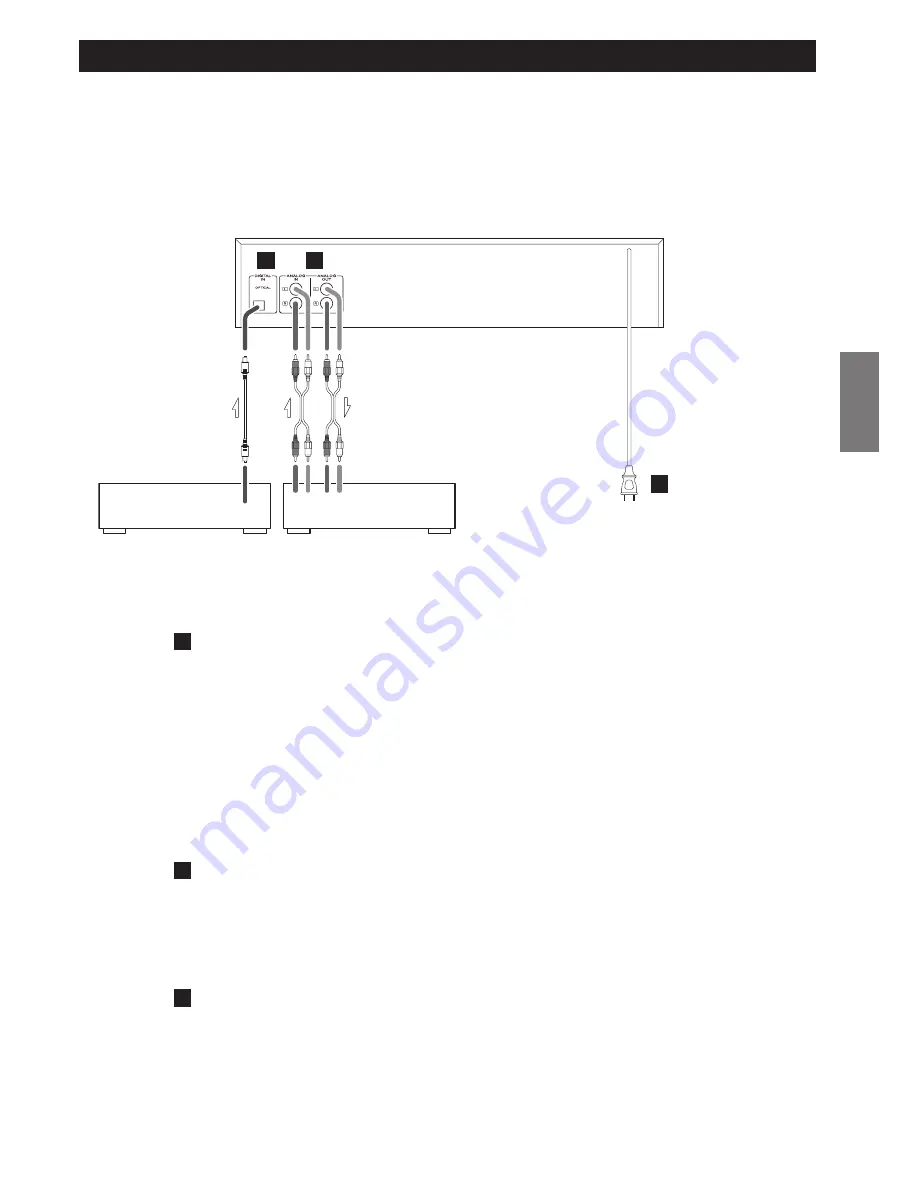
Connections

CAUTION:

<

Switch off the power to all equipment before making connections.

<

Read the instructions of each component you intend to use with this unit.

<

Be sure to insert each plug securely. To prevent hum and noise, avoid bundling the signal
interconnection cables together with the AC power cord.

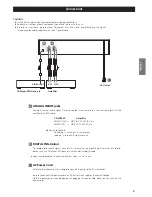
ANALOG IN/OUT jacks

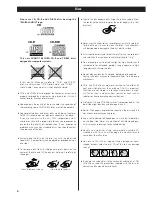
Analog 2-channel audio signal is input or output from these jacks. Connect these jacks to the
amplifier with RCA cables.

CD-WR880

Amplifier

ANALOG OUT

q

MD PLAY, TAPE PLAY, etc.

ANALOG IN

q

MD REC, TAPE REC, etc.

Make sure to connect:

white plug 

q

white jack (L: left channel)

red plug 

q

red jack (R: right channel)

DIGITAL IN terminal

To record digital audio signals, connect this terminal to the digital output terminal of a digital
device such as a CD player, MD deck, etc. with an optical digital cable.

<

Keep the supplied cap to cover the terminal when it is not in use.

AC Power Cord

After all other connections are complete, connect the plug to the AC wall socket.

Be sure to connect the power cord to an AC outlet which supplies the correct voltage.
Hold the power plug when plugging or unplugging the power cord. Never pull or yank on the
power cord.

C

B

A

REC PLAY

DIGITAL OUT

R L

R L

CD Player, MD Deck, etc.

Amplifier

AC Outlet

A

B

C

Summary of Contents for CD-RW880

Page 1: ...9A10350000 CD Recorder OWNER S MANUAL MANUEL DU PROPRI TAIRE Z CD RW880 ENGLISH FRAN AIS...

Page 2: ...ods of time 14 Refer all servicing to qualified service personnel Servicing is required when the apparatus has been damaged in any way such as power supply cord or plug is damaged liquid has been spil...

Page 3: ...to comply with the limits for a Class B digital device pursuant to Part 15 of the FCC Rules These limits are designed to provide reasonable protection against harmful interference in a residential ins...

Page 4: ...e as printed on the rear panel If you are in any doubt regarding this matter consult an electrician Choose the installation location of your unit carefully Avoid placing it in direct sunlight or close...

Page 5: ...APE REC etc Make sure to connect white plug q white jack L left channel red plug q red jack R right channel DIGITAL IN terminal To record digital audio signals connect this terminal to the digital out...

Page 6: ...tion on the label side Never use a ball point or hard tipped pen as this may cause damage to the recorded side Never use a stabilizer Using commercially available CD stabilizers with this unit will da...

Page 7: ...rtment cover Insert two AA R6 SUM 3 dry batteries Make sure that the batteries are inserted with their positive and negative _ poles positioned correctly Close the cover Battery Replacement If the dis...

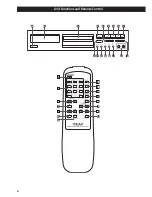
Page 8: ...8 Unit Functions and Remote Control A B C D F G H I K J L M N O P Q E E F G H I F J H G I D C A B J...

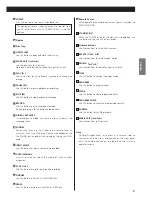
Page 9: ...l synchronized recording FINALIZE Use this button to finalize a CD R CD RW disc ERASE Use this button to erase or unfinalize a CD RW disc P O N M L K J I H G F E D C B The equipment draws a nominal am...

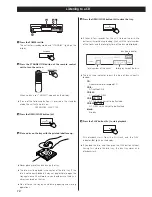
Page 10: ...he disc tray the disc tray closes and playback starts When no disc is set NO DISC appears on the display If one of the following buttons is pressed in the standby mode the unit will also turn on OPEN...

Page 11: ...ck from the selected track When the button is pressed during playback the track being played will be played from the beginning To return to the beginning of the previous track press the button twice T...

Page 12: ...OWER Shuffle playback works with finalized discs only elapsed time of current track time remaining for current track total elapsed time of the disc time remaining for the disc total play time of the d...

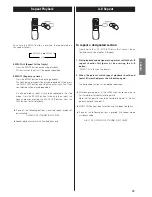
Page 13: ...ll be cancelled OPEN CLOSE STANDBY ON POWER Repeat playback works with finalized discs only Repeat Playback REPEAT ALL REPEAT 1 off To repeat a designated section Please note that CD R CD RW discs tha...

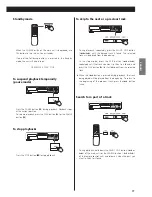
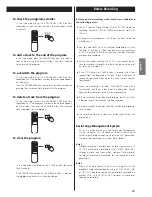
Page 14: ...nly Press the PROGRAM button in the stop mode 1 PROGRAM indicator blinks and 0P00 appears on the display Press the numeric button to select a track 2 track number program number You can also use the M...

Page 15: ...length and there can be a maximum of 99 tracks on an audio CD If the STOP button or PAUSE button is pressed within four seconds from the beginning of a track the unit continues to record no signal an...

Page 16: ...the digital source FS 44_1K FS 48K or FS 32K briefly appears after WAITING DIN UNLOCK appears when the unit cannot perceive the digital signal In that case connect a digital device to the DIGITAL IN t...

Page 17: ...rate converter so that it can record digital signals sampled at 48 kHz or 32 kHz by converting the sampling frequency into 44 1 kHz Press the PLAY or the PAUSE button to start recording Play the sour...

Page 18: ...d You can add track numbers by pressing the RECORD button during recording The increment level is also used to trigger analog synchronous recording see next page 30dB takes a louder signal to trigger...

Page 19: ...etting SYNC ALL Select this to record all the tracks SYNC 1 Select this to record only one track SYNC OFF Select this when you don t use this function The SYNC indicator lights when SYNC ALL or SYNC 1...

Page 20: ...ction deals with the actions taken after recording Once finalized CD R discs are truly final No more tracks can be recorded on them By contrast CD RW discs can be unfinalized and if there is space fur...

Page 21: ...ears when a finalized disc is loaded ERASE and the last track number appear when the disc hasn t been finalized Each time the ERASE button is pressed the display changes as follows ERASE and the numbe...

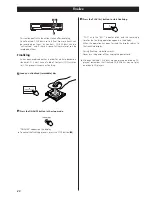
Page 22: ...sible to play back CD R CD RW discs Try again with another disc Sound skips e Place the unit on a stable surface to avoid vibration and shock e If the disc is dirty clean the surface of the disc e Don...

Page 23: ...s Messages BLANK 0 00 A blank CD R CD RW disc is set on the tray CLOSE Close the disc tray ERASE Erase the last track of the CD RW disc ERASE DISC Erase all the tracks of the CD RW disc FINALIZE Final...

Page 24: ...ce suffisant autour de l appareil pour la ventilation La tension d alimentation doit correspondre la tension imprim e sur le panneau arri re si vous avez des doutes concernant l alimentation de l appa...

Page 25: ...rdon d alimentation AC Bien brancher le cordon d alimentation sur une prise de courant qui fournit la tension correcte Tenir la fiche d alimentation en branchant ou d branchant le cordon d alimentatio...

Page 26: ...s dans leur tui apr s utilisation afin d viter de les rayer ou que de la poussi re ne se d pose ceci pouvant compromettre la lecture par la t te laser Ne pas exposer les disques la lumi re directe du...

Page 27: ...samment de place pour enregistrer un autre morceau Retirer le couvercle du compartiment des piles Introduire deux piles AA R6 SUM 3 S assurer que les piles sont correctement mises en respectant les po...

Page 28: ...28 Nomenclatures des controles A B C D F G H I K J L M N O P Q E E F G H I F J H G I D C A B J...

Page 29: ...L K J I H G F E D C B L appareil tire de la prise secteur une puissance faible mais non nulle lorsque l interrupteur POWER est sur la position OFF A SYNC 1 ALL Utiliser cette touche pour un enregistr...

Page 30: ...re total de pistes ainsi que la dur e totale de lecture du disque sont affich s 1 3 5 4 6 Type de disque dur e totale de lecture du disque nombre total de pistes Type de disque indique le type de disq...

Page 31: ...marrer la lecture du morceau d sir Quand la touche est press en lecture le morceau en cours reprendra partir du d but Pour retourner au d but du morceau pr c dant pressez la touche deux fois Pour sus...

Page 32: ...POWER La lecture al atoire fonctionne seulement avec les disques finalis s Temps coul de la plage en cours Temps restant de la plage en cours Temps coul total disque Temps restant total disque Dur e...

Page 33: ...inalis s Lecture r p t e R p tition d une section d sign e Veuillez noter que les disques CD R CD RW qui ne sont pas finalis s ne peuvent pas tre utilis s pour la r p tition A B 1 D marrez la lecture...

Page 34: ...morceau qui ont t m moris s On peut programmer la lecture d un maximum de 32 morceaux dans l ordre souhait Mettre un disque compact en place avant de commencer la programmation Pendant la lecture pro...

Page 35: ...es num riques audio CD R ou CD RW pour l enregistrement Des disques d ordinateur CD R ou CD RW ne fonctionnent pas avec cet appareil Une fois que vous avez enregistr s sur un disque CD R il n est pas...

Page 36: ...ignal num rique Dans ce cas branchez un appareil num rique la prise DIGITAL IN allumez le et attendez quelques secondes jusqu ce que l unit passe en mode pause d enregistrement Vous ne pouvez pas enre...

Page 37: ...vertisseur de fr quence d chantillonnage lui permettant d enregistrer des signaux num riques chantillonn s 48 kHz ou 32 kHz par conversion de la fr quence d chantillonnage en 44 1 kHz Appuyer sur la t...

Page 38: ...ton RECORD durant l enregistrement Le niveau d incr mentation sert galement d clencher l enregistrement synchronis d une source analogique voir page suivante 30 dB n cessite un signal plus fort pour d...

Page 39: ...e SYNC ALL S lectionnez ce r glage pour enregistrer tous les morceaux SYNC 1 S lectionnez ce r glage pour n enregistrer qu un morceau SYNC OFF S lectionnez ce r glage pour ne pas utiliser cette foncti...

Page 40: ...Cette section concerne ce qui suit l enregistrement Une fois finalis les disques CD R sont v ritablement finalis s Il n est plus possible d ajouter d autre pistes Par contre les disques CD RW peuvent...

Page 41: ...inalis est mis en place ERASE et le num ro du dernier morceau apparaissent quand le disque n a pas t finalis A chaque pression sur la touche ERASE l affichage change comme suit ERASE et le num ro du d...

Page 42: ...un t l viseur ou appareil semblable loignez l appareil ou les teindre La t l commande ne fonctionne pas e Appuyez la touche POWER pour allumer l appareil e Si les piles sont mortes les changer e Util...

Page 43: ...e ne fonctionnent pas avec les disques non finalis s sans table des mati res PGM FULL 32 pistes ont t programm es Il n est plus possible d ajouter des pistes TRAY ERROR Une erreur s est produite Appu...

Page 44: ...e Street Mississauga Ontario L4Z 1Z8 Canada Phone 905 890 8008 TEAC MEXICO S A De C V Campesinos N 184 Colonia Granjas Esmeralda Delegacion Iztapalapa CP 09810 M xico DF Phone 525 581 5500 TEAC UK LIM...

Reviews: