7
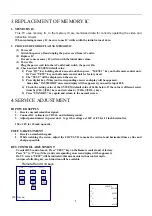
3.REPLACEMENT OF MEMORY IC
1.
MEMORY IC.
This TV uses memory IC. In the memory IC are memorized data for correctly operating the video and
deflection circuits.
When replacing memory IC, be sure to use IC written with the initial value of data.
2.
PROCEDURE FOR REPLACING MEMORY IC
(1)
Power off
Switch the power off and unplug the power cord from AC outlet.
(2)
Replace IC
Be sure to use memory IC written with the initial data values.
(3)
Power On
Plug the power cord into the AC outlet and switch the power On.
(4)
Check and set SYSTEM default value:
1)
Press “QV” key holding about 4 second and then press “MENU1” key on the Remote control unit.
Or Press “TEST” key on the Remote control unit for factory used.
2)
The “TEST” will be displayed on the screen.
3)
Press digital key, (Mkey) and corresponding on-screen display will be appeared.
Some time “PASSWORD” on-screen display will be appeared, you need to input 828.
4)
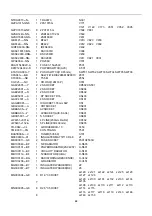
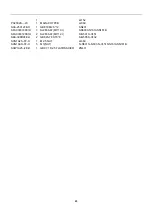
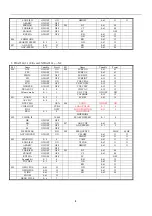
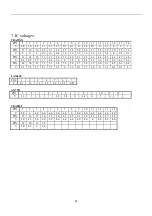
Check the setting value of the SYSTEM default value of Table below. If the value is different, select
items by [CH+]/[CH-] keys and set value by [VOL+]/[VOL-] keys.
5)
Press “STANDBY” key again and return to the normal screen.
4.SERVICE ADJUSTMENT
B1 POWER SUPPLY
1.
Receive normal colour bar signal.
2.
Connect DC voltmeter to VD541- and isolated ground.
3.
Adjust potentiometer in power unit to get the voltage as 110V ±1.0V for 21 inch hereinafter,
130 ±1.0V for 25 inch upwards.
FOCUS ADJUSTMENT
1.
Receive a crosshatch signal.
2.
While watching the screen, adjust the FOCUS VR to make the vertical and horizontal lines as fine and
sharp as possible.
BUS CONTROL ADJUSTMENT
To enter BUS control mode, Press “TEST” key on the Remote control unit of factory.
Press “0” to “9“ key, (Mkey) and corresponding on-screen display will be appeared.
On TV screen “TEST” will be indicated, this means entered bus control mode.
And press following key, each function will be available.
Remote Hand Unit keys
[M1] [M2] [M3]
[M0]
[M8] menu
MENU8
V
SLOPE
31
V
SHIFT
31
V
AMP
31
V
SCOR
31
b
c
d
e
i
j
k
f
g
h
Summary of Contents for CTM6845
Page 3: ...SECTION 1 ...
Page 8: ... 6 ...
Page 32: ... 6 ...
Page 50: ......
Page 51: ......
Page 52: ...SECTION 2 ...
Page 90: ......
Page 91: ......
Page 92: ......


