background image

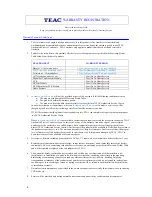
9. This warranty does not apply to equipment showing abuse, damage or that it may have been tampered with, altered 

or repaired outside any TEAC Authorised Service Centre.  If so, the warranty will be void. 

*Your nearest Authorised TEAC Service Centre is listed in your Owner’s Manual, please refer to TEAC 

website for up to date list.

10. No one is authorised to assume any liability on behalf of TEAC or impose any obligation on it, in connection with 

the sale of any equipment other than as stated in this warranty and outlined above. 

11. In no event will TEAC be responsible or liable for indirect or consequential damages from interrupted operations or 

other causes. 

12. Warranty is not transferable to any subsequent purchaser if the product is sold during the warranty period. 

13. LCD dead pixel policy, please contact TEAC Customer Care Centre on 1800 656 700 for assistance.   

* Extended promotional warranty may apply to certain products (for more info please contact: 

service@teac.com.au

)


   In home service administration fee is applied after 1

st

 year of warranty.

3

Summary of Contents for DAB800

Page 1: ...DAB800 DAB RDS FM Clock Radio...

Page 2: ...to a TEAC Authorised Service Centre Where In Home service Pick up is not available the purchaser is required to send the product to the nearest TEAC Authorised Service Centre for repair In this event...

Page 3: ...n connection with the sale of any equipment other than as stated in this warranty and outlined above 11 In no event will TEAC be responsible or liable for indirect or consequential damages from interr...

Page 4: ...Service Centre 3 Please have your purchase receipt as your proof of purchase and the following details completed for a valid Warranty Owner s Name Owner s Address Postcode Model Name No Serial No Deal...

Page 5: ...e climates Operate turning controls and switches as instructed in the manual Before turning on the power for the first time make sure the power cord is properly installed For safety reasons do not rem...

Page 6: ...such as vases to be placed on the equipment DON T place hot objects or naked flame sources such as lighted candles or nightlights on or close to equipment High temperatures can melt plastic and lead t...

Page 7: ...eneral Operation ______________________________________________19 Setting Station Presets____________________________________________________20 Selecting a Preset station _____________________________...

Page 8: ...8 Package Content Main Unit Instruction Menu...

Page 9: ...to store preset station and press to load preset station Note for detail please refer page 17 P2 6 P3 7 P4 8 Shift Unique designed for store or load preset stations P5 P8 Info Press to display queue i...

Page 10: ...ng a plug automatically mutes the internal loudspeaker Line out socket a Red Black RCA Line out sockets located on the rear of your radio is provided for connecting the audio signal to an external amp...

Page 11: ...use radio will make a full scan and store the stations in its memory This will take a while please be patient Later it will say Note a the DAB stations will be displayed in alphanumeric order The firs...

Page 12: ...fer to the following instructions Finding and adding new Stations Note To obtain maximum performance it is highly recommended to place unit at a place with low interference 1 Press MENU at first 2 Tur...

Page 13: ...13 DAB Menu Options...

Page 14: ...mber and frequency list 4 Turn the Scroll knob to step between the channels and press it to select the current channel Note If there is a multiplex corresponding to this channel and frequency then the...

Page 15: ...sound level between radio stations Note Set DRC to off indicates no compression set DRC to low indicates little compression set DRC to high shows maximum compression 1 Press MENU at first 2 Turn the S...

Page 16: ...ions available Alphanumeric and Ensemble shows the corresponding option is currently applied 4 Turn the Scroll knob until your required option is displayed press it to confirm STATION ORDER DESCRIPTIO...

Page 17: ...r Note This operation will remove inactive stations from the station list 1 Press MENU at first 2 Turn the Scroll knob to Prune 3 Press the Scroll knob to confirm 4 Turn the Scroll knob to Yes press i...

Page 18: ...icator on the signal bar shows the minimum acceptable signal level Note Stations with signal strength below the minimum signal level will not provide a steady stream of audio How to change the Station...

Page 19: ...tation you were listening will be selected 3 You can manually change the FM frequency by 0 05MHz per step by turning the Scroll knob 4 To operate Auto Search function press the Scroll knob Note a The...

Page 20: ...the current station to P5 P8 1 Press Shift first 2 Press and hold one of the preset buttons until it says preset stored Selecting a Preset station To select a preset station from P1 P4 1 Press Mode to...

Page 21: ...21 FM Menu Options...

Page 22: ...ong stations only and All stations 3 Turn the Scroll knob to your required option and then press it to confirm Audio setting 1 Press MENU first and then turn the Scroll knob to Audio setting 2 Press t...

Page 23: ...5mm jack your radio is transformed into a high quality audio speaker system 3 Connect one end of the cable lead to the headphone or auxiliary out socket of your source device the other end connect to...

Page 24: ...and then turn the Scroll knob to System 2 Press the Scroll knob to confirm 3 Turn the Scroll knob to cycle through options by which you can find Sleep Alarm Time Backlight Factory Reset and SW versio...

Page 25: ...knob to change the sleep period which is between 0 90 minutes 3 When your required sleep time is display press the Scroll knob to confirm Note a The interval time is 15 minutes per step b The program...

Page 26: ...a While cursor point to Set 12 24 hour press the Scroll knob to confirm b Turn the Scroll knob to your required option and then press it to confirm B Set Date format a Similar to above step 1 turn the...

Page 27: ...e Date b Press the Scroll knob to confirm c Turn the Scroll knob to change the hour and then press it to confirm d Turn the Scroll knob to change the minutes and then press it to confirm Now you can p...

Page 28: ...can be activated from System Time Auto update b Press the Scroll knob to confirm Note There are two options available Auto update from DAB and No update c Turn the Scroll knob to Auto update from DAB...

Page 29: ...etting ensure successful set clock at first 1 It can be activated from System Alarm 2 Press the Scroll knob to confirm meanwhile the alarm icon is blinking 3 Press the Scroll knob to enter setting mod...

Page 30: ...minutes Note After alarm reached the snooze time you ve set and within this Duration the alarm will ring again 7 Press SELECT to confirm and then turn the Scroll knob to set the alarm source You can c...

Page 31: ...after the pre defined period of time elapsed C During snooze time you can activate your radio by pressing STANDBY ON l To cancel Alarm permanently Besides performing a factory reset you can also canc...

Page 32: ...then turn it to cycle through options and select your required setting Note There are three options available High Medium and low 4 Press the Scroll knob to confirm B At Standby condition 1 Continue a...

Page 33: ...actory settings 1 It can be activated from System Factory reset 2 Press the Scroll knob to confirm 3 Turn the Scroll knob to Yes 4 Press the Scroll knob to confirm then unit will clear all memory and...

Page 34: ...34 How to get SW Version 1 It can be activated from System SW version 2 Press the Scroll knob and SW version will be display on LCD screen...

Page 35: ...m x 130mm x 130mm Net Weight Note Specifications are subject to change without prior notice Weight and dimensions are approximate This symbol on the product or in the instructions means that your elec...

Page 36: ...TEAC CUSTOMER CARE CENTRE TCCC Free call 1800 656 700 Between Monday to Friday EST 9AM to 5PM...

Reviews: