background image

8

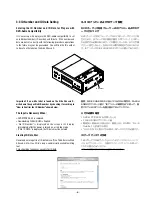
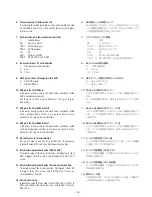
3-3 ID Number and ID Data Setting

Entering the ID Number and ID Data for Players with
DVD-Audio Compatibility

It is necessary with a player with DVD-audio compatibility to set
an individual number (ID number) and ID data.  If the number and
data are not set correctly with the following procedure, operations
in the future may not be guaranteed. You will find the ID number
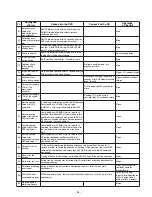
to be set on the label on the Side Chassis R.

Important: If no white label is found on the Side Chassis R,
write down the specified ID number by checking it according to
"How to Confirm the ID Number" shown below.

The Input is Necessary When:

• DVDM PCB ASSY is replaced.
• Downloading FLASH-ROM is finished.
• "No ID Number" is displayed on the screen or FL display

immediately after the power is turned on or in Stop mode.

• If "No ID DATA" is displayed, the ID data must be entered.

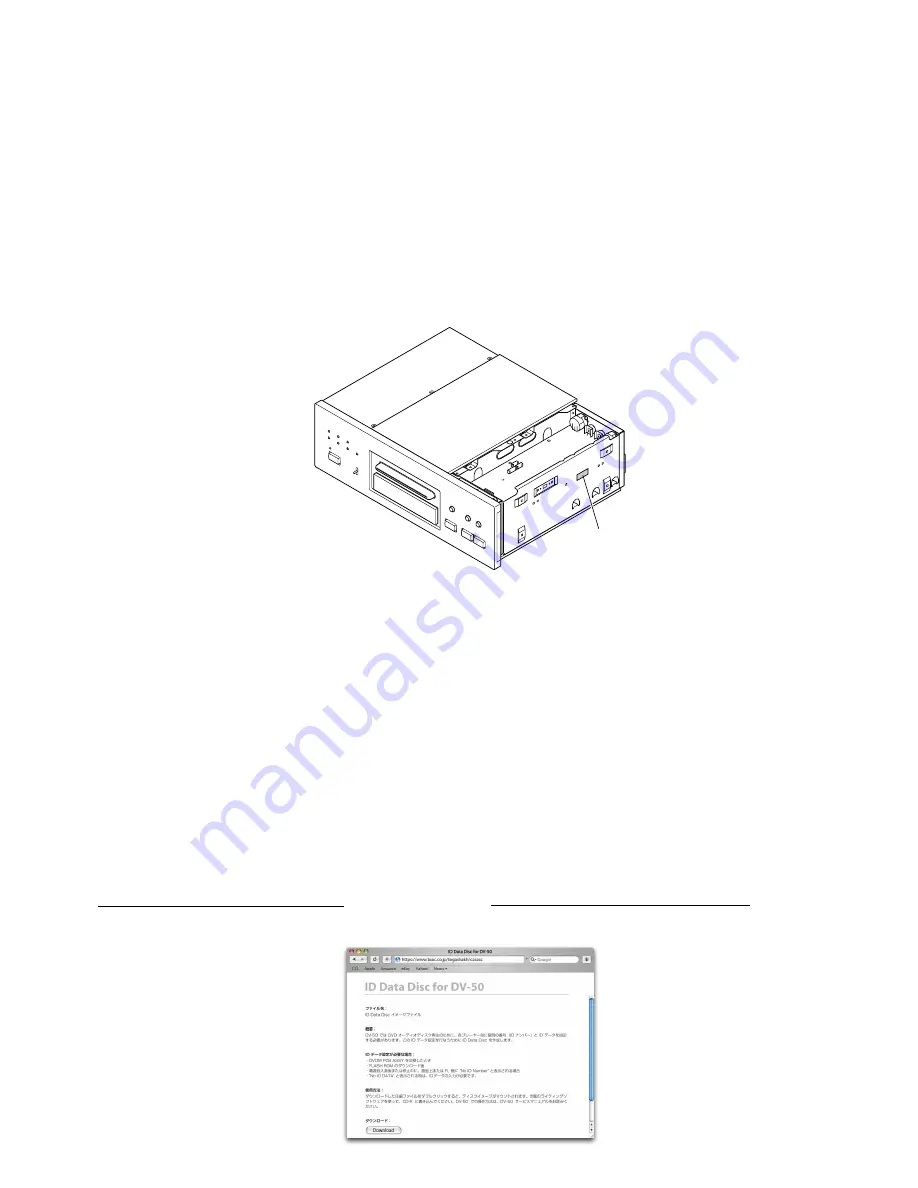
Creating ID Data Disc

Download an image file of ID data disc off the TEAC Service Web
Site and write it to a CD-R using a commercially available writing
tool.
Care should be taken over security for ID data.

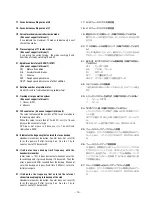
3-3 IDナンバーおよびIDデータ設定

DVDオーディオ対応プレーヤーのIDナンバーおよびIDデ
ータ入力について

DVDオーディオ対応プレーヤーではDVDオーディオディスク再
生のために、各プレーヤ毎に個別の番号(IDナンバー)とIDデー
タを設定する必要があります。この番号とデータを、以下の手順
で正しく設定しないと、将来にわたる動作保証ができなくなりま
す。IDナンバーはSIDE CHASSIS Rのラベルに書いてあります。

重要:  SIDE  CHASSIS  Rに白いラベルがない場合は、FALSH

ROMのダウンロード前に "IDナンバーの確認方法" に従って、設

定されているIDナンバーを書き留めておいてください。

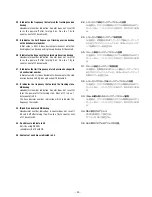
入力が必要な場合

•  

DVDM PCB ASSYを交換したとき

•  

FLASH ROMのダウンロード後

•  

電源投入直後または停止中に、画面上またはFL管に "No  ID
Number" と表示される場合

•  

"No ID DATA" と表示される時は、IDデータの入力が必要です。

IDデータディスクの作成

TEACサービスWebサイトからIDデータディスクのイメージファ
イルをダウンロードし、市販のライティングソフトを使って、
CD-Rに書き込んでください。
IDデータの取り扱いには十分注意してください。

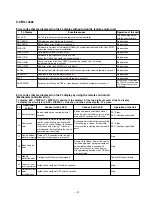
ID Number

Summary of Contents for Esoteric DV-50

Page 1: ...s regards the resistors and capacitors refer to the circuit diagrams contained in this manual Parts marked with this sign are safety critical components They must be replaced with identical components...

Page 2: ...CB 43 POWER PCB 44 REG PCB 44 INLET PCB 44 OUTPUT PCB 44 PSW PCB 44 PARTS LIST MAIN PCB ASSY 45 DAC PCB ASSY 47 SCART PCB ASSY 49 FRONT PCB ASSY 49 LED PCB ASSY 49 V UP PCB ASSY 49 TOGGLE PCB ASSY 49...

Page 3: ...CA 2 2 Vrms 47 k 0 dB XLR 2 2 Vrms 600 0 dB Frequency response 5 Hz 80 kHz 3 dB Dynamic range 1 kHz 108 dB Total harmonic distortion 1 kHz 0 001 Crosstalk 1 kHz 110 dB Audio output Digital Audio OPTIC...

Page 4: ...B CR PR Y 1Vp p 75 CB PB CR PR 0 7Vp p 75 RCA D1 D2 Y CB PB CR PR Y 1Vp p 75 CB PB CR PR 0 7Vp p 75 D 2 RCA2 5 1ch 5 1 RCA1 2 2Vrms 1kHz 220mVrms 1kHz 20dB 2ch 2 RCA1 XLR1 RCA 2 2Vrms 47k XLR 2 2Vrms...

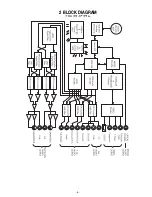
Page 5: ...2 BLOCK DIAGRAM 5...

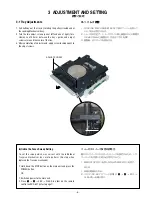
Page 6: ...djustments apply screw locking agent to the adjust screws 3 1 1 LOADING MECHANISM ASSY 2 0 2mm 2 3 ADJUST SCREW 0 2mm Initialize the Focus Sweep Setting To set the sweep which was correct with the ind...

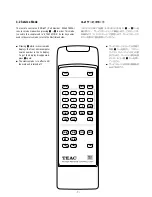
Page 7: ...00A runs in service mode when pressing 1 2 in order This mode is used in this chapter and in 4 TEST MODE As for key names used in the service mode refer to the illustration below Pressing 1 while in s...

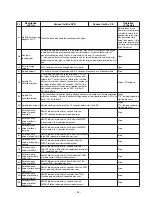
Page 8: ...umber by checking it according to How to Confirm the ID Number shown below The Input is Necessary When DVDM PCB ASSY is replaced Downloading FLASH ROM is finished No ID Number is displayed on the scre...

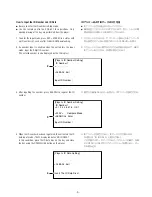
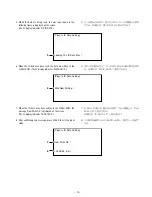
Page 9: ...FL display 3 After inputting the number press SEARCH to register the ID number 4 When the ID number has been registered the unit enters the ID data input mode The FL display indicates NO ID DATA In th...

Page 10: ...7 When the ID data have been written to the FLASH ROM the message Rom Write OK is displayed on the screen The FL display indicates ID DATA OK 8 After confirming this message press CLEAR to exit the in...

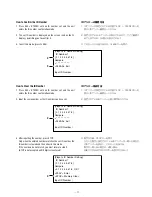
Page 11: ...tting the number press STOP Only when the entered number matches the set ID number the ID number is cleared and the unit exits this mode If the numbers do not match you must return to step 2 STOP is n...

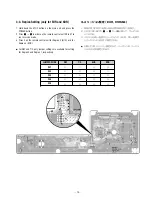
Page 12: ...the remote control unit RC 627 to run in service mode 3 Press 2 on the remote control unit for Region 2 EUR or 3 for Region 3 KOR For DM and T C only jumper settings are available for setting for Regi...

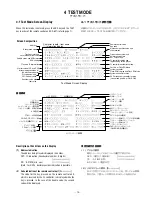
Page 13: ...position Address Background color Tracking status and Laser diode current value Spindle status and AFB status AGC setting FTS servo IC information C1 error value of CD and DVD Internal operation mode...

Page 14: ...AGC off 10 Output video system V NTSC system PAL system Auto setting Skirt terminal output SK VIDEO S VIDEO RGB Note Display only the model which can do the output setting of skirt terminal 11 FTS se...

Page 15: ...le VYW1536 A W1536A Example PD6256A9 6256A9 2 Part number of the system controller Back Example PD3381T1 3381T1 20 1 Version of the flash ROM V 2 Flash ROM size FLSH 21 Revision of the system controll...

Page 16: ...ress the TEST 4 keys in order and turn on the laser diode It light up for nine seconds When let it turn on once again after performed step 2 once After pressed REP B key once 650nm Press the TEST 1 ke...

Page 17: ...t became the trigger that an error of 2 occurred There are many cases same as 2 2 The error number that transferred to the system controller Refer to the error list about contents of error number 3 Co...

Page 18: ...650nm For L1 It indicates a step using in the mechanism controller inside with a hexadecimal number Set a gain so that a S curve becomes 1 8V p p in disc distinction 13 RF count value for disc distinc...

Page 19: ...tracking open state When this value is more than 512 with CD set it in 1 beam because the eccentric is large DVD does not measure it because it is 1 beam fixed indication is 0000 25 It indicates the f...

Page 20: ...equency of sled overrun backup with a hexadecimal number Initial value is 03H it does decrement whenever enter the sled overrun backup and it gives up backup if it became 0 32 It indicates the frequen...

Page 21: ...ing the remote control unit Mechanism controller error To display ESC DISPLAY DISPLAY Location of the display At the two digits of center of the FL display To display the error history ESC DISPLAY One...

Page 22: ...er the GSUMON play AGC measuring command was sent Stop 55 Auto sequence timeout of disc type sensing ABUSY did not return within 2 seconds after the DJSRT disc sensing command was sent Stop 56 Auto se...

Page 23: ...SY was in force for 200 S during continuous coefficient writing or before and after a continuous write command was issued to DSP Open B1 Timeout error for backup In the tracing state during the backup...

Page 24: ...tray switch that had been Open mode was forcibly changed to a mode other than Open by an external force Closes F8 Loading timeout Loading unloading or clamping could not be completed within a specifie...

Page 25: ...F M O R E Z I S H S A L F M O R t i b M 8 r o 4 L A G L L I E V R E S E R T O L S R E W P P S D S P S D F F O L F L F 2 V T L F D V D D C 1 1 7 7 D C V 7 D C D V D 2 1 3 4 K R T 1 1 6 4 2 D C D V D 9...

Page 26: ...A 3 5 U P M J F 0 1 S m 0 3 Y S U B A 4 5 C G A N O M U S G C G A S m 0 5 Y S U B A 5 5 T R S J D 2 Y S U B A 6 5 2 B T A S F O L B T B T A B T A 1 Y S U B A 7 5 N O N O S T N O 0 0 5 S m Y S U B A 8...

Page 27: ...D Y S U B C X S m 0 0 2 3 A P S D P S D Y S U B C X S m 4 2 0 1 4 A P S D P S D Y S U B C X 0 0 2 S 1 B 1 N O S m 0 0 5 P S D N O 2 B N O 3 3 B 3 3 C s m 0 0 3 L 5 C N O s m 0 4 L L F F F O H S A L F...

Page 28: ...and remove it while unhooking a Hook 4 Turn the Short SW to Short side 1 LOADING MECHANISM ASSY 2 MECHA HOUSING 3 4 SW RearView Short MECHA HOUSING Short SW Hook Open Loading Base Triangle mark Drive...

Page 29: ...n installs it 8 Remove the FFC Holder with the state which Flexible Cable was atatched 9 Remove the Pickup Flexible Cable 10 Unhook 11 Remove the TRAVERSE MECHA 5 DVDM PCB ASSY 6 MECHA HOLDER 7 8 FFC...

Page 30: ...Pickup Assy FFC Holder Conducting plane 1 2 Insert the Pickup Flexible Cable in connector and lock it surely 3 Perform the styling as shown in figure below Caution Move the Pickup to the innermost of...

Page 31: ...IEWS AND PARTS LIST EXPLODED VIEW 1 31 1 2 2 3 4 4 4 5 6 7 7 8 9 0 q w e r t y u i o p a s s d f g g h j k l z x c v b n m Q Q Q Q W W W W E E E E E E E E E R R T Y T Y U U U I I O O O O O O O W A A O...

Page 32: ...00A PCB ASSY DVDM V1 051 1 20 E00753800A FLAT CABLE MCH MAIN 1 21 M01487700A BRACKET LED 1 22 5801530400 LENS 1 23 M00390402A ESCUTCHEON B B CUT 1 24 5801070200 PWR SPR 1 25 M01488600A BUTTON ASSY POW...

Page 33: ...B00132600A SCREW VPB 3X8FZC 1 53 5780003004 SCREW BPA 3X4FZC 1 54 5781703008 SCREW HEXAGON M3X8 NI 1 55 5783682010 SCREW PPP 2X10NI 1 56 M01559000A PLAIN WSHR 2 2X5X0 3FNI 1 57 5781703006 SCREW HEXAGO...

Page 34: ...EXPLODED VIEW 2 34 1 2 3 4 5 6 7 8 9 0 q w e r t y u i o p a s d f g h j j z z z z z x x c v b n n n n m l k...

Page 35: ...C E UK K 2 15 M01480200A BRACKET PCB 2 16 M01480100A BRACKET SIDE 2 17 E95150100A PCB ASSY POWER 2 18 M00389300C CHASSIS SIDE L 2 19 E95149800A PCB ASSY PSW 2 20 M01480600A BRACKET POWER SW 2 21 M014...

Page 36: ...07683500 LOADING MOTOR ASSY VXX2505 3 4 9A05547300 MOTOR PULLEY PNW1634 3 5 9A07681900 CARRIAGE DC MOTOR PXM1027 3 6 V0011820 FLAT CABLE 26P VDA1864 3 7 V0011830 CONNECTOR ASSY 2P VKP2253 3 8 V0011840...

Page 37: ...enness No 13 Drive Cam No 13 Drive Cam No 23 Tray No 23 Tray Top View Rear View Top View Bottom View SANKOL CFD 5010Z SANKOL CFD 5010Z SANKOL CFD 5010Z SANKOL CFD 5010Z SANKOL CFD 5010Z Side of the ri...

Page 38: ...38 7 PC BOARDS AND PARTS LIST DVDM PCB SIDE A...

Page 39: ...39 DVDM PCB SIDE B...

Page 40: ...40 MAIN PCB SIDE A This PCB is a four layered board...

Page 41: ...41 MAIN PCB SIDE B This PCB is a four layered board...

Page 42: ...42 DAC PCB This PCB is a four layered board SCART PCB...

Page 43: ...43 FRONT PCB TOGGLE PCB LED PCB V UP PCB...

Page 44: ...44 OUTPUT PCB PSW PCB INLET PCB POWER PCB REG PCB...

Page 45: ...3 5336249200 CONN PLUG B02B PH K S W P2201 5336249400 CONN PLUG B04B PH K S P2202 5336250200 CONN PLUG B12B PH K S W MAIN PCB ASSY J US C K REF NO PARTS NO DESCRIPTION P2204 5336249600 CONN PLUG B06B...

Page 46: ...D721 D728 S0022094 DIODE 1SS355 F706 F708 E0079440 FILTER TH287LSKS 15952 F721 F723 E0075210 FILTER TH287LSJS 15981 J701 E0074620 JACK YKC21 4432 J702 E0074640 JACK YKF51 5572 J703 E0074570 JACK YKC21...

Page 47: ...TC60 U903 S0048934 IC SN74HCT32APWR U904 S0048774 IC BA25BC0FP E2 U1501 S0048754 IC SN74AHC2G74HDCTR U1502 S0039384 IC SN74AHC1G86HDCKR U1503 S0034994 IC SN74AHC1G08HDCKR MAIN PCB ASSY E UK REF NO PA...

Page 48: ...FLAT M2 6X6 C3002 5260531420 CE 100UF 20V M SA C3005 C3007 C0040520 CE 1000UF 6 3V M MV AX C3025 C3030 C0036264 CE 47UF 10V M SVP C3036 C3041 C0036264 CE 47UF 10V M SVP C3057 C3058 C0007510 CE 47UF 1...

Page 49: ...427500 TR 2SC2412KS Q7701 S0036084 TR DTC114YKA Q7703 Q7704 S0036084 TR DTC114YKA R7215 R7223 R0112054 RN 1 16W 68 OHM D R7242 R7252 R0112054 RN 1 16W 68 OHM D R7331 R0112054 RN 1 16W 68 OHM D FRONT P...

Page 50: ...EH WHT P7 5336303300 CONN PLUG B3B EH WHT P8 5336307300 CONN PLUG B3B EH Y YEL P9 5336305400 CONN PLUG B4B EH R RED P10 5336303400 CONN PLUG B4B EH WHT Q1 5230012920 TR 2SA1015GR Q2 5230509100 TR 2SB5...

Page 51: ...MANUAL G I N E E00781800A REMOTE CONTROL UNIT RC 884 J K E00813800A REMOTE CONTROL UNIT RC 908 US C E00781801A REMOTE CONTROL UNIT RC 887 E UK 5347006900 BATTERY UM 3 J 5347007000 BATTERY UM 3 US C E...

Reviews: