background image

16

i.LINK (IEEE 1394)

The i.LINK is also known as IEEE 1394, an international
specification. 
This unit is ready for i.LINK (AUDIO). 
By connecting an i.LINK (AUDIO)-capable device to the IEEE 1394
(or i.LINK (AUDIO) terminal on this unit using an i.LINK cable, you
can transmit Super Audio CD multi-channel signals that could
not be transmitted but in analog format in the past can be
transmitted in its original digital format, in addition to the
capability of transmitting 2-ch linear PCM data and multi-
channel compressed audio signals. 
If you have multiple i.LINK-capable devices, you can connect
them through other devices to transmit data between them, so
you don’t need to be concerned with the order of connection.

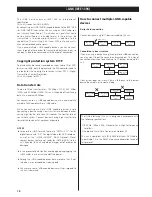
Copyright protection system DTCP

To play back audio sounds recorded on Super Audio CD or DVD
discs using i.LINK, both the player and the D/A converter need to
be ready for the copyright protection system DTCP (Digital
Transmission Content Protection). 
This unit is ready for DTCP.

Data transfer rate

There are three transfer rates: 100 Mbps (S100), 200 Mbps
(S200), and 400 Mbps (S400). This unit is capable of transferring
data at a maximum 400Mbps. 

For connection to an i.LINK-capable device, use a commercially
available S400-compliant 6-pin i.LINK cable. 

When connecting multiple i.LINK-capable devices, avoid
connecting a device having slow transfer rate between devices
having high transfer rate since this reduces the transfer rate of
your whole system. Connect devices having high transfer rate
towards the source as far upstream as possible.

NOTES

<

Among the i.LINK formats there are “MPEG-2 TS” for BS
digital source and “DV” for digital video for DVD recorders,
as well as the “i.LINK (AUDIO)” (A&M Protocol). Never
connect devices that are not ready for i.LINK (AUDIO) to this
unit. If you do, this unit and others may get out of order or be
damaged.

<

In the process of data transfer, avoid plugging/unplugging the
i.LINK cables in use or switch on/off the power. 

<

Among the i.LINK-capable devices there are some that, if not
turned on, are not capable of relaying data.

<

Chances are some i.LINK-capable devices will not respond to
this unit's command.

How to connect multiple i.LINK-capable
devices

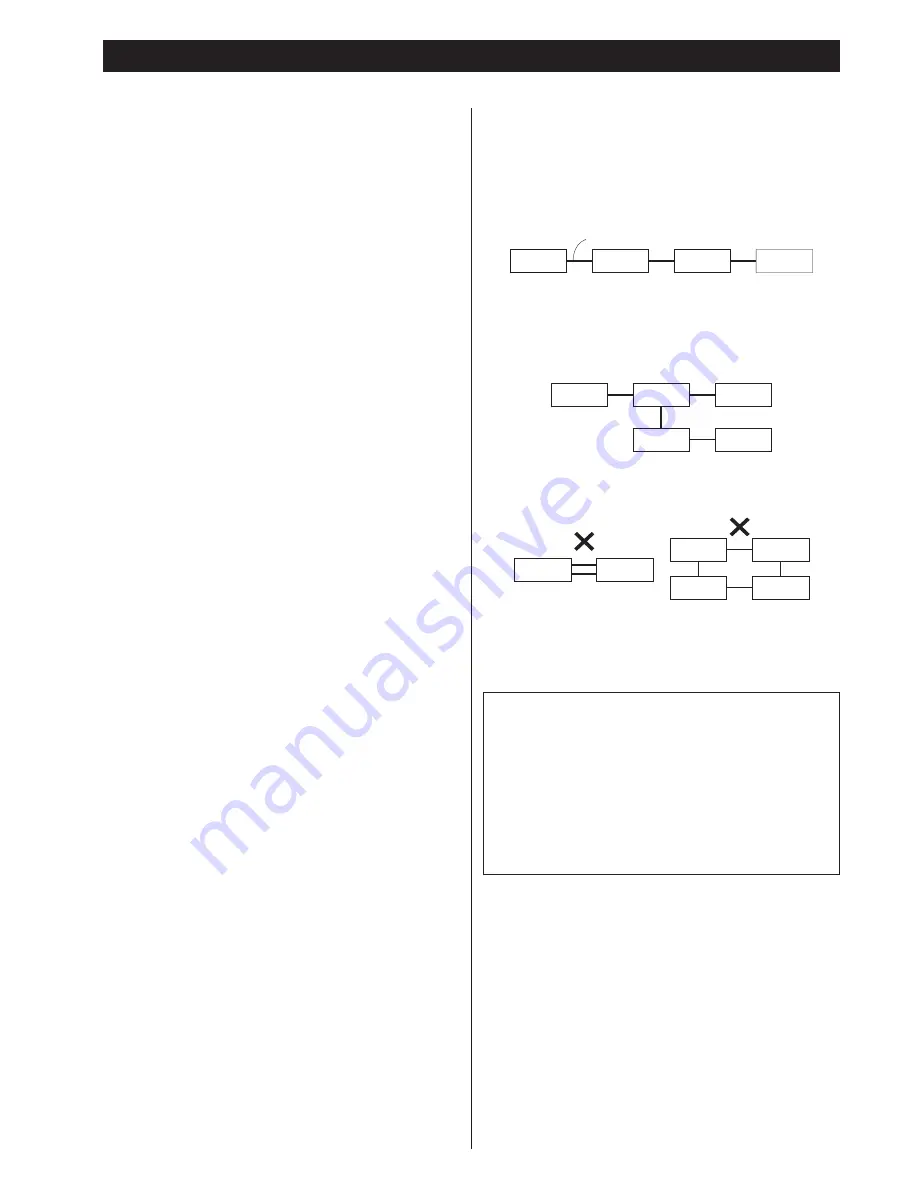
Daisy chain connection

You can daisy-chain up to 17 devices including this unit. 

Connection in tree structure

If you are using a device having three or more i.LINK connectors,
you may want to get the connection branched out. This way of
connection allows you to connect up to 17 devices including this
unit.

Your system does not work if data is fed back to the output
device. Be careful not to create a loop.

i.LINK-capable

device

i.LINK-capable

device

i.LINK-capable

device

i.LINK-capable

device

i.LINK-capable

device

i.LINK-capable

device

i.LINK-capable

device

i.LINK-capable

device

i.LINK-capable

device

i.LINK-capable

device

i.LINK-capable

device

i.LINK-capable

device

i.LINK cable

i.LINK-capable

device

i.LINK-capable

device

i.LINK-capable

device

The i.LINK interface of this unit is designed in accordance with
the following specifications:

1) IEEE Std 1394a-2000, Standard for a High Performance

Serial Bus

2) Audio and Music Data Transmission Protocol 2.0

This unit is compliant with IEC 60958 bitstream, DVD-Audio,
Super Audio CD in the AM824 sequence adaptation layers of
this protocol.

Summary of Contents for Esoteric SZ-1

Page 1: ...D00905600A Super Audio CD Player Owner s Manual ...

Page 2: ...paratus Do not install this apparatus in a confined space such as a book case or similar unit The apparatus draws nominal non operating power from the AC outlet with its STANDBY switch in the standby position The apparatus should be located close enough to the AC outlet so that you can easily grasp the power cord plug at any time An apparatus with Class construction shall be connected to an AC out...

Page 3: ...arefully to get the best performance from this unit Before Use 4 Discs 5 Connections 6 Front panel features 8 Understanding the remote control unit 9 Remote Control Unit 10 Restoring factory settings 10 Playback 11 Skipping playback 12 Selecting a track 12 Fast scanning 12 Selecting the playback area 12 Repeat mode 13 Display dimming 13 Changing the display mode 13 Word sync 14 i LINK AUDIO Output...

Page 4: ...moving the power plug from the wall outlet always pull directly on the plug never yank the cord To keep the laser pickup clean do not touch it and always close the disc tray Do not attempt to clean the unit with chemical solvents as this might damage the finish Use a clean dry cloth Keep this manual in a safe place for future reference Before Use DO NOT MOVE THE UNIT DURING PLAYBACK During playbac...

Page 5: ...ompact discs can be played or recorded only on one side To remove a disc from its storage case press down on the center of the case and lift the disc out holding it carefully by the edges Should the disc become dirty wipe the surface radially from the center hole outward towards the outer edge with a soft dry cloth Never use such chemicals as record sprays antistatic sprays or fluid benzine or thi...

Page 6: ... insert each plug securely To prevent hum and noise avoid bundling the signal interconnection cables together with the AC power cord or speaker cables i LINK cable RCA coaxial cable optical digital cable BNC coaxial cable XLR cable Balanced XLR pin assignment Stereo amplifier Amplifier AZ 1 etc Digital audio device CD recorder MD deck etc Supplied power cord Wall socket RCA cable Connect either th...

Page 7: ...available S400 compatible i LINK IEEE1394 6pin cable to connect the unit to an amplifier When using this terminal set the i LINK output setting to 60958 or PCM see page 14 See page 16 for further details on i LINK To enjoy surround sound from a Super Audio CD connect the i LINK AUDIO terminal to a suitably equipped surround sound amplifier C B A Word sync connector This allows the use of an extern...

Page 8: ...ay Disc tray PLAY PAUSE Use this to start or pause playback SKIP Use these for skip operations Pressing and holding these buttons for more than a second changes the scanning speed H G F E D C B The equipment draws nominal non operating power from the AC outlet with its STANDBY in the standby position A B A C D E G F H Display REPEAT indicator Lights when repeat play is selected Disc type indicator...

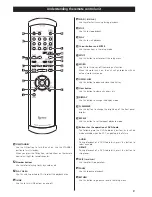
Page 9: ...this to turn on or off the word sync function When the word sync is on the unit will synchronize with an external word sync source OPEN CLOSE Use this button to open and close the disc tray Clear button Use this button to clear entry errors etc DISPLAY Use this button to change the display mode FL DIMMER Use this button to change the brightness of the front panel display REPEAT Use this button to ...

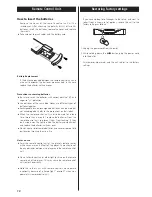
Page 10: ...control unit at the player s remote sensor within seven meters 23 feet of the player There should not be any obstacles between the player and the remote control unit Do not allow direct sun or other light to shine on the remote sensor part of the player This may cause the remote control unit to work incorrectly Note that other units with remote controls may operate incorrectly because of infrared ...

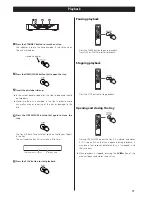
Page 11: ...he OPEN CLOSE button L to open the tray 2 Insert the disc label side up In the case of double sided discs the side to be played should be face down Make sure the disc is centered in the tray in order to avoid any malfunction or jamming of the tray or damage to the disc Press the OPEN CLOSE button L again to close the tray 4 3 The tray will close Take care that you don t catch your fingers in the t...

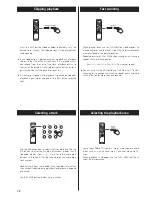
Page 12: ...r stopped at the start of the selected track Selecting a track Use the number button to select tracks for playback Use the 10 button to enter the first digit of numbers greater than 9 repeated presses show 1 2 3 etc and the single digit buttons 0 through 9 for the second digit or single digit track numbers Playback starts from the selected track regardless of whether the number is selected during ...

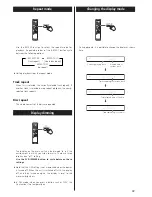
Page 13: ... on the main unit can be dimmed to suit the environment in which you listen to music There are three levels and an off setting Use the FL DIMMER button to cycle between these settings Note that the OFF setting is not memorized when the power is turned off When the unit is switched off with the display off and then turned on again the display is reset to the minimum brightness In OFF mode when you ...

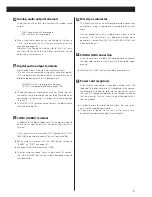
Page 14: ...utput setting changes When using the i LINK terminal select 60958 or PCM and set the Digital Output setting to ON 60958 DSD signal is output during playback of a Super Audio CD The digital signal in IEC60958 format is output during playback of a CD PCM DSD signal is output during playback of a Super Audio CD Linear PCM digital signal is output during playback of a CD Some amplifiers may regard thi...

Page 15: ...itching off the power without exiting the setup mode may cause problems Do not turn the unit off Settings are stored even when power is turned off and the unit is unplugged If left unplugged for an extended period the settings may be lost Output Settings i LINK DF DSD normal display Available menu item and options i LINK Used to select an i LINK output setting 60958 PCM or OFF are available You ca...

Page 16: ...possible NOTES Among the i LINK formats there are MPEG 2 TS for BS digital source and DV for digital video for DVD recorders as well as the i LINK AUDIO A M Protocol Never connect devices that are not ready for i LINK AUDIO to this unit If you do this unit and others may get out of order or be damaged In the process of data transfer avoid plugging unplugging the i LINK cables in use or switch on o...

Page 17: ...navigate the menus 3 When an option marked with is displayed use the up or down cursor buttons to change the setting and press the ENTER button to confirm the entry 4 Exit the setup menu by pressing SETUP once more 5 Refer to the Setup Menu Chart on the next page The options you can change are marked with Use the left and up cursor buttons or the RETURN button to go back a level in the setup menu ...

Page 18: ...Distance L R m C m SR SL m SP Level L R Size C Size SR SL Size SW ON OFF LR dB C dB SR dB SL dB SW dB Test Start Test Tone options options options options options options options options options options options options options options options options Settings Setup Menu Chart ...

Page 19: ...ngs Speaker Setup 1 Use these speaker setup menus when the i LINK AUDIO terminal is connected to a surround sound amplifier and when you don t use the speaker menus of the amplifier There is no need for this setup when not using the i LINK AUDIO terminal or when you use the speaker menus of the amplifier In this case leave this setup as it is factory settings This setup has an effect on the sound ...

Page 20: ...center distance must be between 3 3m 5 1 7 and 5m The distance that you set for the SR SL surround pair cannot be greater than the distance set for the L R pair and must be within 9m of that distance So with the L R pair set at 5m the SR SL pair distance can be set from 0m to 5m Speaker levels SP Level Use this to set the relative levels of the speakers You can set the L R pair together and the ce...

Page 21: ...everse Press the PLAY button to resume normal playback No multi channel audio output e Set the Analog Output setting to Multi ch see page 19 e Change the speaker configuration if necessary see page 20 e Super Audio CDs may have more than one playback area not all of which contain multi channel audio data Choose a multi channel area see page 12 Beware of condensation When the unit or a disc is move...

Page 22: ...z Super Audio CD DSD setting Normal 5Hz 80 kHz Super Audio CD DSD setting Direct Signal to Noise Ratio S N 130 dB Dynamic range 107 dB Total harmonic distortion 0 002 Audio output Digital Audio OPTICAL Optical digital jack x 1 15 to 21 dBm COAXIAL RCA jack x 1 0 5 Vp p 75 Ω Word Synchronization input format Jack BNC Input level TTL level 75 Ω The main unit can accept and synchronize to the followi...

Page 23: ......

Page 24: ...ntebello California 90640 Phone 323 726 0303 TEAC CANADA LTD 5939 Wallace Street Mississauga Ontario L4Z 1Z8 Canada Phone 905 890 8008 TEAC MEXICO S A De C V Campesinos N 184 Colonia Granjas Esmeralda Delegacion Iztapalapa CP 09810 México DF Phone 525 581 5500 TEAC UK LIMITED Unit 19 20 The Courtyards Hatters Lane Watford Hertfordshire WD18 8TE U K Phone 0845 130 2511 TEAC EUROPE GmbH Bahnstrasse ...

Reviews: