background image

WARRANTY PROCEDURE

v1.5.2: DEC 2011

Please read the owner’s manual carefully and ensure that you have followed the correct installation and operating
procedures.

1.

Please read this warranty card.

2.

Keep your purchase receipt to enable you to proceed quickly in the event of a Warranty Service.

3.

If you require Warranty Service, please contact the TEAC Customer Support Hotline at 1300 553 315 for
assistance. Please ensure that you have the model number, serial number and purchase receipt ready when
you call.

Please complete the section below and keep this information for your own records.

Owner’s Name

Owner’s Address

Postcode

Model Name/No.

Serial No.

Dealer’s Name

Dealer’s Address

Postcode

Authorised

Authorised

Authorised

Authorised Service

Service

Service

Service Centres

Centres

Centres

Centres in

in

in

in Major

Major

Major

Major Australian

Australian

Australian

Australian Cities

Cities

Cities

Cities

NSW

NSW

NSW

NSW

151 Arthur Street
Homebush West, NSW 2140

Queensland

Queensland

Queensland

Queensland

Unit 1, 320 Curtin Ave West
Eagle Farm, QLD 4009

Western

Western

Western

Western Australia

Australia

Australia

Australia

Unit 2, 50 Pilbara Street
Welshpool, WA 6106

South

South

South

South Australia

Australia

Australia

Australia

11 McInnes Street
Ridleyton, SA 5008

Victoria

Victoria

Victoria

Victoria

282 Normanby Road
South Melbourne, VIC 3205

Thank

Thank

Thank

Thank you

you

you

you for

for

for

for selecting

selecting

selecting

selecting a

a

a

a TEAC

TEAC

TEAC

TEAC product

product

product

product

.

If you should require assistance with your product regarding its setup

or operation, or if any difficulties arise, please call us directly for advice

between Monday to Friday at 8.30AM – 6PM AEST at the

TEAC

TEAC

TEAC

TEAC Customer

Customer

Customer

Customer Support

Support

Support

Support Hotline

Hotline

Hotline

Hotline

1300

1300

1300

1300 553

553

553

553 315

315

315

315

teacservicesupport@awa.com.au

www.teac.com.au

Summary of Contents for MCDV72iP

Page 1: ...MCDV72iP DVD Micro Hi Fi System with Docking for iPod USER MANUAL WARRANTY INFORMATION INSIDE PLEASE READ www teac com au IMPORTANT Trademark of TEAC Corporation JAPAN iPhone iPad ...

Page 2: ...alian Australian Cities Cities Cities Cities NSW NSW NSW NSW 151 Arthur Street Homebush West NSW 2140 Queensland Queensland Queensland Queensland Unit 1 320 Curtin Ave West Eagle Farm QLD 4009 Western Western Western Western Australia Australia Australia Australia Unit 2 50 Pilbara Street Welshpool WA 6106 South South South South Australia Australia Australia Australia 11 McInnes Street Ridleyton ...

Page 3: ...conditions are met a The product is indicated in the Warranty Period Table b The product is within the warranty period c The product is located within the normal service area of the local TEAC Authorised Service Centre If TEAC determines that the product is not repairable on site TEAC can complete the repair by taking the product to a TEAC Authorised Service Centre Carry in Service Where In Home s...

Page 4: ...roduct in a sufficiently ventilated place to avoid overheating Allow at least 10cm of space at the back and top of the product and 5cm of space on both side to prevent overheating The product should not be exposed to dripping or splashing No object filled with liquids such as vases should be placed on the product Do not place other items that may damage the product close to it for example water co...

Page 5: ...hat charge from USB terminal cannot be use for playback Hard disk drives CD DVD Drives and other devices connected via USB cannot be used This unit cannot copy or move files Playable formats FAT12 FAT16 FAT32 Depending on the conditions of a USB flash drive this unit might not be able to play the files on it or skipping might occur NTFS HFS and HFS formats are not support and cannot be used Max nu...

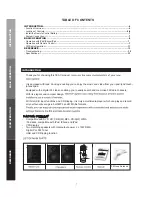
Page 6: ...mpatible with iPod iPhone and iPad VFD display Two matching speakers with total output power 2 x 15W RMS Digital PLL FM Tuner USB and CD Ripping function TABLE OF CONTENTS INTRODUCTION 4 Function Overview 4 Location of Controls 5 6 Install the Remote Control Battery 7 System Connection 7 BASIC OPERATION 8 Operation with iPod iPhone iPad 7 Operation with Remote Control 7 FM Radio Operation 11 REFER...

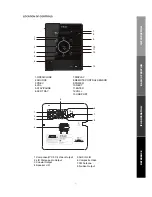
Page 7: ... L R Stereo audio Output 3 Coaxial Output 4 Speaker L R 7 DISPLAY 8 REMOTE CONTROL SENSOR 9 POWER 10 NEXT 11 ENTER 12 VOL 13 USB PORT 1 2 3 1 2 3 4 5 6 7 8 4 5 6 7 8 9 10 11 12 13 5 AUX IN L R 6 Composite Video 7 FM Antenna 8 S video Output INTRODUCTION BASIC OPERATION REFERENCE IPOD OPERATION ...

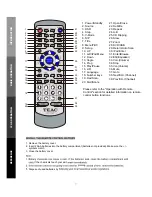
Page 8: ...ose 22 Subtitle 23 Repeat 24 A B 25 CD Ripping 26 Slow 27 Zoom 28 DVD USB 29 Return Auto Scan 30 iPod Enter 31 Enter Browse 32 EQ Equalizer 33 Vol Volume 34 Stop 35 Vol Volume 36 Mute 37 Goto 38 Next CH Channel 39 Prev CH Channel prolong If the chemicals touch your skin Dispose of used batteries by 1 Remove the battery cover 2 Insert 2 AAA batteries into the battery compartment batteries not provi...

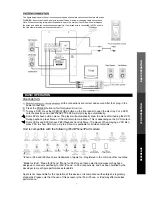
Page 9: ...sible connections to external devices WARNING Ensure that the AC power is turned off when making or changing cable connections Note When connecting this product s speaker wires to the main unit note the white markings on the wires and make the connections consistent ie if a marked wire is connected to MR ensure that the other marked wire is connected to ML all the connections are correct and secur...

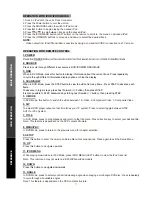
Page 10: ...creen Setup Menu for setup options Press again to exit the Setup Menu 9 SETUP In DVD Mode press to select your desired viewing angle when playing a multi angle DVD disc Press repeatedly to cycle through all available angles Note This feature is dependant on the DVD content structure 13 ANGLE 11 IPOD MENU While playing music video in iPod Mode press IPOD MENU LEFT button to view the iPod track list...

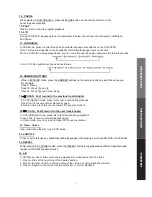
Page 11: ...e soundtracks on the DVD SVCD Note This feature depends on the availability of alternate language tracks on the disc When a DVD disc is being played back you can cycle through the audio channels in the following modes For a VCD the soundtrack options are as follows 15 PLAY Press to start or resume program playback In DVD Mode Use A B to set up looping playback for a desired section of a track 1 Pr...

Page 12: ...ve into the USB port on the front panel 2 Press the DVD USB to switch to USB playback After the unit finishes reading the device it will start to play Note Depending on the capacity of the device reading may take more than 1 minute Special note This unit does not support NTFS file system make sure that the storage devices is FAT or FAT32 file system Large storage devices may take longer than norma...

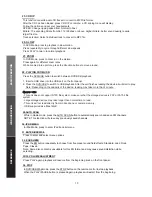
Page 13: ...ATION REFERENCE During playback press the MUTE button to silence the audio completely Press the button again to revert to the original volume 36 MUTE 37 GOTO In DVD Mode press to go to to your desired position directly via this function Tuning to FM Stations Note When you perform AUTOSCAN function will clear all stored stations and new stations are stored To improve reception reposition the FM ant...

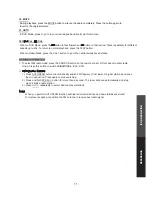
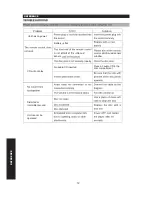
Page 14: ...play Distorted or intermittent sound Unit cannot be operated Battery is flat No audio CD inserted Place an audio CD in the disc compartment REFERENCE Problem 12 REFERENCE Solution infra red sensor properly at infra red sensor window ...

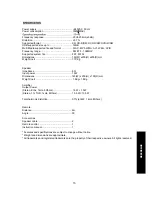
Page 15: ... Kg Speaker Impedance 8Ω Input power 15W Dimensions 145 W x 200 H x 195 D mm Weight net 1 8Kg 1 8Kg Amplifier Output Power Stereo EIAJ 1kHz 8Ohms 1 5W 1 5W Stereo 1 THD 1kHz 8Ohms 13 5 W 13 5 W Total harmonic distortion 0 7 at 4W 1 kHz 8Ohms Remote Distance 6m Angle 30 Accessories Speaker cable 2 Remote control 1 Instruction manual 1 Features and specifications are subject to change without notice...

Page 16: ...TEAC CUSTOMER SUPPORT HOTLINE TCS Free call 1300 553 315 Between Monday to Friday AEST 8 30AM to 6PM ...

Reviews: