background image

2

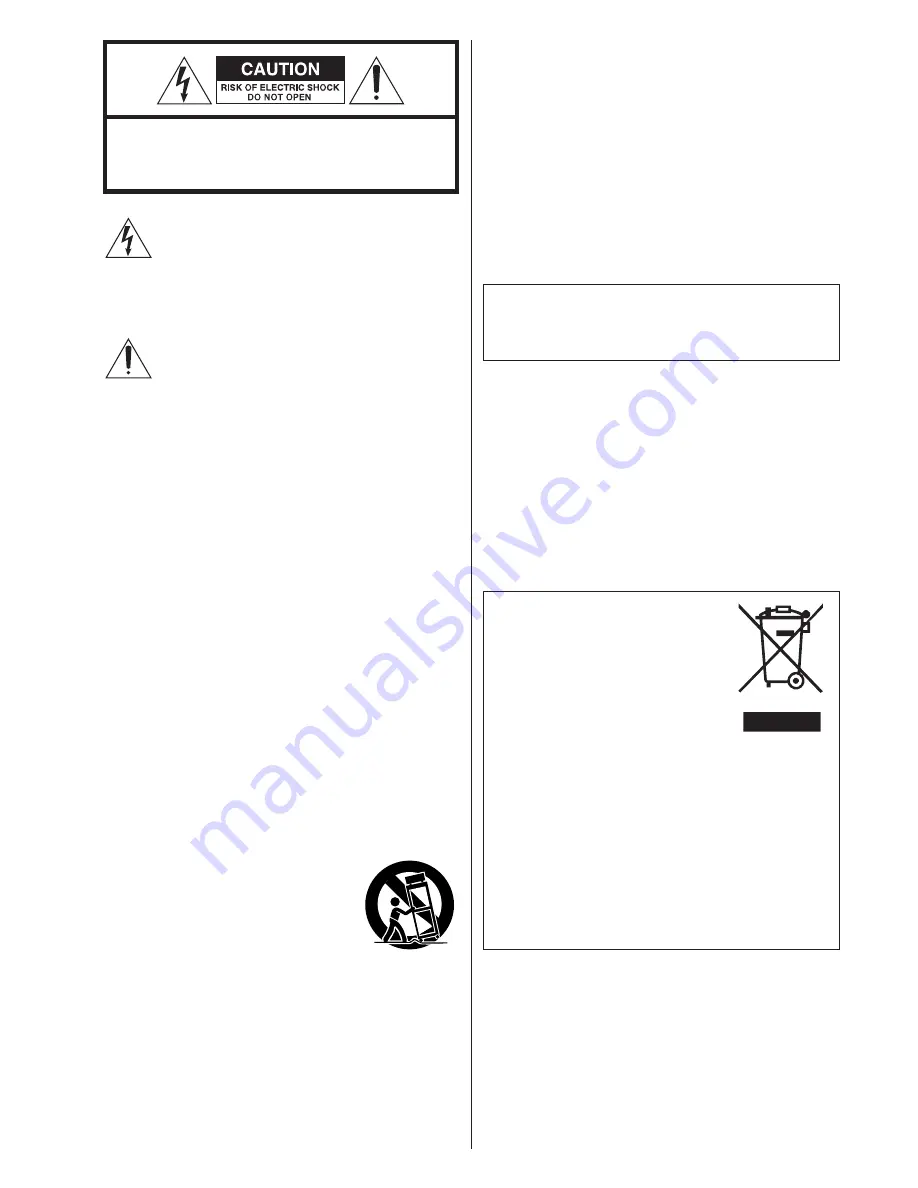
Disposal of your old appliance

1. When this crossed-out wheeled bin

symbol is attached to a product it means
the product is covered by the European
Directive 2002/96/EC.

2. All electrical and electronic products

should be disposed of separately from
the municipal waste stream via designated collection
facilities appointed by the government or the local
authorities.

3. The correct disposal of your old appliance will help prevent

potential negative consequences for the environment and
human health.

4. For more detailed information about disposal of your old

appliance, please contact your city office, waste disposal
service or the shop where you purchased the product.

CAUTION

<

DO NOT REMOVE THE EXTERNAL CASES OR CABINETS TO
EXPOSE THE ELECTRONICS. NO USER SERVICEABLE PARTS
ARE WITHIN!

<

IF YOU ARE EXPERIENCING PROBLEMS WITH THIS PRODUCT,
CONTACT TEAC FOR A SERVICE REFERRAL. DO NOT USE THE
PRODUCT UNTIL IT HAS BEEN REPAIRED.

<

USE OF CONTROLS OR ADJUSTMENTS OR PERFORMANCE OF
PROCEDURES OTHER THAN THOSE SPECIFIED HEREIN MAY
RESULT IN HAZARDOUS RADIATION EXPOSURE.

WARNING: TO PREVENT FIRE OR SHOCK
HAZARD, DO NOT EXPOSE THIS APPLIANCE
TO RAIN OR MOISTURE.

IMPORTANT SAFETY INSTRUCTIONS

1) Read these instructions.
2) Keep these instructions.
3) Heed all warnings.
4) Follow all instructions.
5) Do not use this apparatus near water.
6) Clean only with dry cloth.
7) Do not block any ventilation openings. Install in accordance

with the manufacturer’s instructions.

8) Do not install near any heat sources such as radiators, heat

registers, stoves, or other apparatus (including amplifiers) that
produce heat.

9) Do not defeat the safety purpose of the polarized or

grounding-type plug. A polarized plug has two blades with
one wider than the other. A grounding type plug has two
blades and a third grounding prong. The wide blade or the
third prong are provided for your safety. If the provided plug
does not fit into your outlet, consult an electrician for
replacement of the obsolete outlet.

10) Protect the power cord from being walked on or pinched

particularly at plugs, convenience receptacles, and the point
where they exit from the apparatus.

11) Only use attachments/accessories specified by the

manufacturer.

12) Use only with the cart, stand, tripod,

bracket, or table specified by the
manufacturer, or sold with the apparatus.
When a cart is used, use caution when
moving the cart/apparatus combination to
avoid injury from tip-over.

13) Unplug this apparatus during lightning storms or when

unused for long periods of time.

14) Refer all servicing to qualified service personnel. Servicing is

required when the apparatus has been damaged in any way,
such as power-supply cord or plug is damaged, liquid has
been spilled or objects have fallen into the apparatus, the
apparatus has been exposed to rain or moisture, does not
operate normally, or has been dropped.

CAUTION: TO REDUCE THE RISK OF ELECTRIC SHOCK,
DO NOT REMOVE COVER (OR BACK). NO USER-
SERVICEABLE PARTS INSIDE. REFER SERVICING TO
QUALIFIED SERVICE PERSONNEL.

The lightning flash with arrowhead symbol, within an
equilateral triangle, is intended to alert the user to the
presence of uninsulated “dangerous voltage” within
the product’s enclosure that may be of sufficient
magnitude to constitute a risk of electric shock to
persons.

The exclamation point within an equilateral triangle is
intended to alert the user to the presence of important
operating and maintenance (servicing) instructions in
the literature accompanying the appliance.

<

Do not expose this apparatus to drips or splashes.

<

Do not place any objects filled with liquids, such as vases, on
the apparatus.

<

Do not install this apparatus in a confined space such as a
book case or similar unit.

<

The apparatus draws nominal non-operating power from the
AC outlet with its STANDBY/ON switch in the standby
position.

<

The apparatus should be located close enough to the AC
outlet so that you can easily grasp the power cord plug at
any time.

<

An apparatus with Class 

!

construction shall be connected to

an AC outlet with a protective grounding connection.

Summary of Contents for PD-H300mkIII

Page 1: ...9A10429500 OWNER S MANUAL MANUEL DU PROPRI TAIRE MANUAL DEL USUARIO Compact Disc Player Z PD H300mk ENGLISH FRAN AIS ESPA OL...

Page 2: ...n electrician for replacement of the obsolete outlet 10 Protect the power cord from being walked on or pinched particularly at plugs convenience receptacles and the point where they exit from the appa...

Page 3: ...Use 3 Remote Control Unit 3 Discs 4 Connection 5 Names of Each Control 6 Playback 8 Search 10 Shuffle Playback 10 Repeat Playback 11 Programmed Playback 12 Time Display 13 Display 14 Specifications 14...

Page 4: ...label side up Compact discs can be played or recorded only on one side To remove a disc from its storage case press down on the center of the case and lift the disc out holding it carefully by the ed...

Page 5: ...rate this unit Connect the REMOTE CONTROL jack A or B to the REMOTE CONTROL jack of A H300mkIII or T H300 DAB mkIII with the provided remote control connection cord Turn the SELECTOR switch to SYSTEM...

Page 6: ...6 Names of Each Control A C D B G J I E F H A R Q K P T L S D F G E O M U N V...

Page 7: ...B repeat FOLDER b 5 Use these buttons to select a folder of MP3 WMA SCAN m During playback use these buttons to search the part you want to listen to SHUFFLE Use this button for shuffle playback CLEA...

Page 8: ...ically put in the 001 folder and playback starts from the first file of the 001 folder If there are folders that has no MP3 WMA file this unit skips them If you load the disc and then press the PLAY b...

Page 9: ...To resume playback press the PLAY button G or PAUSE button J B To skip to the next or a previous track file During playback repeatedly press the SKIP button or until the desired track file is found T...

Page 10: ...play mode press the SHUFFLE button RANDOM indicator lights When the shuffle playback of all the tracks or files has been finished the unit stops and the shuffle playback mode is cancelled If you press...

Page 11: ...eat one track RPT repeat folder Blinking Only MP3 WMA disc RPT p repeat all Repeat Off Repeat A B This function allows repeat playback of any desired portion of the disc Designate the point at which r...

Page 12: ...n to start programmed playback 3 When the playback of all the programmed tracks has finished or if one of the following buttons is pressed the PROGRAM indicator will go off and the program mode will b...

Page 13: ...the PROGRAM button repeatedly until the program number to be deleted appears on the display then press the CLEAR button The selected track file is deleted from the program WMA MP3 RANDOM CHAP TRK MIN...

Page 14: ...tandard Accessory RCA cable x 1 Remote control connection cord x 1 Remote control unit RC 1039 x1 Batteries AA x2 Owner s manual x1 Warranty card x1 Design and specifications are subject to change wit...

Page 15: ...int at the front panel e Clear obstacles between the remote control unit and the main unit e If a fluorescent light is near the unit turn it off MP3 WMA There is no sound even if the PLAY button y is...

Page 16: ...s sa position d origine Puis appuyer sur l interrupteur principal pour teindre l appareil et d brancher le cordon d alimentation Si vous d placez l appareil alors qu un disque est dans l appareil celu...

Page 17: ...nels portant le logo COMPACT DISC DIGITAL AUDIO CD R et CD RW correctement finalis s CD de MP3 Note Selon la qualit du disque et ou les conditions de la gravure certains CD R CD RW peuvent ne pas tre...

Page 18: ...bo tier de t l commande fonctionne dans le voisinage d autres appareils g n rant des rayons infrarouges ou si d autres t l commandes utilisant des rayons infrarouges sont utilis es pr s du lecteur le...

Page 19: ...A H300mkIII ou le T H300mkIII avec le cordon de raccordement de t l commande fourni Tournez le commutateur SELECTOR sur SYSTEM Lisez le mode d emploi de l A H300mkIII pour plus de d tails Commutateur...

Page 20: ...20 Nom de chaque commande A C D B G J I E F H A R Q K P T L S D F G E O M U N V...

Page 21: ...nner un num ro de plage Par exemple pour s lectionner le num ro de plage 35 appuyez sur les touches 3 et 5 A B Utilisez cette touche pour r gler les points A et B pour la r p tition A B FOLDER b 5 Uti...

Page 22: ...er MP3 c est appareil les saute Si vous mettez un disque puis appuyez sur la touche PLAY ou les touches num riques de la t l commande sans avoir d abord referm le tiroir celui ci se referme et la lect...

Page 23: ...tourner au d but du morceau pr c dant appuyez sur la touche deux fois En lecture programm e c est le morceau programm suivant ou pr c dant qui est lu C Lecture Directe En mode d arr t ou de lecture vo...

Page 24: ...euvent tre lus de fa on al atoire Dans le mode Stop ou lecture appuyez sur SHUFFLE RANDOM s illumine sur l cran Lorsque tous les morceaux ont t lus l appareil s arr te et le mode lecture al atoire est...

Page 25: ...RPT R p tition d une seule plage RPT R p tition de dossier Clignote Uniquement disque MP3 WMA RPT p R p tition de toutes les plages R p tition hors service R p tition A B Cette fonction permet de rep...

Page 26: ...ur la touche PLAY pour lire la liste programm e 3 Quand la lecture de tous les morceaux programm s est termin e ou si l un des touches suivants est activ l afficheur PROGRAM s teindra et le mode progr...

Page 27: ...la touche PROGRAM jusqu ce que le num ro d ordre du programme supprimer apparaisse puis appuyez sur la touche CLEAR La plage ou le fichier s lectionn est supprim du programme WMA MP3 RANDOM CHAP TRK...

Page 28: ...Hz 20 kHz 2 dB Distorsion harmonique totale Inf rieure 0 02 1 kHz Rapport signal bruit S B Sup rieur 90 dB IHF A Sortie Analogique 2 0 Vrms RCA Num rique TOS OPTICAL G n rales Alimentation 230 Vca 50...

Page 29: ...appareil e Eteignez tout clairage fluorescent proximit de cet appareil MP3 WMA Il n y a pas de son m me si vous avez appuy sur la touche PLAY y e Il y a des formats que cet appareil ne peut pas lire...

Page 30: ...s en el propio equipo Indice Enhorabuena por la adquisici n de un TEAC Lea detenidamente este manual a fin de obtener el mejor rendimiento de esta unidad Antes de utilizar la unidad 30 Discos 31 MP3 y...

Page 31: ...D R y CD RW con la sesi n correctamente cerrada CD MP3 Observaci n Dependiendo de la calidad del disco o del estado de la grabaci n algunos CD R y CD RW es posible que no puedan reproducirse Los disco...

Page 32: ...infrarrojos o si se emplean otros aparatos de control remoto por rayos infrarrojos cerca del reproductor es posible que ste no funcione correctamente Del mismo modo es posible que los otros aparatos...

Page 33: ...al cuando no se est utilizando Terminales REMOTE CONTROL Con el modelo TEAC A H300mkIII se pueden usar las pr cticas funciones de control del sistema Cuando pulse PLAY el selector de entrada del A H30...

Page 34: ...34 Nombres de los controles A C D B G J I E F H A R Q K P T L S D F G E O M U N V...

Page 35: ...ivo 35 pulse 3 y 5 1A B Utilice este bot n para ajustar los puntos para la repetici n A B FOLDER b 5 Utilice estos botones para seleccionar una carpeta de MP3 WMA SCAN m Durante la reproducci n utilic...

Page 36: ...t n PLAY y para dar comienzo a la reproducci n 5 La reproducci n se inicia en la primera pista o el primero archivo Las pistas MP3 WMA grabadas fuera de carpetas se colocar n autom ticamente en la car...

Page 37: ...reproducci n pulse el bot n PLAY G o el bot n PAUSE J B Para saltar a la pista o el archivo siguiente o anterior Durante la reproducci n pulce el bot n repetidas veces hasta localizar la pista o el a...

Page 38: ...e parada o reproducci n pulse el bot n SHUFFLE RANDOM se ilumina en la pantalla Cuando termina la reproducci n al azar de todas las pistas o los archivos la unidad se detiene y el modo queda cancelado...

Page 39: ...simple RPT Repetici n de carpeta Palpadea Con s lo disco MP3 WMA RPT p Repetici n total Repetici n desactivada Repetici n de una secci n espec fica A B Esta funci n permite la reproducci n repetida d...

Page 40: ...la programaci n pulse PLAY para iniciar la reproducci n del programa 3 Cuando finaliza la reproducci n de todas las pistas o los archivos programadas o si se pulsa uno de los siguientes botones el ind...

Page 41: ...que el n mero del programa a eliminarse aparezca en la pantalla y a continuaci n pulse el bot n CLEAR Se elimina la pista o el archivo que se ha seleccionado del programa Lectura de tiempo WMA MP3 RA...

Page 42: ...emoto x 1 Control remoto RC 1039 x1 Pilas AA x2 Manual del usuario x1 Tarjeta de garant a x1 El dise o y las especificaciones est n sujetos a cambios sin previo aviso El peso y dimensiones son aproxim...

Page 43: ...st culos situados entre el control remoto y el equipo e Si hay una luz fluorescente cerca del equipo ap guela MP3 WMA No se produce ning n sonido a n cuando se pulsa el bot n PLAY y e No se pueden rep...

Page 44: ...TEAC CANADA LTD 5939 Wallace Street Mississauga Ontario L4Z 1Z8 Canada Phone 905 890 8008 TEAC MEXICO S A De C V Campesinos N 184 Colonia Granjas Esmeralda Delegacion Iztapalapa CP 09810 M xico DF Pho...

Reviews: