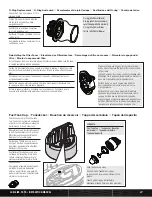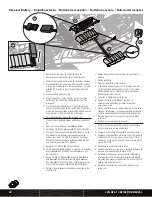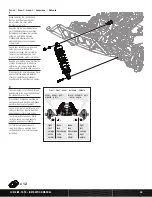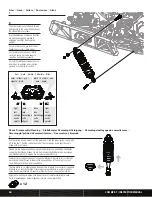
1/2 way
1/2 Weg
1/2 course
1/2 corsa
1/2 recorrido
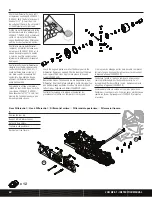
1
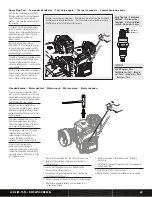
Fill the shock body 1/4” (6mm) from
the top with 30 wt silicone fluid
(LOSA5224).
Befüllen Sie die Stoßdämpfer bis 6mm
zur Oberkante mit 30 wt Silikonöl
(LOSA5224).
Remplissez le corps d'amortisseur
jusqu'à 6mm du haut avec de l'huile
silicone 30wt.
Riempire il corpo dell'ammortizzatore
fino a 1/4" (6 mm) dal bordo superiore
con fluido al silicone 30 WT
(LOSA5224).
Llene el cuerpo del amortiguador hasta
una 1/4" (6mm) del máximo, con
hidráulico de 30wt (LOSA5224).
refilling/Bleeding Shocks
//
Befüllen der Stoßdämpfer
//
remplissage des amortisseurs
//
riempimento/spurgo
ammortizzatori
//
rellenar/Purgar
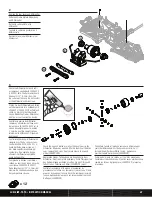
2
Slowly move the piston up and down
5 times, allowing air to rise to the top
and leave it 1/2 way up.
Bewegen Sie langsam den Kolben 5
Mal rauf und runter damit Luft nach
oben entweichen kann. Lassen Sie ihn
auf halben Weg nach oben stehen.
Effectuez lentement 5 va et vient de
la tige pour évacuer l'air et laisser le
piston à mi-hauteur dans le corps.
Muovere lentamente il pistone su e giù
per 5 volte, dando la possibilità all'aria
di raggiungere la parte superiore e
lasciarlo a 1/2 corsa.
Lentamente mueva el pistón hacia
arriba y hacia abajo 5 veces,
permitiendo que el aire escape.
Deje el vástago a la mitad.
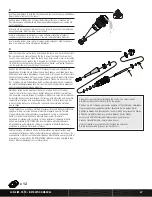
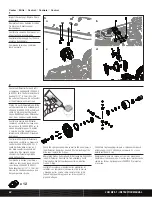
3
With the piston 1/2 way up, fill the body 1/16” (1mm) from the top and insert the
correct bladder (Front or Rear). Some fluid will be pushed out. Replace the shock
cap and reassemble the boot, spring and spring cup.
Füllen Sie, mit dem Kolben auf halben Weg, das Gehäuse auf 1mm bis Oberkante
und setzen die richtige Volumenausgleichskappe (Front oder Heck) wieder auf.
Dabei wird etwas Flüssigkeit austreten. Setzen Sie die Stoßdämpferkappe und
Gummimanschette, Feder und Federteller wieder auf.
Avec le piston à mi hauteur, remplissez le corps d'huile jusqu'à 1mm de bord.
Placez la membrane, De l'huile va s'échapper. Remontez le bouchon, remettez
en place, la chaussette, le ressort et la coupelle.
Con il pistone a mezza corsa, riempire il corpo fino a 1/16" (1 mm) dal bordo
superiore e inserire la sua camera d'aria (anteriore o posteriore). Un po' di liquido
cadrà fuori. Rimettere il coperchio superiore e rimontare la protezione, la molla e il
fermo della molla.
Con el pistón a la mitad del recorrido, llene hasta 1/16" (1mm) del máximo y
monte la membrana correcta (delantera o trasera). Algo de hidráulico escapará.
Monte la tapa, apriete y monte el muelle y el soporte inferior del muelle.
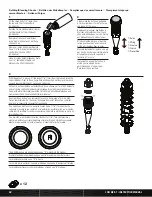
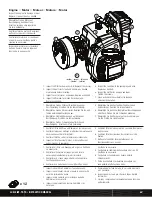
The REAR bladders are deeper and have an "R" molded into the bladder.
Die hinteren Volumenausgleichskappen sind tiefer und mit einem R markiert.
Les membranes arrière on un "R" d moulé.
Le camere d'aria posteriori sono più profonde e hanno una R stampata all'interno.
Las membranas traseras son más profundas y tienen una "R" marcada.
x 12
58
Losi 5ive-T • iNsTrucTioN maNuaL
Summary of Contents for 5IVE-T
Page 95: ......

