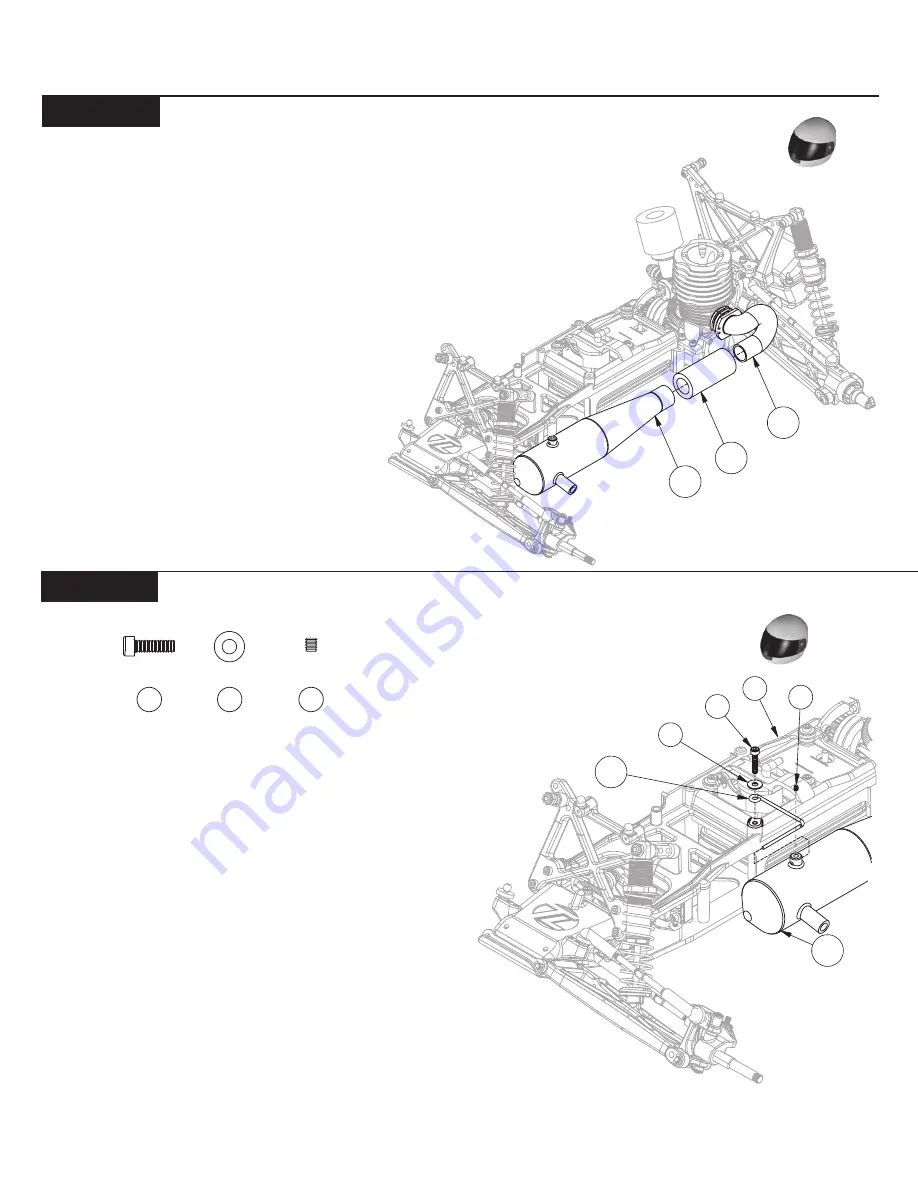
171
175
174
Ba
Ba
Ba
Ba
Bag H
g H
g H
g H
g H
(Contin
(Contin
(Contin
(Contin
(Continued)
ued)
ued)
ued)
ued)
39
1. Place the silicone Exhaust Coupler (174) over the end of the
Exhaust Header (171) as shown.
2. Insert the Tuned Exhaust Pipe (175) into the opposite end of
the Exhaust Coupler so that the exhaust outlet on side of the Pipe
points away from the truck, and the mounting stud points straight up.
Step H-12
Step H-12
Step H-12
Step H-12
Step H-12
Step H-13
Step H-13
Step H-13
Step H-13
Step H-13
Figure H-13
Figure H-12
1 . Insert the straight end of the Pipe Mount Bracket (177) into
the unthreaded hole in the mounting stud on the Tuned Pipe (175) so
that the bend is behind the mounting stud. Thread a 5-40 Set Screw
(47) into the threaded hole at the top of the mounting stud of the Pipe
but do not tighten completely.
2. Place a #4 Washer (23) over a 4-40 x 3/8" Cap-Head Screw (17).
Position the loop of the Pipe Mount over the hole just forward of the
Fuel Tank in the Center Brace (29). Place the 4-40 Screw and Washer
through the loop in the end of the Pipe Mount and thread it until tight
as shown in Figure H-13. Tighten the 5-40 Set Screw in the top of the
Pipe Mount on the Pipe.
17
23
47
Pipe Mount Adjustment:
Tuned Pipe Install:
177
175
17
23
29
47
Summary of Contents for XXX-NT AD2
Page 65: ......


