41
40
42
39
38
35
34
26
7
10
34
BAG B (Continued)
5
Figure 12
!
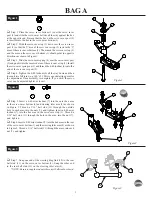
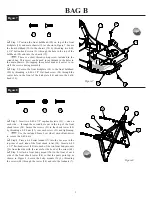
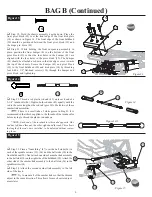
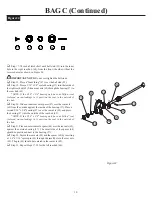
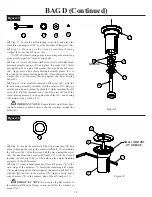
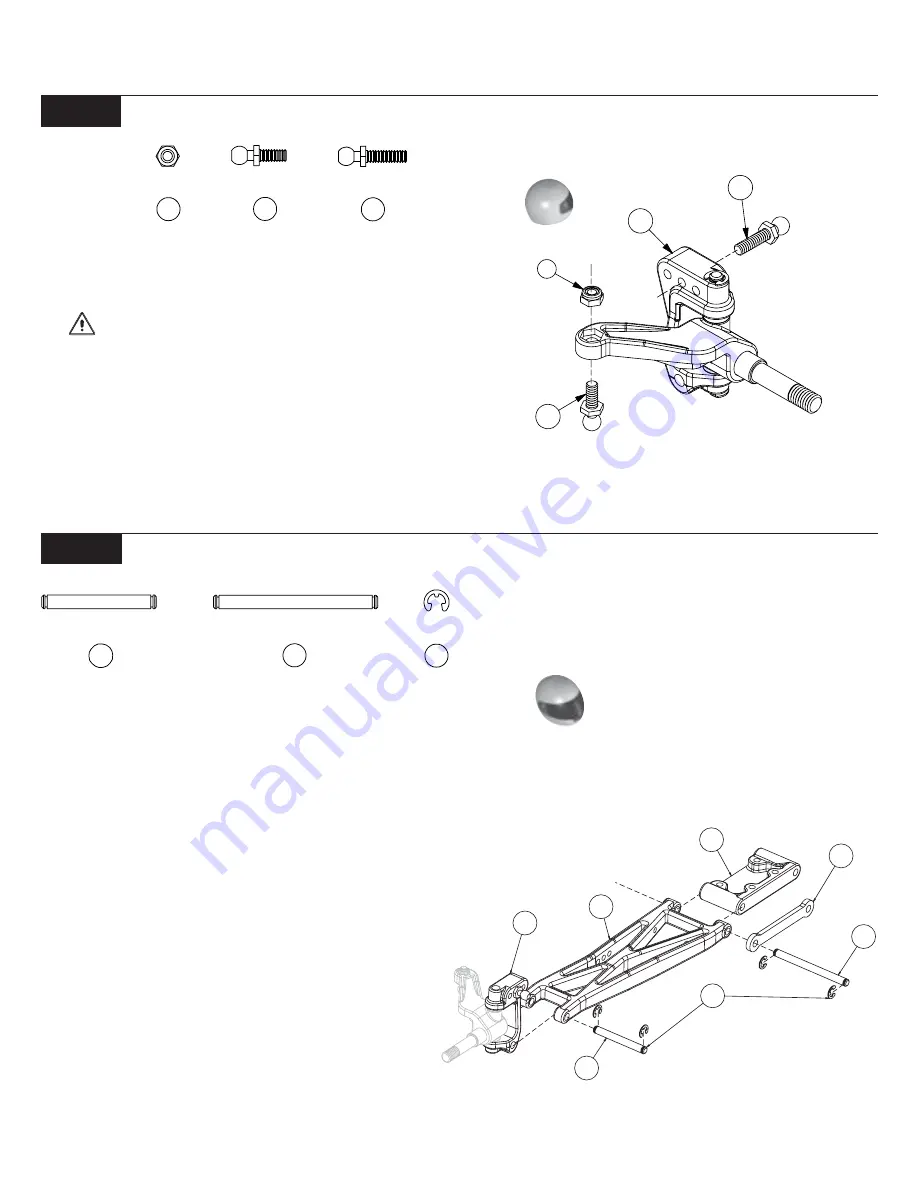
Step 13. Insert a 3/8" ball stud (26) into the middle hole on
top of each spindle carrier (33), (34) from the front as shown,
and tighten.
IMPORTANT NOTE:
Do not overtighten the ball
studs!
!
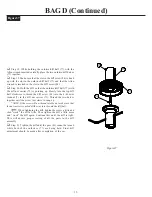
Step 14 . Insert a 4-40 mini locknut (7) into the hex area in
the top of each spindle (28), (29). Thread a 1/4" ball stud (10) into
the nut from the bottom of the spindle (28), (29) and tighten.
7
10
Figure 11
26
40
41
35
Figure 12
Figure 11
!
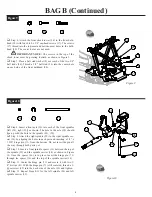
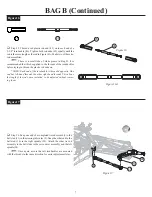
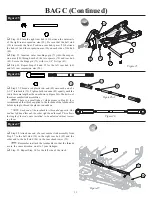
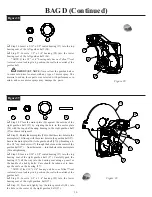
Step 15. Attach the right spindle and carrier assembly to a front
suspension arm (38) as shown in Figure 12. Note that the spindle arm
faces the side of the suspension arm (38) with the shock mount holes
(rear) and the ball stud pointing forward. Line up the holes in the
spindle carrier (34) with the holes in the front arm (38), insert a 1/8“ x
.960"" hinge pin (35) and attach a
1/8” E-clip (41) to both sides of the hinge pin (35).
!
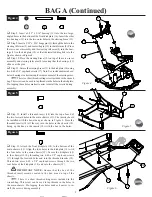
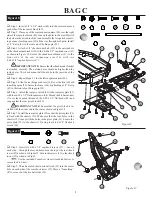
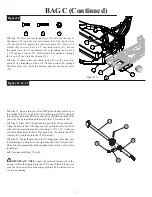
Step 16. Attach the arm (38) to the right side of the front pivot
block (39) by inserting a 1/8" x 1.42" hinge pin (40), from the front,
through the arm (38) and pivot block (39) as shown in Figure 12.
!
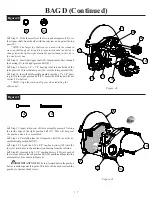
Step 17. Insert a 1/8" E-clip (41) in the groove in the rear of the
hinge pin (40) only.
!
Step 18. Repeat Steps 15-17 for the left spindle and carrier assem-
bly and left front suspension arm (38).
!
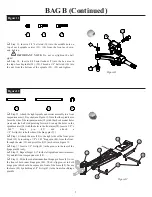
Step 19. Slide the red aluminum front hinge pin brace (42) over
the front of both inner hinge pins (40). The E-clip grooves in both
hinge pins (40) should be exposed in front of the brace (42). Secure
the brace (42) by attaching a 1/8" E-clip (41) to the front of each hinge
pin (40)
Summary of Contents for XXX-T Matt Francis Edition
Page 2: ......


