background image


6. CLEANING AND MAINTENANCE 

TP-05 / TP-06 / TP-07 


TP-08 


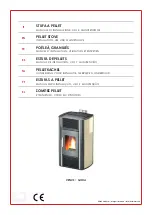
Summary of Contents for TP-05

Page 1: ...Installation and User Manual Model TP 05 TP 06 TP 07 TP 08 TP 09 TP 10 TP 11 Pellet Stove Tested according to DIN EN 14785 E N...

Page 2: ...5 2 MENU FUNCTIONS 13 5 2 1 COMBUSTION FUNCTIONS MENU 13 Level 13 Auger Calibration 13 Fan Calibration 13 5 2 2 HEATING MANAGEMENT 13 5 2 4 CHRONO MENU 14 5 2 5 LOADING MENU 15 5 2 6 TIME AND DATE MEN...

Page 3: ...tallation and instructions as described in the guide We recommend you to keep this guide in order to reach the information about the correct use of the stove at the beginning of every winter 2 FEATURE...

Page 4: ...tove or its accessories may still be damaged during transport Therefore after removing the stove from the package check whether it is complete and undamaged In case of any damage notify your dealer If...

Page 5: ...ng to the interior spaces and give heat to the environment they should not be installed in places such as bathrooms shelter cellar And they should not be used for cooking 4 3 ELECTRICITY The electrici...

Page 6: ...chimney should be at least 80 cm higher than the highest point of the roof Use rain cap or wind cowl at the end of the chimney to avoid to come inside anything bird etc Distance between raincap and ch...

Page 7: ...ROOM THERMOSTAT CONNECTION POINT TP 05 TP 06 TP 07...

Page 8: ...TP 08 TP 09...

Page 9: ...TP 10 TP 11...

Page 10: ...the chimney provider Minimum distances to be observed in flammable or heat sensitive materials eg furniture wallpaper wood panels see diagram above are This distance can be reduced to 40 cm when the p...

Page 11: ...to access the menus P3 SUBMENU ENTRY Use the P3 to enter a submenu in the current menu SAVE Use the P3 to save data or values in the current submenu MENU CHANGE Use the P4 and P6 s to switch between...

Page 12: ...e chimney and second ash tray is clean Er03 Chimney outlet temperature drop or auger failure Check if there is fuel in the combustion chamber and whether the fuel is supplied by the coil Er05 Chimney...

Page 13: ...n and Fan Calibration menus Level In this menu the pellet combustion speed can be changed with the help of P4 and P6 buttons Ex 1 2 3 4 5 6 A A Auto Use P3 to save Auger Calibration Enter the pellet l...

Page 14: ...in the table below should be followed 3 time slot opening and 3 time slot shutdowns can be programmed for each day To set each time slot use the P3 menu button to flash the time slot on the display a...

Page 15: ...numbers will flash Use P4 and P6 to change numbers After setting save it with P3 After the time setting is completed P4 button changes to day month year Press P3 to enter The display will flash Use P4...

Page 16: ...6 CLEANING AND MAINTENANCE TP 05 TP 06 TP 07 TP 08...

Page 17: ...TP 09 TP 10...
Page 18: ...NG For the cleaning of the flame transmission channels the combustion wall behind the firepot should be removed by taking screws out Clean the flame channels and put the part where its place 6 2 COMBU...

Page 19: ...continue to serve you in the necessary conditions You are kindly requested to inform the relevant dealer where you have purchased the product from with the model number printed on the label on the bac...

Page 20: ...anayi B lgesi 8 Cad No 16 Melikgazi KAYSER Tel 90 0 352 321 28 11 Fax 90 0 352 321 28 14 E posta aral aralmakina com tr Sign Stamp Company Name Address Tel Fax E posta Sign Stamp User Informations Nam...

Reviews: