background image

Operator's guide:

1)Unpacking instructions
2)The handles
3)Cleaning of the internal
4)External cleaning
5)Connections to mains
6)Controls

8)Internal cleaning
9)Replacement of the interna light
10)Replacement of the door's magnetic gasket

7)Checking the correct functioning

Maintenance manual (Page 48):

1)Cleaning the condenser
2)Replacement of a glass panel
3)Wiring diagram diagram of refrigeration unit

!

I

UK

D

E

F

NL

P
S

DK

FIN

B

GR

CZ
EE

LV

LT

H

M

PL

SK

SLO

6

Operator's guide

WARNINGS
It is most important that this instruction booklet is kept together with the appliance both for future
reference and for reasons of safety.
1

Assistance has to be provided by an authorized engineer only. Always use original spare parts.

UNPACKING INSTRUCTIONS

CARDBOARD PACKAGING 1a

WOODEN CRATE

2. THE HANDLES
1.

2

3.

3. CLEANING OF THE INTERNAL
1
2
4. EXTERNAL CLEANING
1

5. CONNECTIONS TO MAINS
1.

(A)

2.

3.

4.

Notice:

5.

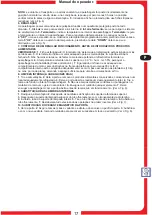
. Adults should operate this appliance only. Do not allow children to use the controls or play with it.

. Cut surrounding tape. Remove the cardboard packaging by sliding

upwards.

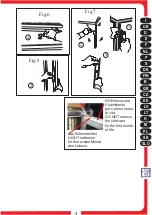
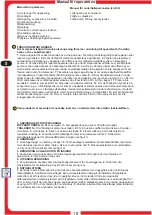
The handles will be found into a package inside the appliance. . Fix the base part of the handle using

the two screw inserted on the holes already. Tighten with care.

Place the plastic part and press down

until it clicks into place

. Only clean the internal components and glass panels with a soft, wet sponge and a neutral detergent.
. Dry with care using a soft cloth.

. For the glass panels use the same products as used for the internal cleaning.

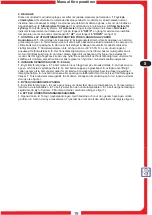
Ensure that mains voltage and frequency are the same as those stated on the rating plate

attached

to the appliance.

Ensure that the supply socket has the following characteristics:

Ensure that there is no danger of explosion (AD) in the room.

The connecting cable to the appliance is H05 VVF, designed for internal use only.

in case of

appliance, during the transport or storage, has been erroneously placed in horizontal position or upside-
down, it must be left in the correct vertical position for at least 3 hours before connecting it to the electrical
supply.

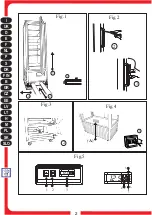
Insert the plug (do not use triple and reductions outlets) ( see picture 4).

2

3

4

5

6

. It

is forbidden to modify in any way the main functions and characteristics of this appliance. . The electrical
installation of the appliance should be carried out by a qualified electrician or other competent person.

. Never attempt to carry out repairs unassisted. Inexpert repairs can cause serious damage and

malfunction. . This appliance is not suitable for the storage of basic commodities not including food-
stuffs. . The manufacturers of this appliance accept no responsibility for the consequences of misuse in
contravention of these safety instructions. It further reserves the right to carry out improvements without
prior notice.

a)

b)

c)

It is properly

earthed.

It is appropriate for the nominal current as set out on the rating plate.

It complies with the

IEC regulations: -Magneto-thermic differential switch with in=nominal value as stated on the rating plate;
-Differential with ID sensitivity = 30 mA.

7

8

9

10

11

12

13.

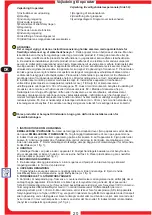
. Avoid installing the cabinet directly in line with sunlight. . Nevere install the appliance

near sources of heat, such as radiators, stoves, etc. . Keep the ventilation grills free from obstruction for
at least 30 cm.

. Ensure that the products displayed on the shelves and grills do not hang over the

edges.

. If damp air or products to be refrigerated should cause ice to form on the evaporator, we

recommend stopping the compressor and placing the goods in special refrigerated containers, kept at the
same temperature, until defrosting is completed;if this is not carried out the compressor will continue to
operate leading to a wasteful consumption of electricity and poor performance.

.

Do not keep the neon light up if the

refrigeration is off.

If the appliance is not

working and unused, it is indispensable to keep the door open at least 10 cm. Avoiding this, you will avoid
also the consequent mildew formation and unpleasant smells.

. Remove the nails from the wooden crate with care. . Insert forks of

fork-lift truck between appliance and pallet or crate. . Lift the appliance. . Remove the pallet or crate.

. Place the appliance on a horizontal level surface. . Pay attention anything is left inside the packing.
. Separate the packing materials according to their type, for easier disposal (See picture 1).

(See picture 2).

. Remove the protection

tape from the steel panel and from the grids (See picture 3).

Our products are for internal use only do not install outside restaurants, shops.

1.

1b

2

3

4

5

6

7

2

!

!

Summary of Contents for SNELLE 400 GBT

Page 1: ...BETJENINGS ASENNUS JA K YTT INSTALLATIE EN GEBRUIK INSTALACE A POU IT UN INSTALACIJA IN UPORABA PAIGALDAMINE JA KASUTAMINE BE P T S S HASZN LAT IN TAL CIA A POU ITIE INSTALACJA I UZYTKOWANIE ISTALLAZ...

Page 2: ...I UK D E F NL P S DK FIN B GR CZ EE LV LT H M PL SK SLO 2 Fig 2 Fig 1 Fig 3 Fig 4 3 4 2 5 2 A 5 T 12 5 P 3 2 1 4 5 12 5 P 6 Fig 5 2 3...

Page 3: ...EE LV LT H M PL SK SLO 3 Fig 7 2 Fig 6 Fig 8 4 2 3 4 NON rimuovere il lubrificante per il primo mese di vita DO NOT remove the lubricant for the first month of life das Schmiermittel f r den ersten M...

Page 4: ...rno della cella Evitando ci eviterete anche la conseguente formazione di muffa ed odori sgradevoli Non tenere l illuminazione neon accesa senza la refrigerazione inserita Tagliare la reggia sfilare la...

Page 5: ...m Il vano interno sia caricato adeguatamente senza un peso eccessivo sui ripiani Max Kg 10 per ogni piano lasciando spazi per una buona circolazione dell aria fredda Togliere l alimentazione Aprire la...

Page 6: ...dify in any way the main functions and characteristics of this appliance The electrical installation of the appliance should be carried out by a qualified electrician or other competent person Never a...

Page 7: ...rosting Take the internal plug out Do not use sharp or pointed metal objects to remove the ice from the evaporator Dry everything with care Leave the appliance to dry with the door open before restart...

Page 8: ...dem Verdampfer kommen empfehlen wir den Kompressor auszuschalten und die Ware w hrend des Abtauens bei gleicher Temperatur in dem vorgesehenen Beh lter aufzubewahren andernfalls arbeitet der Kompress...

Page 9: ...lassen ist Klima Klasse 4 Es muss ein auf den Motorenraum angepasster Luftstrom gesichert sein ohne Verstopfungen vor den Gittern f r wenigstens 30 cm Der Innenraum ist angemessen zu laden ohne berh h...

Page 10: ...muy bien Aplicar la parte de pl stica apretando hasta el disparo Limpiar las partes internas y los cristales s lo con una esponja blanda y detergents neutros Secar cuidadosamente con un pa o suave Us...

Page 11: ...uitar el tap n de fondo No usar cuerpos met licos cortantes o con puntas para tratar de quitar el hielo del evaporador Secar cuidadosamente cada cosa Dejar secar con la puerta abierta el aparato antes...

Page 12: ...our des raisons de s curit 2 3 4 5 6 L assistance cet appareil doit tre effectu par un Centre de Service Apr s Vente autoris Utiliser seulement des pi ces de rechange originales EMBALLAGE EN CARTON 1a...

Page 13: ...8 9 6 REGLAGE 5 UP 6 DOWN 7 CONTROLER QUE 1 8 NETTOYAGE INTERNE DEUX FOIS PAR MOIS 1 2 3 4 5 6 7 9 REMPLACEMENT DES TUBES NEON 1 2 3 4 5 6 7 10 REMPLACEMENT DU JOINT MAGNETIQUE DE LA PORTE 1 2 3 L ap...

Page 14: ...compressorgroep ten minste 30cm van de wand Denk eraan dat de tentoongestelde producten niet buiten de omtrek van de schappen of roosters mogen steken 12 13 14 1 UITPAKINSTRUCTIES KARTONNEN VERPAKKIN...

Page 15: ...gd zie Fig 5 De stekker in het stopcontact zit De schakelaar van de koelinstallatie omgezet is en het groene lampje brandt De thermometer een temperatuur aangeeft die geschikt is voor hetgeen erin gep...

Page 16: ...n o deixar os produtos expostos sobressair fora do per metro das prateleiras ou grelhas Ao se verificar forma o anor mal de gelo no evaporador causado pela humidade do ar ou pelos produtos a serem re...

Page 17: ...equado para as mercadorias A porta est bem fechada N o h raios solares ou de far is com elevada pot ncia a reflectir directamente na aparelhagem A temperatura ambiente n o superior a 30 C hum rel 55 p...

Page 18: ...ens omkrets Om det bildas f r mycket is p evaporatorn p g a luftfuktighet eller varor som ska nedkylas rekommenderas det att stanna kompressorn och placera varorna i en l mplig kylbeh llare med samma...

Page 19: ...jus Rumstemperaturen inte r h gre n de 30 C 55 R L som utrustningen r anpassad f r Klimatklass 4 Det finns tillr ckligt utrymme minst 30cm bakom motorgallret s att motorn f r tillr cklig kylning Varor...

Page 20: ...nnelse af is p fordamperen som f lge af fugtighed i luften eller i f devarerne som skal afk les anbefales det at standse kompressoren og anbringe varerne i k leskab k ledisk indtil afrimningen har fun...

Page 21: ...D ren er ordentligt lukket Rumtemperaturen ikke er h jere end den temperatur som apparatet er indstillet til 30 C R L 55 Klimaklasse 4 Der er tilstr kkelig luft mindst 30 cm omkring gitteret der d kke...

Page 22: ...esta tai s ilytett vist tuotteista Suorita sulatus aseta tuotteet sulatuksen ajaksi astiaan joka on j hdytetty samaan l mp tilaan kuin laite ja pys yt kompressori Muuten kompressori toimii jatkuvasti...

Page 23: ...aloa tai voimakasta valoa Ymp rist n l mp tila ei ole yli 30 C 55 Suht Kost jolle laite on s detty ilmastoluokka 4 Moottorin ritil n l heisyydess on riitt v sti tilaa v hint n 30 cm jotta ilmaa p see...

Page 24: ...essor uit te zetten en de waren gedurende de tijd die nodig is voor het ontdooien in een adequate op dezelfde temperatuur gekoelde plaats te zetten Indien dit niet gebeurt zal de compressor voortduren...

Page 25: ...tuur niet hoger is dan 30 C R V 55 waarvoor het apparaat geschikt is Klimaatklasse 4 Een luchtstroom naar de motorruimte gegarandeerd is en er tenminste 30 cm ruimte zonder belemmeringen voor het roos...

Page 26: ...1 51 1 3 2 1 2 3 4 5 6 7 8 9 10 11 12 13 14 30 0 cm evaporator 3 cm 1 1 1 2 3 4 5 6 7 2 1 2 3 3 1 2 4 1 2 5 1 2 3 4 N B 5 1 2 3 IEC In Id 30 mA AD H05 VVF 3 4 I UK D E F NL P S DK FIN B GR CZ EE LV L...

Page 27: ...6 1 2 3 4 SET 5 UP 6 DOWN 7 1 2 3 4 5 6 7 8 8 1 2 3 4 5 6 7 9 1 2 3 4 5 6 7 10 1 2 3 5 30 C U R 55 4 30 cm Max 10 Kg 6 7 8 I UK D E F NL P S DK FIN B GR CZ EE LV LT H M PL SK SLO 27...

Page 28: ...tavit kompresor po dobu pot ebnou k odmrazen a mezit m ulo it zbo do jin ho chlazen ho prostoru o stejn teplot V opa n m p pad by kompresor pokra oval v nep etr it m chodu co by m lo za n sledek zbyte...

Page 29: ...ev ete dv ka vyjm te chlazen zbo a ulo te je do jin ho chladic ho za zen Nechte otev en dv ka a prove te kompletn odmrazen Sejm te v ko kter se nach z na dn boxu Pro odstra ov n ledu z v parn ku nepou...

Page 30: ...e temperatuurile jahutatud mahutisse vastasel korral t tab kompressor pidevalt ebat hususalt tarbides asjatult elektrienergiat Kui vitriinkapp seisab ja seda kasutata tuleb kindlasti j tta uks lahti v...

Page 31: ...hteline niiskus 55 mis on seadme etten htud t tingimused Kliimaklass 4 Tagatud on vajalik hujuurdevool mootoriruumi ja resti ees on v hemalt 30 cm vaba ruumi Siseruum on ige koormusega ja riiulid ei o...

Page 32: ...novietot produktus pietiekami atdzes t l dz l dz gai temperat rai viet un veikt atkaus anu pret j gad jum ilglaic ga kompresora funkcion ana rad s p r k lielu elektroener ijas pat ri u un pazemin s li...

Page 33: ...etri kas piem roti apr kojumam Klimatisk klase 4 J nodro ina adekv ta gaisa pl smas padevi motoram nenovietojot r us gaisa pl smas ne maz k k 30 cm starp sienu un paka jo iek rtas da u Iek j noda a ti...

Page 34: ...kit iki tos pa ios temperat ros aldom talp ir palaukti kol aparatas atitirps prie ingu atveju kompresorius dirbs nei sijungdamas sukels bereikaling energijos s naud ir duos visai menk naud Jei vitrin...

Page 35: ...ne daugiau kg vienai lentynai ir ar pakanka erdv s tinkamam alto oro cirkuliavimui tinimo tamp Atidaryti duris ir i traukus ten laikomus maisto produktus perkelti juos tinkamai aldom viet Duris palik...

Page 36: ...t st s csek ly teljes tm nyt eredm nyez Ha a vitrint zemen s haszn laton k v l hagyj k akkor n lk l zhetetlen az ajt legal bb 0 cm nyire t rt n nyitvahagy sa Fesz ts k fel a fadeszk kat vatosan j rjan...

Page 37: ...szintre helyet hagyva ez ltal a hideg leveg szabad bels raml s nak le a h l zati csatlakoz st Nyiss k ki az ajt t s vegy k ki a tart s tott rut majd megfelel en h t tt helyre helyezz k t Hagyj k nyitv...

Page 38: ...nserva o etti o ra li mhumiex alimentari Id ditta li olqot l appliance ma terfax responsabilita meta n normi spe ifikati ma ji ux rispettati u l mi uri ta prikawzjoni ma ji ux me uda Id ditta tirri er...

Page 39: ...jiet kollha b ordni ghall kuntrarju ara disinn 7 Ifta il bieb Zomm f idejk il gasket magnetiku w ne ih mill frame Da al il gasket il gdid u ag fas l isfel ma kullimkien ara disinn 8 display juri t tem...

Page 40: ...ty do specjalnego zbiornika och odzonego do tej samej temperatury co urz dzenie na czas konieczny do przeprowadzenia operacji usuni cia szronu W przeciwnym razie kompresor b dzie dzia a nieprzerwanie...

Page 41: ...owiedni spos b bez nadmiernego ci aru na p kach maks Kg na ka d p k pozostawiaj c wolne miejsca w celu dobre kr enia zimnego powietrza Odci dop yw pr du Otworzy drzwiczki wyj artyku y i u o y je w mie...

Page 42: ...bo slne n mu iareniu Nein talujte pr strojov zariadenie do bl zkosti tepeln ch zdrojov ako s napr kachle radi tory a pod Ventila n mrie ky kompresorovej jednotky musia by vzdialen od steny aspo 30 cm...

Page 43: ...e ktor hodnoty je pr strojov zariadenie ur en Klimatick trieda 4 Pred ro tom mus by vo n priestor min 30 cm aby bol zaru en l zaru en dostato n pr vod vzduchu do priestoru motora Vn torn priestor mus...

Page 44: ...adu vo v parn ku doporu uje sa zastavi kompresor na dobu potrebn na odmrazenie a medzit m odlo i tovar na in chladn miesto s rovnakou teplotou V opa nom pr pade by kompresor pokra oval v prev dzke o...

Page 45: ...prostor je pravilno nabavljen brez previsoke te e na predalih najve Kg za vsaki predal in da je dovolj prostora za dobri notranji preto Izklju iti elektri no napajanje Odpreti vrata odstraniti blago i...

Page 46: ...derhoud Pokyny pro dr bu Hooldusjuhend Instrukcija tehnisk s apkopes darbiniekam Techninio aptarnavimo darbuotojo vadovas Karbantart si k zik nyv Manwal g all manutenzjoni Podrecznik obslugi konserwac...

Page 47: ...I UK D E F NL P S DK FIN B GR CZ EE LV LT H M PL SK SLO 47 Fig 1 2 3 Fig 2 3...

Page 48: ...e the dust layer from the condenser s fins using a brush Use a vacuum cleaner to remove the remaining dust from between the fins Replace the grill and switch on the electricity supply Switch off elect...

Page 49: ...A l aide d un aspirateur liminer la couche de poussi re restante Remonter la grille et rebrancher l appareil D brancher l appareil Enlever la porte en d vissant les vis des charni res D filer vers le...

Page 50: ...aget Skruva ur skruvarna till fr mre galler Ta bort dammlagret fr n kondensorns fl nsar Dammsug bort resterande damm mellan fl nsarna S tt tillbaka gallret och anslut utrustningen till eln tet Se fig...

Page 51: ...NMAAK VAN DE KOELINSTALLATIE 1 2 3 4 5 2 VERVANGING VAN EEN GLASWAND 1 2 3 4 5 6 Schakel de elektrische voeding uit middels de hoofdschakelaar ter bescherming van het stopcontact en haal de stekker ui...

Page 52: ...st ra Puhastada pintsliga tolmukord kondensaatori ribidelt Eemaldada lej nud tolm tolmuimejaga Asetada rest kohale tagasi ja l litada elektritoide sisse vt Joon 1 L litada elektritoide v lja Keerata u...

Page 53: ...a kondenz tor bord ir l a finom porr teget A porsz v val t vol tsa el a marad k port Szerelje vissza a r csot s k sse be a h l zati csatlakoz st l sd bra ajt t Csavarozz k ki a k ls s a bels r gz t cs...

Page 54: ...iahnite upev ovacie skrutky z bo n ho ro tu a vylo te samotn ro t tetcom odstr te prach usaden na lopatk ch kondenz tora Vys va om odstr te zbytok prachu Op t hnite skrutky zo z vesu dver a dvere vybe...

Page 55: ...I UK D E F NL P S DK FIN B GR CZ EE LV LT H M PL SK SLO 55 M M 11 13 5 6 9 7 12 14 10 8 M M 11 13 5 6 9 7 14 8 15...

Page 56: ...clean it periodically Die meisten Einheiten haben eine Tasse mit automatischer Verdunstung Auch das Tauwasser kann erhebliche Sch den verursachen da das Rohr dass die notwendige W rme f r die Verdampf...

Page 57: ...Evaporador Filtro Interruptor Caja de bornes Motocompresor Neon Resistencia Reactor Enchufe Dispositivo de arranque Termostato Ventilador condensador Alimentador 1 2 3 4 5 6 7 8 9 10 11 12 13 14 15 Ba...

Page 58: ...rasia Moottorikompressori Neon Vastus Reaktori Virtapistoke K ynnistin Termostaatti Kondensaattorin tuuletin Virtal hde 1 2 3 4 5 6 7 8 9 10 11 12 13 14 15 Teiltje Koelinstallatie Verdamper Filter Sch...

Page 59: ...ondenz tor ventil tor T pegys g 1 2 3 4 5 6 7 8 9 10 11 12 13 14 15 Trej Kondensatur Evaporatur Filtru Interruttur Terminal Kompressur bil mutur Dwal Neon Rezistenza Rijattur Plakka tal Kurrent Starte...

Page 60: ...FRIGO s p a 42024 Castelnovo di Sotto Reggio Emilia Italy Via Galileo Galilei 22 Tel 0522 683246 0522 688443 Fax 0522 682196 Fax Uff acquisti 0522 682311 Fax Uff amm 0522 688444 e mail info tecfrigo c...

Reviews: