background image

English

   - 35 -

Features

Remote controlled colour LED TV.

• 

Fully integrated Terrestrial digital TV (DVB-T  

• 

MPEG2)
HDMI connectors for digital video and audio.

• 

USB input.

• 

1000 programmes (adigital).

• 

On Screen Display (OSD) menu system.

• 

Integrated tuner DVB-T, MPEG2 compatible.

• 

Scart socket for external devices.

• 

Stereo sound system. (Nicam)

• 

Teletext, fastext, TOP text.

• 

Headphone connection.

• 

Automatic programming system.

• 

Forward or backward manual tuning.

• 

Sleep timer / Child lock.

• 

Automatic sound mute when no transmission.

• 

NTSC playback.

• 

AVL (Automatic Volume Limiting).

• 

Auto power down.

• 

PLL (Frequency Search).

• 

PC input.

• 

Plug&Play for Windows 98, ME, 2000, XP, Vista, 

• 

Windows 7.
Game Mode.

• 

Introduction

Thank you for choosing this product. This manual 
will guide  you through the proper operation of your 
TV. Before operating the TV, please read this manual 
thoroughly. Please keep this manual in a safe place 
for future reference.
This device is intended to receive and display TV 
programmes. The different connection options make 
an additional expansion of the reception and display 
sources possible (receiver, DVD player, DVD recorder, 
VCR, PC etc.).
This device is only suitable for dry indoor use. This 
appliance is intended solely for private domestic use 
and may not be used for industrial and commercial 
purposes. We exclude liability in principle, if the device 
is not used as intended, or unauthorized modi

fi

 cations 

have been made. To operate your LED TV in extreme 
ambient conditions may cause the damage of the 
device.

Preparation

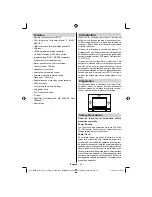
For ventilation, leave a free space of at least 10 cm 
all around the set. To prevent any fault and unsafe 
situations, please do not place any objects on top of 
the set. Use this device in moderate climates.

10  cm

10
 cm

10

 cm

Safety Precautions

Read the following recommended safety 
precautions carefully.

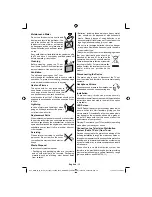
Power Source

The TV set should be operated only from a 220-240V 
AC, 50 Hz outlet. Ensure that you select the correct 
voltage setting for your convenience.

Power Cord

Do not place the set, a piece of furniture, etc. on the 
power cord or pinch the cord. Handle the power cord 
by the plug. Do not unplug the appliance by pulling from 
the power cord and never touch the power cord with wet 
hands as this could cause a short circuit or electric shock. 
Never make a knot in the cord or tie it with other cords. 
The power cord should be placed in such a way that they 
are not likely to be stepped on. A damaged power cord 
can cause 

fi

 re or give you an electric shock. When it is 

damaged and needs to be replaced, it should be done 
by quali

fi

 ed personnel.

A02_MB62_[GB]_(01-TV)_woypbpr_3900UK_IDTV_BRONZE19_26970LEDW_10075473_50200007.indd   35

A02_MB62_[GB]_(01-TV)_woypbpr_3900UK_IDTV_BRONZE19_26970LEDW_10075473_50200007.indd   35

17.09.2011   15:56:57

17.09.2011   15:56:57

Summary of Contents for TL-26LE970B

Page 1: ...BEDIENUNGSANLEITUNG OPERATING INSTRUCTIONS TL 26LE970B LCD FARBFERNSEHGERÄT LCD COLOR TELEVISION ...

Page 2: ...nder verwalten Favoriten 16 Tastenfunktionen 16 Sender verwalten Kanalliste sortieren 17 Bildschirminformationen 17 Medienwiedergabe mit Medienbrowser 17 Videos per USB anschauen 17 Fotos via USB anschauen 18 Musik via USB wiedergeben 18 Medienbrowser Einstellungen 19 Bildgröße ändern Bildformate 19 Bildeinstellungen konfigurieren 20 Optionen des Bildeinstellungen Menüs bedienen 20 Optionen des Bi...

Page 3: ...ie weitere Verwendung gut auf Geben Sie das Handbuch unbedingt auch weiter wenn Sie das Gerät verkaufen oder weitergeben Bestimmungsgemäßer Betrieb Dieses Gerät dient zum Empfang und zur Anzeige von TV Programmen sowie zum Abspielen von CDs und DVDs siehe Kapitel Mit diesem Gerät kompatible Disc Typen Die verschiedenen Anschlussmöglichkeiten ermöglichen eine Erweiterung der Empfangs und Anzeigeque...

Page 4: ...el können zu Bränden oder Stromschlägen führen Wenn das Netzkabel beschädigt ist und ausgetauscht werden muss darf dies nur durch qualifizierte Personen erfolgen Feuchtigkeit und Wasser Verwenden Sie dieses Gerät nicht in feuchter oder dunstiger Umgebung vermeiden Sie das Badezimmer die Spüle in der Küche oder die Umgebung der Waschmaschine Achten Sie darauf dass dieses Gerät niemals Regen oder Wa...

Page 5: ...ilersystem kann unter Umständen eine mögliche Feuergefahr darstellen Außer Betrieb nehmen und lagern Ziehen Sie den Netzstecker aus der Steckdose und verpacken Sie das TV Gerät in einer geeigneten Kartonage Entnehmen Sie die Batterien aus der Fernbedienung und packen Sie die Fernbedienung zum TV Gerät HINWEIS Das TV Gerät sollte in einem trockenen und staubfreien Raum gelagert werden Stromquelle D...

Page 6: ...Audio Anschlusskabel Batterien 2 x AAA Bedienungsanleitung HINWEIS Prüfen Sie den Lieferumfang direkt nach dem Erwerb Stellen Sie sicher dass alle Zubehörteile enthalten sind A01_MB62_ DE _ 01 TV _ VESTEL_GERMANY _woypbpr_3900UK_IDTV_BRONZE19_26970LEDW_10075473_50200007 indd 5 A01_MB62_ DE _ 01 TV _ VESTEL_GERMANY _woypbpr_3900UK_IDTV_BRONZE19_26970LEDW_10075473_50200007 indd 5 17 09 2011 15 55 46...

Page 7: ...e bei längerer Abwesenheit die Stromversorgung Beachten Sie dass der Energiesparmodus anstatt des Bereitschaftsmodus effizienter ist als die Unterbrechung der Stromversorgung durch Ziehen des Netzsteckers aus der Steckdose Daher empfehlen wir zur Reduzierung Ihres jährlichen Stromverbrauchs dringend die Energiesparmodus Option zu aktivieren Zudem raten wir den Fernseher zum Energiesparen bei Nicht...

Page 8: ...ke 15 Programm Zurück Programm weiter im DTV 16 Modus Elektronischer Programmführer im DTV 17 Modus Programm Weiter Programm zurück im DTV 18 Modus Schlaf Timer 19 Auswahl Bildmodus 20 Ok Bestätigung Halten im TXT Modus 21 Kanalliste editieren Cursor nach unten 22 Verlassen ZurückReturn Indexseite im TXT 23 Modus Cursor nach rechts Subseiten im TXT Modus 24 Cursor nach oben 25 Voriges Programm 26 ...

Page 9: ...ehe nachstehende Abbildung SCART 3 Eingang oder Ausgang zum Anschließen externer Geräte Schließen Sie das SCART Kabel an den SCART Anschluss am Fernsehgerät und an den SCART Anschluss des externen Gerätes z B Decoder Videorecorder oder DVD Player an Beachten Sie Wenn ein externes Gerät über den SCART Anschluss verbunden ist schaltet das Fernsehgerät automatisch in den AV Modus um Beachten Sie S VH...

Page 10: ...sskabels Achten Sie darauf dass Sie die Anschlüsse gleicher Farbe miteinander verbinden Um die Audioverbindung zu ermöglichen müssen Sie die ROTEN und WEISSEN Eingänge des seitlichen AV Anschlusskabels verwenden Stecken Sie dann die Anschlüsse des Audiokabels von Ihrem Gerät in die ROTEN und WEISSEN Eingänge des mitgelieferten AV Anschlusskabels Achten Sie darauf dass Sie die Anschlüsse gleicher F...

Page 11: ...formationen zur Auflösung finden Sie im Anhang PC Eingang Hinten AV Eingang seitlich PC VGA Kabel nicht mitgeliefert PC Audio Kabel nicht mitgeliefert Eingang Audio Video Anschlusskabel Oder SIDE AV Seitliche AV Anschlüsse verwenden Sie können eine Reihe von Zusatzgeräten an Ihr LED TV Gerät anschließen Verwenden Sie den seitlichen AV Anschluss wenn Sie einen Camcorder oder eine Camera anschließen...

Page 12: ... LED gegebenenfalls durch Blinken an dass Standby Suche Over Air Download oder Timer aktiv sind Anschluss eines DVD Players Wenn Sie einen DVD Player an Ihr LED TV Gerät anschließen möchten können Sie dafür die Anschlüsse des TV Geräts verwenden DVD Player können verschiedene Anschlüsse aufweisen Bitte sehen Sie im Handbuch Ihres DVD Players für weiterführende Informationen nach Schalten Sie das T...

Page 13: ...dem Bildschirm wird eine Lautstärkeskala Schieberegler eingeblendet Kanalauswahl vorheriger oder nächster Kanal Mit P wählen Sie den vorherigen Kanal Mit P wählen Sie den nächsten Kanal Kanalauswahl Direktzugriff Wählen Sie mit den Zifferntasten an der Fernbedienung Kanäle zwischen 0 und 9 Der Fernseher wechselt zum ausgewählten Kanal Zur Auswahl zweistelliger Kanäle drücken Sie die entsprechenden...

Page 14: ...ation über die farbigen Tasten die Cursortasten und die Taste OK Die Bedienung kann je nach Inhalt des digitalen Teletexts unterschiedlich sein Folgen Sie den Anweisungen die auf dem Bildschirm des digitalen Teletexts angezeigt werden Wenn Sie die Taste drücken kehrt das Fernsehgerät zum normalen Fernsehprogramm zurück Bei digitalem Rundfunk DVB verfügen Sie neben Kanälen die digitalen Teletext un...

Page 15: ...en Sie Mit der MENU Taste können Sie den Vorgang abbrechen Nachdem alle verfügbaren Kanäle gespeichert wurden erscheint die Programmliste auf dem Bildschirm Wenn Sie die Kanäle nach LCN sortieren möchten wählen Sie Ja und drücken die OK Taste Drücken Sie zum Schließen der Kanalliste und Aufrufen des Fernsehprogramms die OK Taste Installation Drücken Sie die MENU Taste an der Fernbedienung und wähl...

Page 16: ...unden wurde werden alle neuen Kanäle die sich noch nicht in der Liste befinden gespeichert Analoge Feinabstimmung Wählen Sie aus dem Installationsmenü die Option Analoge Feinabstimmung indem Sie die Tasten oder und OK drücken Der Analoge Feinabstimmung Bildschirm wird angezeigt Die Analoge Feinabstimmung ist nicht verfügbar wenn keine analogen Kanäle digitalen Kanäle oder externen Quellen gespeich...

Page 17: ...en 0 9 können Sie den markierten Buchstaben durch die über der Taste aufgedruckten Buchstaben ersetzen Drücken Sie anschließend zum Speichern die OK Taste Mit M brechen Sie den Vorgang ab Einen Kanal sperren Mit der grünen Taste können Sie alle Kanäle markieren bzw alle Markierungen aufheben mit der gelben Taste können Sie einen einzelnen Kanal markieren bzw dessen Markierung aufheben Wählen Sie d...

Page 18: ...wser Drücken Sie zum Fortfahren die OK Taste Die Menüoptionen des Medienbrowsers werden angezeigt Zudem wird der Medienbrowserbildschirm automatisch eingeblendet wenn Sie ein USB Gerät einstecken Sie können die Musik Bild und Videodateien auf dem angeschlossenen USB Speicherstick wiedergeben Wählen Sie mit den Tasten oder zwischen Videos Fotos Musik und Einstellungen Videos per USB anschauen Wenn ...

Page 19: ...wiedergabe Wenn Sie die Taste ein weiteres Mal drücken ist nur die Zufallswiedergabe aktiviert Bei einer vierten Betätigung werden alle Funktionen aktiviert Anhand der Symbole sehen Sie welche Funktionen deaktiviert wurden RETURN Verlassen Rückkehr zur Dateiliste INFO Zeigt den Hilfebildschirm an Musik via USB wiedergeben WennSiedieMusik OptionausdenHauptoptionenauswählen werden die verfügbaren Mu...

Page 20: ...s ist nur bei HDMI YPbPr und DTV Quellen verfügbar 16 9 Hier kann man die linke und die rechte Seite eines normalen Bildes 4 3 Seitenverhältnis zum Ausfüllen des Breitbildfernsehers gleichmäßig strecken Bei Bildern mit 16 9 Seitenverhältnis die in ein normales Bild 4 3 Seitenverhältnis komprimiert wurden nutzen Sie zum Wiederherstellen der Originalgröße eines Bildes den 16 9 Modus Untertitel Mit d...

Page 21: ...nen eingestellt werden Niedrig Mittel Hoch und Aus Advanced Settings Farbtemperatur Stellt den gewünschten Farbton ein Die Kalt Option verleiht Weiß einen leichten Blaustich Bei normalen Farben wählen Sie die Normal Option Die Warm Option verleiht Weiß einen leichten Rotstich Bildformat Stellt die Bidlgröße auf Auto 16 9 Untertitel 14 9 14 9 Zoom 4 3 Panorama oder Kino ein HDMI True Black Diese Fu...

Page 22: ...Im Equalizer Menü können Sie die Voreinstellung auf Musik Film Sprache Normal Klassik oder Benutzer anpassen Mit der M Taste kehren Sie zum vorherigen Menü zurück HINWEIS Die Einstellungen des Equalizer Menüs können nur dann von Hand geändert werden wenn der Equalizer Modus auf Benutzer eingestellt ist Balance Mit dieser Einstellung wird die Balance zwischen rechtem und linkem Lautsprecher eingest...

Page 23: ...CI Modul erkannt auf dem Bildschirm Einzelheiten zu den Einstellungen finden Sie in der Bedienungsanleitung des Moduls Conditional Access Menü anzeigen Diese Menüeinstellungen können sich je nach Dienstanbieter ändern Drücken Sie die MENU Taste und wählen mit oder das Symbol Drücken Sie zur Anzeige des Einstellungen Menüs die OK Taste Wählen Sie mit oder die Option Conditional Access und drücken z...

Page 24: ...utz Sperre Ist diese Option eingestellt bezieht sie vom Sender Informationen zur Altersfreigabe Wenn die entsprechende Altersstufe deaktiviert ist wird der Zugriff auf die Sendung gesperrt Kindersicherung Wenn die Kindersicherung Option eingestellt ist kann das Fernsehgerät nur über die Fernbedienung gesteuert werden In diesem Fall funktionieren die Tasten am Bedienfeld nicht Bei Betätigung einer ...

Page 25: ...en Sie im Einstellungen Menü zur Konfiguration der Datum Zeiteinstellungen die Option Datum Zeit Drücken Sie die OK Taste Markieren Sie mit den Tasten die Option Datum Zeit Die Optionen Datum Zeit Zeiteinstellungen und Zeitzone sind verfügbar Markieren Sie mit den Tasten die Option Zeiteinstellungen Die Option Zeiteinstellungen wird mit Hilfe der Tasten angepasst Sie können Auto oder Manuell auswä...

Page 26: ...tung zur automatischen Abschaltung einstellen Nachdem der Fernseher bei Inaktivität ohne Betätigung von Tasten die Zeitüberschreitung erreicht hat schaltet er sich aus Standby Suche optional Wählen Sie mit oder die Option Standby Suche und drücken zum De Aktivieren dieser Funktion oder Wenn Sie die Standby Suche ausschalten ist diese Funktion nicht verfügbar Achten Sie zur Nutzung dieser Funktion ...

Page 27: ...rd Bei Bildschirmen verschwinden eingebrannte Bilder gewöhnlich nach kurzer Zeit Lassen Sie das Fernsehgerät eine Weile ausgeschaltet Damit dieser Effekt nicht erneut auftritt vermeiden Sie es Standbilder über längere Zeit anzeigen zu lassen Kein Strom Falls Ihr Fernsehgerät stromlos sein sollte überprüfen Sie das Netzkabel und die Verbindung mit der Steckdose Schlechte Bildqualität Haben Sie die ...

Page 28: ...0 60 HzA 21 1920 x 1080 60 HzB 22 1920 x 1200 60 HzA 23 1920 x 1200 60 Hz Anhang B AV und HDMI Signalkompatibilität Eingangssignaltypen Quelle Unterstützte Signale Verfügbar EXT SCART PAL 50 60 O NTSC 60 O RGB 50 O RGB 60 O AV seitlich PAL 50 60 O NTSC 60 O YPbPr 480I 60 Hz O 480P 60 Hz O 576I 50 Hz O 576P 50 Hz O 720P 50 Hz O 720P 60 Hz O 1080I 50 Hz O 1080I 60 Hz O 1080P 50 Hz O 1080P 60 Hz O HD...

Page 29: ... der Download automatisch Eine Fortschrittsleiste zeigt die verbleibende Dauer an NachAbschluss des Downloads werden Sie über eine Meldung aufgefordert das Gerät zum Aktivieren der neuen Software neu zu starten Drücken Sie zum Fortfahren mit einem Neustart die OK Taste 2 Modus zur Suche und Aktualisierung um 3 00 Uhr morgens Wenn Sie die Option Automatische Suche im Upgrade optionen Menü aktiviere...

Page 30: ...d 1 10 beta1 2 PCM Musik mp3 MPEG 1 Layer 1 2 MP3 32 Kbps 320 Kbps Bitrate 32 KHz 48 KHz Samplingrate Foto jpg jpeg Baseline JPEG max B x H 15360 x 8640 4147200 Bytes Progressive JPEG max B x H 1024 x 768 6291456 Bytes bmp max B x H 9600 x 6400 3840000 Bytes Untertitel sub srt A01_MB62_ DE _ 01 TV _ VESTEL_GERMANY _woypbpr_3900UK_IDTV_BRONZE19_26970LEDW_10075473_50200007 indd 29 A01_MB62_ DE _ 01 ...

Page 31: ...x Scart 1 x USB 1 x PC VGA 1 x Digitaler Audioausgang koaxial 1 x 3 5 mm Klinke Kopfhörerausgang 1 x CI Slot 1 x Seiten A V Digitaler Empfang DVB T MHEG 5 ENGINE konform mit ISO IEC 13522 5 Engine Profil 1 für UK Objektkarussel Unterstützung konform mit ISO IEC 135818 6 und UK DTT Profil Frequenzbereich 474 850 MHz bei UK Modellen 170 862 MHz bei EU Modellen Übertragungsstandards DVB T MPEG 2 Demo...

Page 32: ...Definition Multimedia Interface Dieser Anschluss liefert ein unkomprimiertes digitales Video und Audiosignal hoher Qualität Dabei werden Audio und Videosignale über einen einzigen Anschluss ausgegeben NTSC Der in den USA verwendete Standard für Zeilen TV Signale der auch in einigen anderen Ländern verwendet wird OSD Bildschirmanzeige On Screen Display Informationen wie Kanalnummer und Lautstärke d...

Page 33: ... Ihres Gerätes oder den Austausch gegen ein gleichwertiges Gerät die bei uns anfallenden Arbeitslöhne Materialkosten und die Transportkosten des Gerätes innerhalb der Schweiz 5 Zur Geltendmachung Ihrer Beanstandung setzen Sie sich bitte mit folgender Servicenummer in Verbindung Es wird empfohlen die Originalverpackung aufzubewahren um im Garantiefalle einen sicheren Transport des Gerätes zu gewähr...

Page 34: ...nn das Gerät keinen technischen Defekt aufweist bei Pixelfehlern die innerhalb der in der ISO Norm 13406 2 festgelegten Pixelfehlerklasse II Toleranzen liegen 10 Die Garantie umfasst keine weitergehende Haftung unsererseits ins besondere keine Haftung für Schäden die nicht am Gerät selbst ent standen sind oder die durch den Ausfall des Gerätes bis zur Instandsetzung entstehen z B Wegekosten Handli...

Page 35: ...Channel List 48 Moving a Channel 48 Deleting a Channel 48 Renaming a Channel 48 Locking a Channel 48 Managing Stations Favourites 48 Button Functions 48 Managing Stations Sorting the Channel List 49 On Screen Information 49 Media Playback Using Media Browser 49 Viewing Photos via USB 50 Media Browser Settings 51 Changing Image Size Picture Formats 51 Cinema 52 Configuring Picture Settings 52 Opera...

Page 36: ...l purposes We exclude liability in principle if the device is not used as intended or unauthorized modifications have been made To operate your LED TV in extreme ambient conditions may cause the damage of the device Preparation For ventilation leave a free space of at least 10 cm all around the set To prevent any fault and unsafe situations please do not place any objects on top of the set Use thi...

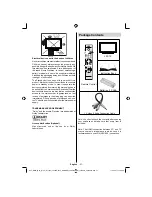
Page 37: ...mentally friendly manner Find out about the legal regulations which apply in your area Do not try to recharge batteries there is a danger of explosion Replace batteries only with the same or equivalent type This symbol on the product or on its packaging means that your electrical device should be disposed at the end of its service life separately from your household wastes There are separate colle...

Page 38: ...ttery medical aid has to be sought immediately Also keep the packaging away from children as there is danger of suffocation The Standby button does not fully switch off this product Moreover the device continues to consume power in standby mode In order to separate the device completely from mains the mains plug has to be pulled from the mains socket Because of that the device should be set up in ...

Page 39: ...rom the mains plug This will also reduce energy consumption Note that annually using the TV set in Power Save Mode has more power efficiency than disconnecting the TV from the mains plug instead of keeping stand by mode Therefore it is highly recommended to activate Power Save Mode setting to reduce your annual power consumption And also it is recommended to disconnect the TV from the mains plug t...

Page 40: ...9 Picture mode selecion 20 Okay Confirm Hold in TXT mode Edit 21 Channel List Cursor Down 22 Exit Return Index page in TXT mode 23 Cursor Right Subpage in TXT mode 24 Cursor Up 25 Previous programme 26 Yellow button 27 Blue button 28 No function 29 Subtitle on off in DVB channels 30 V V SCREEN LANG SUBTITLE MENU RETURN OK SOURCE FAV PRESETS PRESETS SLEEP INFO EPG V V P P 1 2 3 4 6 5 9 7 8 0 V 8 9 ...

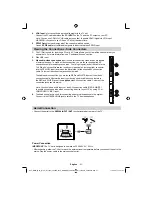
Page 41: ...n is needed for a HDMI to HDMI connection RF Input 2 connects to an aerial antenna system Note If you use a decoder or a media recorder you should connect the aerial cable through the device to the television with an appropriate antenna cable as shown in the illustration in the following pages SCART 3 input or output for external devices Connect the SCART cable between the SCART socket on the TV a...

Page 42: ...of the supplied AV connection cable Colours of the connected jacks should match To enable audio connection you must use RED and WHITE inputs of the side AV connection cable Afterwards insert your device s audio cable s connectors into the RED and WHITE jack of the supplied side AV connection cable Colours of the connected jacks should match Note You should use audio inputs of side AV connection ca...

Page 43: ...AV Input PC VGA Cable Not supplied PC Audio Cable Not supplied Side Audio Video Connection Cable Supplied Or SIDE AV Note If you connect a PC to the TV using HDMI connection radio interference may occur Therefore this type of connection is not recommended You should use VGA connection instead Using Side AV Connectors You can connect a range of optional equipment to your LED TV For connecting a cam...

Page 44: ...d replace the battery cover Note Remove the batteries from the remote control handset when it is not to be used for a long period Otherwise it can be damaged due to any leakage of batteries Remote range is approximately 7m 23ft Switching On Off To Switch the TV On Connect the power cord to the 220 240V AC 50 Hz Press STANDBY touch button Then the standby LED lights up To switch on the TV from stan...

Page 45: ...the previous programme Viewing Main Menu Press the button at the same time to view main menu In the Main menu select sub menu using AV button and set the sub menu using or buttons To learn the usage of the menus refer to the menu system sections AV Mode Press the AV button in the control panel on the TV to switch between AV modes Operation with the Remote Control The remote control of your TV is d...

Page 46: ...etext broadcasting together with the normal broadcasting there are also channels with just digital teletext broadcasting The aspect ratio picture shape when watching a channel with just digital teletext broadcasting is the same as the aspect ratio of the picture viewed previously When you press the button again the digital teletext screen will be displayed Analogue Teletext Use of teletext and its...

Page 47: ...and watch TV Installation Press MENU button on the remote control and select Installation by using or button Press OK button and the following menu screen will be displayed Select Automatic Channel Scan Retune by using button and press OK button Automatic Channel Scan Retune options will be displayed You can select options by using and OK buttons Auto Channel Scan Retune Menu Operation Digital Sea...

Page 48: ...lation menu by using or and OK buttons The analogue fine tune screen will be displayed The Analogue Fine Tune feature will not be available if there are no analogue channels digital channels and external sources stored Press OK button to proceed Use or button to set Fine Tune When finished press OK button again Clear Service List This setting is visible only when the Country option is set to Denma...

Page 49: ...ighlighted character with the characters printed above the button one by one as the button is pressed When finished press the OK button to save Press MENU to cancel Locking a Channel You can press GREEN button to tag untag all channels YELLOW button to tag untag a single channel Select the channel that you want to lock and select Lock option Press OK button to continue You will be asked to enter p...

Page 50: ...ized after power off on or First Time Installation unplug the USB device turn the TV off and on again and re insert the USB device To display the Media Browser window press either MENU button on the remote control and then select Media Browser by pressing or button Press OK button to continue Media Browser menu options will be displayed Also when you plug USB devices media browser screen will be d...

Page 51: ...Zooms picture Note If a picture is zoomed out displayed in full screen you cannot navigate the picture by using Up Down Left Right buttons Pause YELLOW button Pauses the slideshow Continue GREEN button Continues the slideshow Previous Next Left Right buttons Jumps to previous or next file on slideshow Rotate Up Down buttons Rotates the image using up down buttons Loop Shuffle BLUE button Press onc...

Page 52: ...icture in different zoom modes Press the SCREEN button repeatedly to change the image size Available zoom modes are listed below Auto WhenAUTO is selected the aspect ratio of the screen is adjusted by the information provided by the selected source if available The format being displayed in AUTO mode is completely independent of WSS information which could be included in the broadcast signal or th...

Page 53: ...cture mode can be set to one of these options Cinema Game Dynamic and Natural Contrast Sets the lightness and darkness values of the screen Brightness Sets the brightness value for the screen Sharpness Sets the sharpness value for the objects displayed on the screen Colour Sets the colour value adjusting the colors Power Save Mode Use or button to select Power Save Mode Press or button to set Powe...

Page 54: ...ears on the screen Contrast Brightness Colour Colour Temp and Picture Zoom settings in this menu are identical to settings defined in TV picture menu under Main Menu System Sound Settings and Source settings are identical to the settings explained in main menu system PC Position Select this to display PC position menu items Autoposition Automatically optimizes the display Press OK to optimize H Po...

Page 55: ... or disables selected source options Other Settings Displays other setting options of the TV set Using a Conditional Access Module not included IMPORTANT Insert or remove the CI module only when the TV is SWITCHED OFF In order to watch certain digital channels a conditional access module CAM may be necessary This module must be inserted in the CI slot of your TV Obtain the Conditional Access Modul...

Page 56: ...guration menu highlight the Language Settings item by pressing or buttons Press OK and Language Settings submenu will be displayed on the screen Use or buttons to highlight the menu item that will be adjusted and then press or button to set Notes System Language determines the on screen menu language Audio Language is used for selecting the soundtrack of a channels Primary settings are the first p...

Page 57: ...ting is used for setting the TV to turn off after a certain time Highlight Sleep Timer by using or button Use or button to set The timer can be programmed between Off and 2 00 hours 120 minutes in steps of 30 minutes Setting Programme Timers You can set programme timers for a particular programme using this feature Press button to set timers on an event Programme timer function buttons will be dis...

Page 58: ...nable or disable the selected source Changes are automatically stored Configuring Other Settings To view general configuration preferences select Other Settings in the Settings menu and press OK button Operation Press or buttons to select an item Use or button to set an option Press OK button to view a sub menu Menu Timeout Changes timeout duration for menu screens Scan Encrypted Channels When thi...

Page 59: ... available broadcasts will be searched If the TV locates any new or missing broadcasts a menu screen will be displayed asking you whether or not to execute these changes Other Features Displaying TV Information Programme Number Programme Name Sound Indicator time teletext channel type and resolution information is displayed on the screen when a new programme is entered or INFO button is pressed Mu...

Page 60: ...ence may disappear after a short time Try turning the TV off for a while To avoid this do not leave the screen in still picture for extended periods No Power If your TV system has no power please check the main power cable and connection to the mains socket outlet Poor Picture Have you selected the correct TV system Is your TV set or house aerial located too close to a non earthed audio equipment ...

Page 61: ...A 21 1920x1080 60 HzB 22 1920x1200 60HzA 23 1920x1200 60Hz Appendix B AV and HDMI Signal Compatibility Input Signal Types Source Supported Signals Available EXT SCART PAL 50 60 O NTSC 60 O RGB 50 O RGB 60 O Side AV PAL 50 60 O NTSC 60 O YPbPr 480I 60Hz O 480P 60Hz O 576I 50Hz O 576P 50Hz O 720P 50Hz O 720P 60Hz O 1080I 50Hz O 1080I 60Hz O 1080P 50Hz O 1080P 60Hz O HDMI 480I 60Hz O 480P 60Hz O 576I...

Page 62: ...rade and press OK button If a new upgrade is found it starts to download the upgrade A progress bar indicates the remaining download progress When the download completes successfully a message is displayed for reboot to activate new software Press OK to continue with the reboot operation 2 3 AM search and upgrade mode If Automatic scanning in Upgrade Options menu is enabled the TV wakes up at 03 0...

Page 63: ...4x768 6291456bytes bmp max WxH 9600x6400 3840000bytes Subtitle sub srt Products Battery Information for Users on Disposal of old Equipment and Batteries European Union only These symbols indicate that equipment with these symbols should not be disposed of as general household waste If you want to dispose of the product or battery please consider the collection systems or facilities for appropriate...

Page 64: ...xLxH Without foot 40 x 641 x 407 Weight Kg 5 85 Digital Reception DVB T MHEG 5 ENGINE compliant with ISO IEC 13522 5 UK engine Profile 1 for UK Object carousel support compliant with ISO IEC 135818 6 and UK DTT profile Frequency range 474 850 MHz for UK models 170 862 MHz for EU models Transmission standard DVB T MPEG 2 Demodulation COFDM with 2K 8K FFT mode FEC all DVB modes Video MP ML PAL 4 3 1...

Page 65: ...50199918 ...
Reviews: