background image


Powering and installation


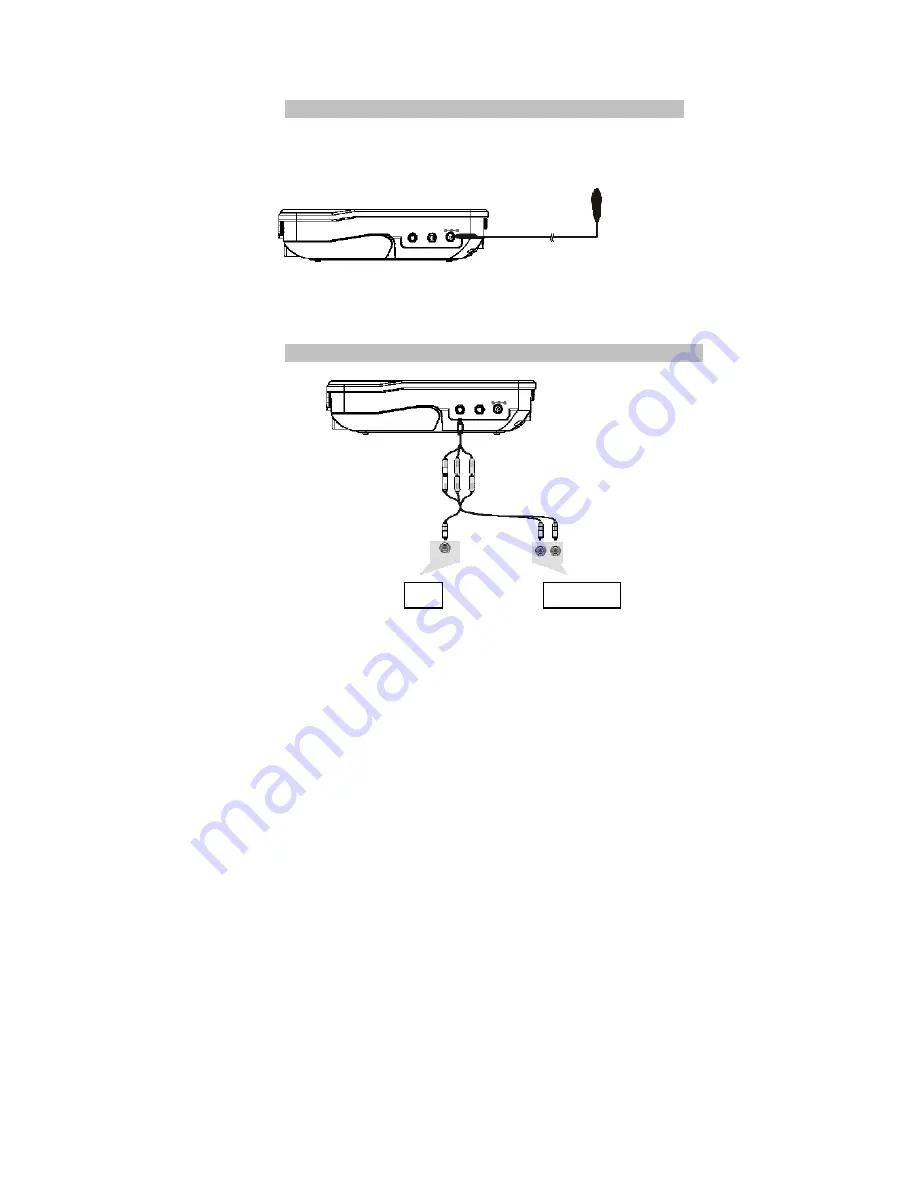
Using car  cigarette lighter adaptor to connect to the power: 
Plug one end of the cigarette lighter adaptor into the DC IN jack on the 
unit, plug the other end into the car cigarette lighter socket. See 
illustration below. 


Note: 

- Car cigarette lighter adaptor is available to use only when the car power 
supply is 12V (max allowed is 15V) 


  Connecting to external device  


TV


AMPLIFIER


- 6 -

Summary of Contents for DUO 2

Page 1: ...TECHLUX DUO 2 TL107003 Instruction Manual for Main Unit V20080509 ...

Page 2: ...y Precautions 2 Main Features 3 Unit View 3 The Remote Control 4 The Package 5 Powering and installation 6 Connecting to external device 6 Basic Operation 7 System Setup 12 Specifications 15 Troubleshooting 15 Warranty Terms and Conditions 16 ...

Page 3: ...he unit any container with liquid inside 3 Do not install near any heat sources such as radiators heat registers stoves or other apparatus including amplifiers that produce heat 4 Unplug this unit during lightning storms or when unused for long time 5 About Cleaning Unplug the system use only wet cloth to clean Do not use liquid detergent or aerosol 6 Only use accessories specified by the manufact...

Page 4: ... PAL NTSC system Multi language OSD Full function remote control SD MMC Card reader up to 2GB and USB connection 1 1 AV out function Unit View 2 3 4 5 6 7 8 1 16 17 9 12 11 10 15 14 13 1 Open knob 9 S 2 Earphone jack 10 T 3 Volume knob 11 W 4 Power ON OFF switch 12 X 5 MODE button 13 DC IN 6 MENU button 14 DC OUT 7 SETUP button 15 AV OUT 8 Play Pause 16 USB Port 17 SD card slot 3 ...

Page 5: ...peat a specific portion from point A to B press it again to cancel repeat playing 6 Fast forward backward button To scan forward backward at 2 4 8 16 or 32 times 16 Repeat To repeat playing title chapter or track 7 OSD To display disc information during playing such as elapsed and remaining time 17 Return To return to the main menu 8 Play pause 18 MUTE To mute the sound 9 Stop press once to stop p...

Page 6: ...d remote control must be within 3 metres Please refer to the illustration on the right Note 1 To avoid falling off or place near damp environment 2 To avoid infrared receiving window of the unit being under direct sunlight 3 Please use a new battery to replace old one if the remote control doesn t work The Package The package contents Audio Video Cable 1 Remote Control with battery 1 Cigarette Lig...

Page 7: ...of the cigarette lighter adaptor into the DC IN jack on the unit plug the other end into the car cigarette lighter socket See illustration below Note Car cigarette lighter adaptor is available to use only when the car power supply is 12V max allowed is 15V Connecting to external device TV AMPLIFIER 6 ...

Page 8: ...unit will load the disc and start playing 6 Press once to stop playback then press to resume playback from the point where you stopped press twice to stop playback completely 7 When the playing is finished please turn off thepower by sliding ON OFF switch to OFF Pause during playback During playback press to pause press it again to resume playback 7 Note When at pause stop or no disc status after ...

Page 9: ...g disc of DVD MPEG4 SVCD VCD CD user can repeat playing one chapter title or the whole disc For DVD disc press repeat button to repeat playing one Chapter press it again to repeat playing Title press it third time to repeat playing the whole disc Press it again to cancel repeat function For CD VCD disc press Repeatrepeatedly to repeat thetrack and the whole disc For Mp3 disc press REPEAT to repeat...

Page 10: ...repeat A playing the part between A B Press it the third time the unit will return to normal playback A B Number A B Angle Angle During playing DVD disc with multi angle press Angle button the followings will be displayed on screen 1 4 2 4 3 4 4 4 Press number buttons to select the angle you desire To return to normal playing please press Angle the unit will play the disc in the default angle Note...

Page 11: ... 3x 4x 1 2x 1 3x 1 4x During playback press Zoom button the image will be enlarged press it again the image will be enlarged again press it fourth time the image will zoom out press it repeatedly and the image will return to normal status When the image is enlarged user can press to move the image Zoom In Out 10 ...

Page 12: ...from top to bottom b from bottom to top c from left side to right side d from right side to left side e from left top to right bottom f from right top to left bottom g from left bottom to right top h from right bottom to left top I from horizontal centre to both sides j from vertical centre to both sides k from top and bottom to centre l from right and left to centre m from four window top side to...

Page 13: ...choose Wide 16 9 when using a 16 9 widescreen TV set Angle Mark When available a camera symbol will appear on the screen when various angle are available on the DVD Select OFF and the camera symbol will disappear Set Screen Saver Video Setup Page Set OSD Language TV Display WIDE Angle Mak ON ON TV Type PAL OFF Screen Saver ON OSD Lang ENG TV Type Enter this option to select TV type PAL NTSC The de...

Page 14: ...ted Brightness contrast Hue and Saturation For all these items the default is 00 Video Setup Page Panel Quality Go to Video Setup Page Password setup page Password Setup Page Password Enter this option you can set a password four numbers All parental Control features are protected The default password is 8888 Go To Password Setup Page ...

Page 15: ...er preferred audio langua The default is English Note The audio language each disc User can also change duringplayback by pres can select his ge for DVDs dependon the material on the audio language sing theAudio button Subtitle Select your preferred subtitles on the screen The su depend on the inform disc You can also c language during play SUBTITLE button language to show the btitle languages ati...

Page 16: ...e the machine is connected properly Make sure all cables are securely inserted into the appropriate jacks Can t advance through a movie You can t advance through the opening credits and warning information that appears at the beginning of movies because the disc is programmed to prohibit that action The icon appears on screen The feature or action cannot be completed because 1 The disc s software ...

Page 17: ...le defect THE WARRANTY DOES NOT COVER transport costs nor charges relating to an intervention at the address of the purchaser Scratches splinters or marks in the packaging of the device or its accessories which were not noted at the time of delivery breakable accessories except in case of manufacturing defects recognized by our technical department Moreover we wave any liability for general damage...

Reviews: