background image

2. Battery Charging Instructions 

1.

Connect the USB charging cable (included) to the computer USB port and connect the other end to the battery


connector (Pic 2). 

2.

The Red LED light will turn OFF while charging. After the battery is fully charged, the Red LED light will turn ON.


Charging time is around 40 minutes. 


                                                                                Pic 2 


Caution: 

1.

Allow 10-15 minutes for the battery to cool down


before recharging. 

2.

Do not overcharge the battery. 

3.

If the battery becomes too hot while charging then


remove it from charging immediately and allow it


cool down. 

4.

Do not reconstruct battery. 

5.

Do not connect the battery to an electrical outlet. 

 
3. Suitable Flying Conditions 

1.

Places with no/limited obstacles are recommended. 

2.

Do not fly your Quad-copter in strong winds, as it


may affect the remote-control system and interfere


with your control leading to a crash or damage to


the unit. 

3.

Do not fly in rain/damp conditions. 

4.

Flies best, indoors. 

Caution: Never allow young children to use this product alone. Parental guidance is highly recommended during


the use of this device. DO NOT operate your Quad-copter if someone else is operating a similar device in the same


operating range, as it may interfere with the frequency range and impact the controlling capacity of the


Quad-copter. 


Prepare for take off 

1.

Install the fully recharged battery into the bottom bracket of Quad-copter, and connect the battery connector to


the socket in the Quad-copter. Blue and Red LED lights will flash on successful connection. 

2.

Place the Quad-copter on a flat surface. 

3.

Recheck the area to make sure it is clear from people, pets, trees, buildings, high voltage wires and other


obstructions. 

4.

Push the throttle stick upward to take off. If the Quad-copter flies uncontrollably in a certain direction, push the


respective trimming button to even out its flight. Please refer to “5. Additional Information”. 

Caution: Always turn OFF the controller before you unplug the battery from the Quad-copter. Do not apply full


power on the throttle while taking off as it may lead to a quick descend which may cause injury.


4. Control Information 

Warning:

Do not fly in strong wind, as it may overpower your Quad-copter and cause loss of control. 

Flying time:

On a full charge, and in low wind conditions, the Quad-copter will fly for 4 - 5 minutes. 

 
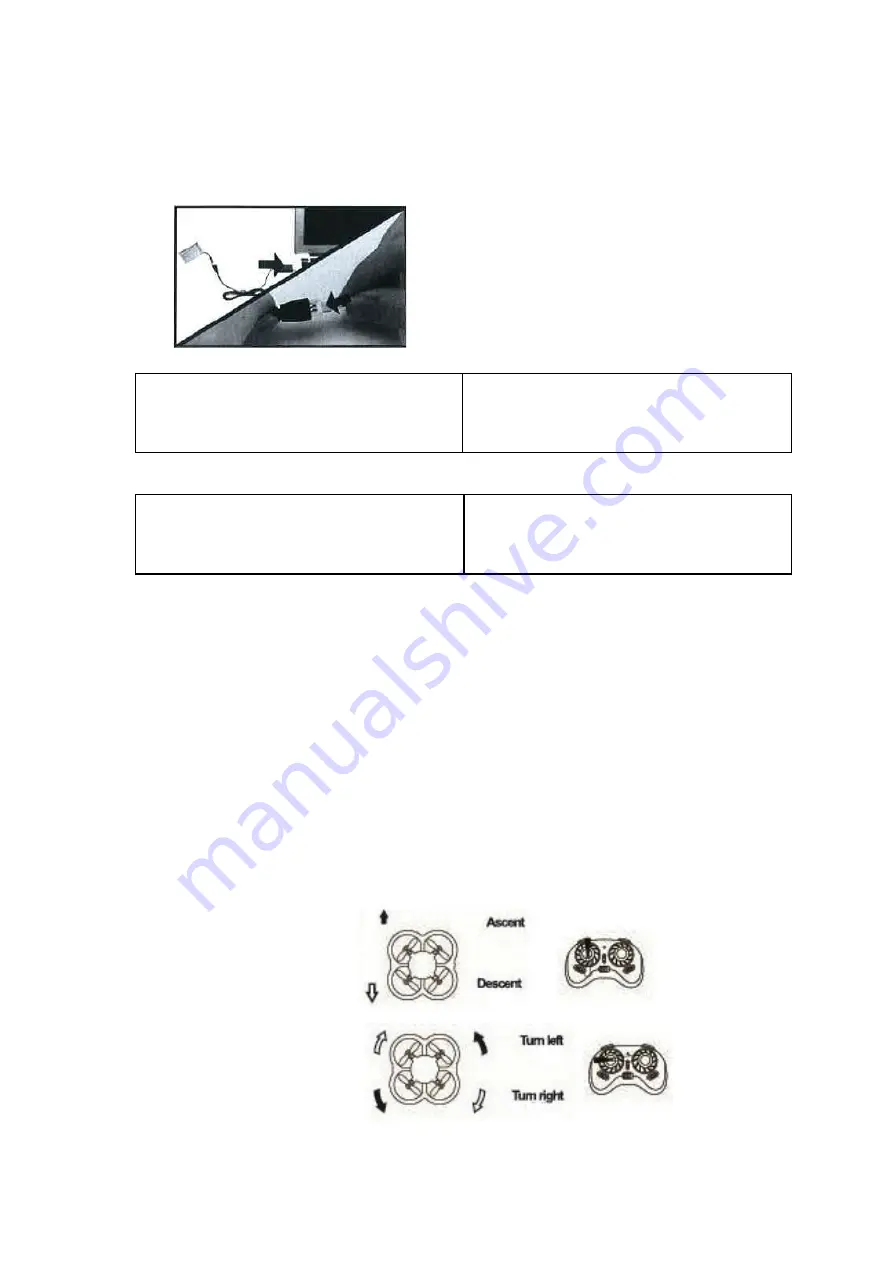
Ascend or descend 
When you push the left


stick (throttle stick) up


or

down,

the


Quad-copter begins to


ascend or descend. 
 
 
Turning left or right 

When the left stick


(rudder stick) is moved


left

or

right,

the


Quad-copter turns left


or right. 
 

Summary of Contents for Aerodrone MQ4C-24/6485

Page 1: ...AGES 14 MQ4C 24 6485 WIRELESS INDOOR OUTDOOR QUAD COPTER INSTRUCTION MANUAL PLEASE READ ALL INSTRUCTIONS CAREFULLY RETAIN FOR FUTURE USE ...

Page 2: ...tdoor Quad copter Remote Controller USB charging cable Rechargeable battery Mini screwdriver Instruction Manual 1 Instructions to assemble the Controller Use the Mini screwdriver to loosen the screw and open the battery cover as the arrow direction indicated Pic 1 Install 2 x AA batteries not included inside the battery compartment of the controller Notice 1 Install the battery as per the plus or ...

Page 3: ...ange as it may interfere with the frequency range and impact the controlling capacity of the Quad copter Prepare for take off 1 Install the fully recharged battery into the bottom bracket of Quad copter and connect the battery connector to the socket in the Quad copter Blue and Red LED lights will flash on successful connection 2 Place the Quad copter on a flat surface 3 Recheck the area to make s...

Page 4: ...m Possible Cause Solution Remote doesn t work Batteries installed with incorrect polarity Check and make sure that the batteries are installed as per the right polarity Batteries are drained Install new batteries Quadcopter flies out of control Windy environment Do not fly in windy environment As it will limit or disturb your flying control The helicopter does not receive commands appropriately Pu...

Page 5: ...ry to anybody or damage to any property 2 When you assemble and fly the Quad copter you must operate it according to the instruction manual 3 The user is responsible completely for correct operation and use of product We and the dealer accept no responsibility or liability for damage and or loss caused due to inappropriate usage and operation of this device 4 Not recommended for children under 14 ...

Page 6: ...has been damaged by accident in shipment unreasonable use misuse neglect improper service commercial use repairs by unauthorized personnel or other causes not arising out of defects in materials or workmanship This warranty doesn t cover the following which may be supplied with this product including but not limited to LCD Screens glass parts lenses bulbs etc This warranty is effective only if the...

Reviews: