10
TL-CAV-01-HD User Manual
www.tlnetworx.com
an interactive display.
Step4.
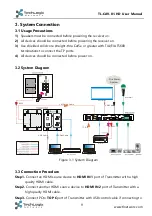
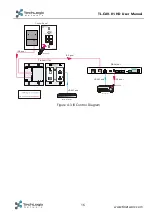
Connect
TP OUT/PoC IN
port of Transmitter and
TP IN/PoC
port of Receiver on
the rear panel with single
shielded solid core straight-thru Cat5e or greater cable
with TIA/EIA T568B terminations
.
Step5.
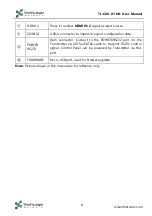
Connect
POWER RS232
port of Transmitter and
POWER RS232
port of Control
Panel on the rear panel with single CAT5e or greater cable. The distance between
Transmitter and Control Panel should be kept within 5 meters.
Step6.
Connect a display to the
TO DISPLAY
and
RS232
port of Receiver.
Step7.
Connect an interactive display to the
FROM TOUCH SCREEN
port of Receiver
with the included USB control cable.
Step8.
Connect audio broadcast device to the
LINE OUT
port of Receiver.
Step9.
Connect a microphone to the
MIC
port of Receiver
Step10.
Connect
REMOTE MUTE
port of Receiver to the Fire Alarm System.
Step11.
Connect a speaker to the
2x20Watt@4
port of Receiver.
Step12.
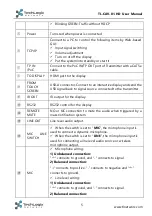
Connect a PC to the
TCP/IP
port of Receiver for Web-based GUI control.
Step13.
Connect the IR Emitter to the
IR OUT
port of Receiver, and then put it over the
IR receiver port of the display.
Step14.
Connect DC24V 2.71A power adaptor to the
power port of Receiver.
1)
System Diagrams shown in this manual are for reference only.
2)
Connect TP ports via
single
shielded solid core straight-thru Cat5e or greater cable
with TIA/EIA T568B terminations at both ends.
3.4
PoC Solution
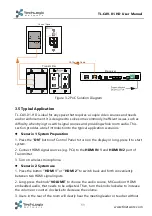
TL-CAV-01-HD supports PoC, which allows all components in the kit to share the same
power supply and eliminates the need for extra power supplies at the remote nodes.
Connect the DC24V 2.71A power adapter to the power port of Receiver,
Transmitter and Control Panel can be powered via the PoC solution, see the picture
below:


